Introduction to Cement Pouring
When embarking on any construction project, one of the most fundamental materials you are likely to use is cement. That brings us to a fundamental question, ‘How do you pour cement?’ You see, cement pouring is an integral process in construction work that requires careful planning and execution. With the right knowledge and tools, it becomes a manageable task even for beginners.
Pouring cement may seem straightforward; after all, it’s just mixing water with a dry mix, right? In reality, concrete pouring is both a science and an art that demands accuracy and skill. It’s more than merely creating a mixture; it involves perfect timing, precise measurement, uniform mixing, and specific placement methods while ensuring that the final product is sturdy and durable.
Cement pouring can be applied to various construction projects ranging from simple DIY projects like garden pathways or shed foundations to larger scale projects such as building houses or skyscrapers. Regardless of the size of your project, understanding the basics of how to pour cement is essential. It’s not only about getting the job done but also about doing it correctly and efficiently. This process requires careful attention to detail throughout each step; from preparing the site, acquiring the correct materials, mixing the cement, to pouring and finishing.
This introduction aims to break down the complexities of cement pouring into simple terms that anyone can understand. Whether you’re undertaking a small home improvement project or supervising a large construction site – knowing how to pour concrete correctly is crucial. This guide will walk you through every step of pouring cement ensuring your project has a solid foundation. Get ready to dive deep into this fascinating world of concrete works!
So whether you’re a seasoned builder or a novice DIY enthusiast wondering ‘how do you pour cement?’, this blog post will provide valuable insights and practical guidance that will equip you with the skills needed for successful cement pouring. Let’s embark on this cement pouring journey, shall we?
Understanding the Tools and Materials
Before we dive into the finer aspects of ‘how do you pour cement’, it is crucial to understand the tools and materials required for this process. Having a clear comprehension of these will not only make the task more manageable but also ensure its successful completion.
Tools
Pouring cement requires specific tools to ensure that the task is carried out smoothly and efficiently. The primary tools involved in this process are as follows:
- Cement Mixer: A cement mixer is essential to mix the cement, water, and aggregate (typically sand and gravel) together. This mixer guarantees a homogenous mixture which is critical for strength and durability.
- Shovels and Wheelbarrows: These are essential for transporting the mixed cement to the place where it is to be poured, especially if it’s a large area or far from your mixing site.
- Trowels: There are different types of trowels used for spreading and smoothing the freshly poured cement. Float trowels help level and smooth the surface while grooving trowels are used to create joints in concrete to prevent cracking.
- Screed Board: This tool, generally a straight piece of wood or metal, is used after pouring cement to level the surface by removing excess concrete.
Materials
Beyond tools, pouring cement also involves several key materials:
- Cement: Cement is a powdery material that reacts with water to create a hardening effect. It’s typically sold in bags and forms the “glue” that holds concrete together.
- Aggregate: Aggregate, typically sand and gravel, gives concrete its body and strength. The choice of aggregate depends on the finish you want for your concrete surface.
- Water: Water is a crucial material in this process, as it initiates the chemical reaction that allows cement to harden and bind the aggregates into a solid mass.
In conclusion, understanding the tools and materials involved in pouring cement is an essential first step before embarking on the actual task. Once you’re equipped with the right tools and know how to use them, the question ‘how do you pour cement’ becomes far less daunting.
Safety Measures for Cement Pouring
When dealing with an activity like cement pouring, safety should always be the priority. ‘How do you pour cement?’ is a question often asked by DIY enthusiasts and people venturing into construction-related projects. However, knowing how to pour cement is not enough; it’s equally important to understand the safety precautions necessary during this process.
The first safety measure to consider is personal protective equipment (PPE). This includes safety glasses to protect eyes from splashes of wet cement or dust; heavy-duty gloves to protect hands from dryness, chemical burns, and abrasion; long-sleeved clothing and long pants to protect skin from harmful contact with cement; and rubber boots that are high enough to prevent wet cement from getting inside them.
In addition to PPE, it’s essential to ensure good ventilation if you’re working in an enclosed space. This is because the dust produced when mixing dry cement can be harmful if inhaled. If adequate ventilation isn’t possible, wearing a dust mask or respirator can help you avoid respiratory problems.
Another safety measure is understanding how to handle wet cement properly. Wet cement is highly alkaline and can cause serious skin burns if not promptly washed off. Therefore, if you come into contact with wet cement, rinse it off immediately with plenty of water. Furthermore, keeping a neutralizing agent like vinegar or a buffer solution within reach can help you effectively neutralize any alkali that might get onto your skin.
When it comes to equipment safety, always ensure that you are using clean, well-maintained tools. Using damaged or dirty tools can lead not only to poor results but also potential harm. For instance, a damaged wheelbarrow could cause you to trip and fall into the wet cement.
Lastly, never forget the importance of good posture and lifting techniques during the cement pouring process. Since bags of cement tend to be heavy, improper handling can lead to back injuries. Always lift with your knees, not your back, and if a load is too heavy, don’t hesitate to ask for help or use mechanical aids.
In conclusion, knowing ‘how do you pour cement’ is only part of the puzzle. Implementing safety measures during cement pouring is equally essential to ensure personal safety and achieve a successful project. Remember, working safely might take a bit more time, but it’s always worth it in the end.
Preparation before Pouring Cement
Before discussing ‘how do you pour cement’, it’s essential to understand the importance of proper preparation. Without the right preparation, your concrete project can fail or not hold up over time. Here are few steps you need to consider before pouring cement.
The first step in preparing to pour cement is choosing the appropriate type of cement for your project. There are various types of cement available, each with its own specific properties and purposes. In most cases, general-purpose cement is suitable for most small-scale projects, but for specialized tasks like underwater structures or high-strength requirements, you may need a particular type of cement.
Once you’ve chosen the correct type of cement, the next step is to prepare the site where you’ll be pouring it. For new construction, this usually involves digging out and leveling the area, then compacting the soil to create a firm base for the concrete. If you’re replacing existing concrete, you’ll need to break up and remove the old concrete before proceeding.
After the area has been prepared, it’s time to build a form – a sort of mold that will hold the poured cement in place until it hardens. These forms are typically made from wood or metal and should be sturdy enough to withstand the weight of the wet cement.
The final preparation step is mixing the cement itself. This involves combining cement powder with water in precise proportions to create a paste-like mixture. The amount of water added is crucial: too much water will make the mixture too thin and weaken the finished product; too little water will make it difficult to pour and spread.
It’s also crucial to consider safety during preparation. Always wear protective clothing when working with cement, including gloves and goggles. Cement can cause skin irritation and burns if it comes into direct contact with your skin, so it’s important to wash any affected areas immediately with water.
In conclusion, the preparation before pouring cement plays an essential role in the overall success of your concrete project. Whether you’re laying a new foundation, building a patio, or repairing a sidewalk, taking the time to properly prepare will save you time and money in the long run. So when you ask ‘how do you pour cement’, remember that the answer begins with thorough preparation.
Step-by-Step Guide to Pouring Cement
Do you have a home improvement project that requires cement? You might be wondering, “How do you pour cement?” If so, worry no more. This step-by-step guide will help you through the process.
Step 1: Preparation
Before beginning, ensure you have all the necessary materials. These include cement mix, water, a mixing container, a shovel or hoe for stirring, and protective gear like gloves and safety glasses. Also, prepare the area where you will be pouring cement. It should be clean, level, and properly marked.
Step 2: Mixing
The next step is to prepare the cement mix. Follow the instructions on the package of your cement mix to determine the proper ratio of cement to water. Generally, it’s about one part water to four parts of cement mix. Remember that it’s better to add less water at first; you can always add more if needed. Stir until the mixture is of uniform consistency.
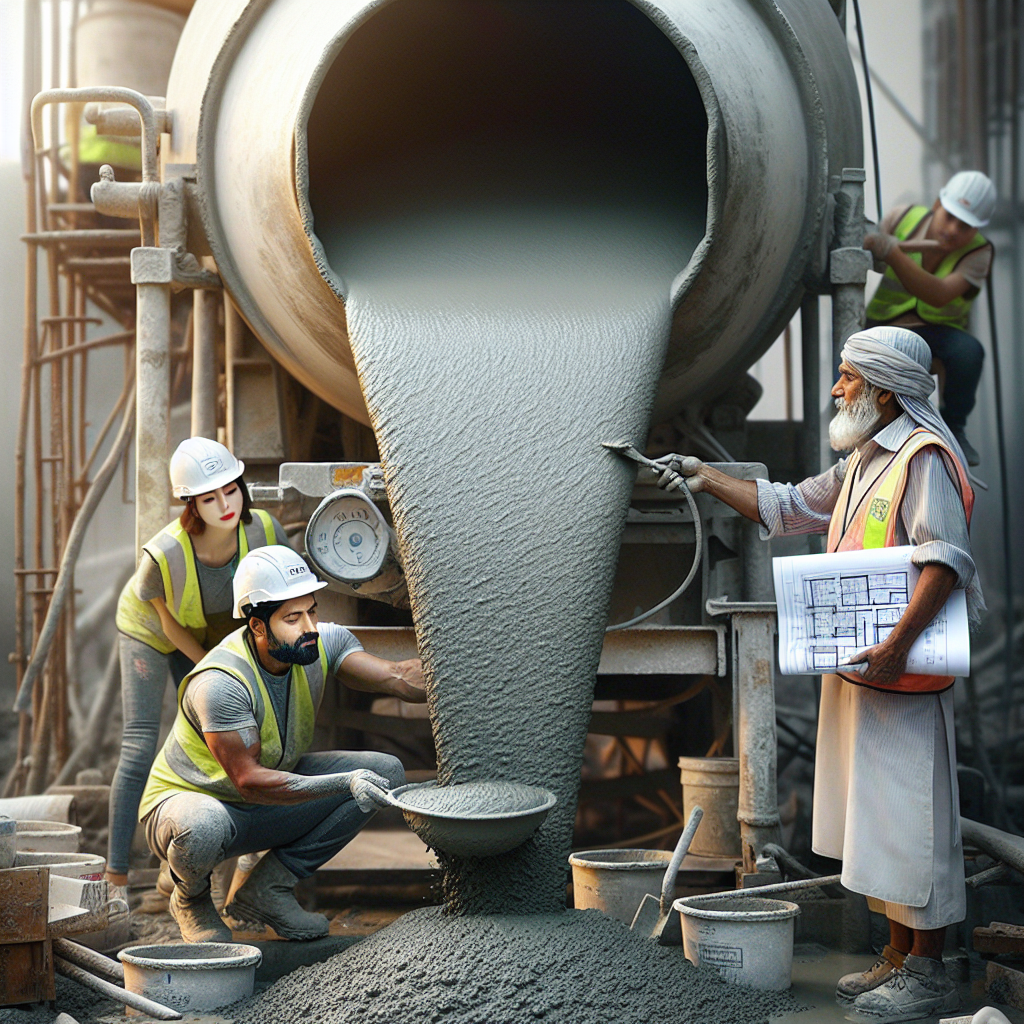
Step 3: Pouring
Once your mixture is ready, it’s time to pour. Start from one end of your marked area and slowly pour the cement mixture. It’s important to do this steadily and evenly to avoid lumps or gaps.
Step 4: Levelling
As soon as you’ve poured the concrete into your designated area, use a trowel or rake to spread it out evenly. Make sure it’s level by using a screed — a long flat tool designed to level out concrete.
Step 5: Finishing touches
After levelling the cement, give it time to start setting before applying any finishing touches. This may include smoothing out the surface, adding texture, or including decorative elements. Remember to keep it moist as it cures to prevent cracking.
Step 6: Curing
Cement takes time to cure and reach its full strength, usually about 24-48 hours for initial set, but a week for it to become sturdy. Keep the cement moist during this period by periodically spraying water over it.
So, how do you pour cement? With careful preparation, thorough mixing, even pouring, and patient curing, you will have a sturdy and durable cement structure. Always remember safety first and enjoy your DIY project!
Dealing with Common Problems during Cement Pouring
When you’re asking, “How do you pour cement?” it’s essential to understand common issues that can arise during the process and how to deal with them. There are a variety of different problems that can occur while pouring cement, and addressing these promptly can ensure a smooth, professional finish.
Air Bubbles
One of the main issues encountered when pouring cement is the formation of air bubbles. These bubbles can lead to visible holes or pits on the surface once the cement has dried. To avoid this issue, after filling your mold or form with wet cement, gently tap the sides to encourage any trapped air to rise to the surface and escape.
Drying too Quickly
Another common problem is the cement drying too quickly, leading to potential cracking and weakness in the final product. This can be especially problematic in hot or dry climates. To prevent this, it helps to cure the cement. Curing involves maintaining adequate moisture for hydration and keeping the cement at a suitable temperature over a specific period. This process allows the concrete to harden and gain strength properly.
Inconsistent Mixture
An inconsistent mixture is another issue often encountered when pouring cement. If your mixture is too dry, it will be difficult to work with and may not settle correctly. Conversely, if it’s too wet, you might face issues like segregation or decreased strength. The key here is to get a consistency where the cement is workable but holds its shape.
Incorrect Ratios of Ingredients
Using incorrect ratios of water, aggregate, and cement can lead to various issues like decreased strength, inadequate workability, cracking, etc. Therefore, always follow manufacturer instructions regarding ratio requirements for your specific project.
In conclusion, knowing how to pour cement involves more than just mixing materials and filling a form. It requires an in-depth understanding of potential issues and their solutions to ensure a sturdy, smooth, and reliable structure. So the next time you wonder, ‘How do you pour cement?’, keep these common problems and their solutions in mind.
Tips for a Smooth Finish
When approaching the question, “How do you pour cement?”, it’s important to consider not just the pouring process itself, but also how to achieve a smooth and professional-looking finish. A smooth finish is integral to the durability and aesthetics of your cement project. Whether you’re pouring a small slab or an entire driveway, here are some tips that can help you achieve that perfect finish:
- Choose the Right Tools: Having the right tools on hand before you start pouring your cement is crucial. A shovel and wheelbarrow may be necessary for mixing, a screed for leveling, and a trowel or float for smoothing.
- Mixing Properly: Ensure that the cement mix is neither too dry nor too wet. A well-mixed cement will have the consistency of thick cake batter.
- Screeding: This is the process of leveling the surface of the cement after it has been poured. Use a straight-edged board to scrape off excess concrete from the top while moving side to side across the surface.
- Floating: After screeding, use a bull float to further smooth out any imperfections from screeding and bring up the cream or fine material of the concrete mixture.
- Edging: If your concrete slab has edges, use an edging tool to create rounded corners. This will give your slab a finished look and will prevent chipping at the corners.
- Curing: Curing is allowing your cement to dry slowly under optimal conditions. This helps in enhancing its strength and durability. Covering it with plastic or keeping it moist can aid in proper curing.
Remember, the key to a smooth cement finish is patience and attention to detail. And while experience does make a difference, these tips should help even beginners achieve an impressive outcome. So, the next time someone asks you, “How do you pour cement?”, not only will you know how to pour it, but also how to finish it smoothly.
It’s worth noting that temperature and weather conditions can significantly impact the results of your cement project. Hence, always check the forecast before starting and try to work in moderate temperatures for the best results.
In conclusion, pouring cement might seem daunting at first, but with the right preparation, tools, and steps, anyone can achieve a smooth and lasting finish.
Maintenance of Poured Cement
“`html
Once you have mastered the art of “how do you pour cement,” it’s also crucial to understand how to maintain the poured cement. The maintenance of poured cement is fundamental in preserving its aesthetic, structural integrity, and longevity. Just like any other material, poured cement can erode over time. The good news is that with regular maintenance, you can significantly extend the life of your poured cement structure.
Poured cement should ideally be sealed after 30 days of curing. Sealing helps protect the surface from moisture absorption, harmful UV rays, chemical spills, and wear and tear. It’s vital to choose a high-quality sealer that offers breathability and doesn’t trap moisture under the surface. The sealing process should be repeated every 2-3 years to maintain its protective properties.
Cleaning is another key aspect of maintaining poured cement. Regular cleaning helps prevent the build-up of dirt and grime. For general cleaning, use clean water and a stiff bristle brush or broom to scrub the surface gently. Avoid using harsh chemicals as they can cause damage to the cement surface.
Over time, cracks may develop on the surface of your poured cement due to temperature fluctuations and ground movements. These cracks not only detract from the appearance of your surface but can also lead to further damage if left untreated. So it’s important always to repair cracks as soon as they appear. Cracks can be filled with a suitable crack filler product that matches your original cement color. After applying the filler, allow it adequate time to dry before you walk or drive over it.
Finally, while any DIY enthusiast keen on learning “how do you pour cement” might consider doing the maintenance themselves, some tasks are best left to professionals – especially when dealing with significant damages or complex repair works. Professional cement contractors have the knowledge, skills, and tools to ensure the job is done right.
In conclusion, correctly maintaining your poured cement will help ensure its longevity and keep it looking fresh and new. Regular sealing, cleaning, and timely crack repairs are the key maintenance tasks that you need to keep in mind.
“`
Conclusion
In conclusion, the process of pouring cement may appear to be a difficult task, but armed with the right knowledge and tools, it can be accomplished by anyone keen to give it a try. Knowing ‘how do you pour cement’ isn’t only useful for construction professionals, but it can also be a fun and rewarding DIY project for homeowners. The key is to understand that thorough preparation is just as important as the pouring phase; from ensuring the correct cement mix, preparing the ground correctly to setting up forms. The success of your project heavily depends on these careful preliminary processes.
Also noteworthy is the importance of safety when handling cement. It’s crucial to use protective gear to avoid any potential harm. Cement can cause burns, skin irritation or even serious eye injuries. Therefore, always ensure you are wearing gloves, safety goggles and protective clothing during the process.
Additionally, understanding that weather conditions have significant effects on cement is crucial. If the environment is too hot, cold or wet, you might need to take precautionary measures to guarantee optimum results. This might include adding more water during hot weather or using heaters during cold weather.
The final step in the process – curing – is often overlooked by beginners who might not know its importance. Curing doesn’t only help in hardening the cement but also increases its strength and durability. Hence, properly wetting the cement surface for a week after pouring ensures your structure will remain sturdy for years to come.
In conclusion, ‘how do you pour cement’ isn’t as complex as it might seem at first glance. It involves multiple steps and considerations, but with patience and precision, it’s an achievable task. Whether you’re fixing your sidewalk or laying a foundation for a new shed in your backyard, understanding how to pour cement correctly helps create durable and long-lasting structures.
As with all skills, practice makes perfect. The more you do it, the better you become. With this blog post as your guide, you should be well on your way to mastering the art of pouring cement.