Introduction
Welcome to our step-by-step guide on ‘How to build a shed base with concrete blocks’. A shed serves as a great storage space for your garden tools, bicycles, lawnmowers, and more. However, to ensure that your shed remains stable and durable over time, it’s critical to build a strong, level base. And one of the best materials for this job is concrete blocks.
Concrete blocks are not only robust and reliable but also highly versatile. They are resistant to fire and moisture damage, creating a solid foundation that can bear heavy loads for years. Moreover, their affordability and easy availability make them a popular choice among homeowners and professionals alike.
However, building a shed base with concrete blocks may seem like a daunting task if you’ve never done it before. But fret not! It’s simpler than it seems. With the right tools, materials, and guidance, you can construct the base yourself even if you’re not an experienced builder.
This blog post explains ‘How to build a shed base with concrete blocks’ in clear, easy-to-understand steps. The guide includes everything from choosing the right location for your shed to leveling the ground and laying the concrete blocks effectively. Even if you’re a beginner DIYer with little or no construction experience, this guide will help you create a firm foundation for your shed.
So whether you’re planning to build a new garden shed or replace an old unstable one, read on to learn how to lay down a sturdy foundation that stands the test of time.
Materials Needed
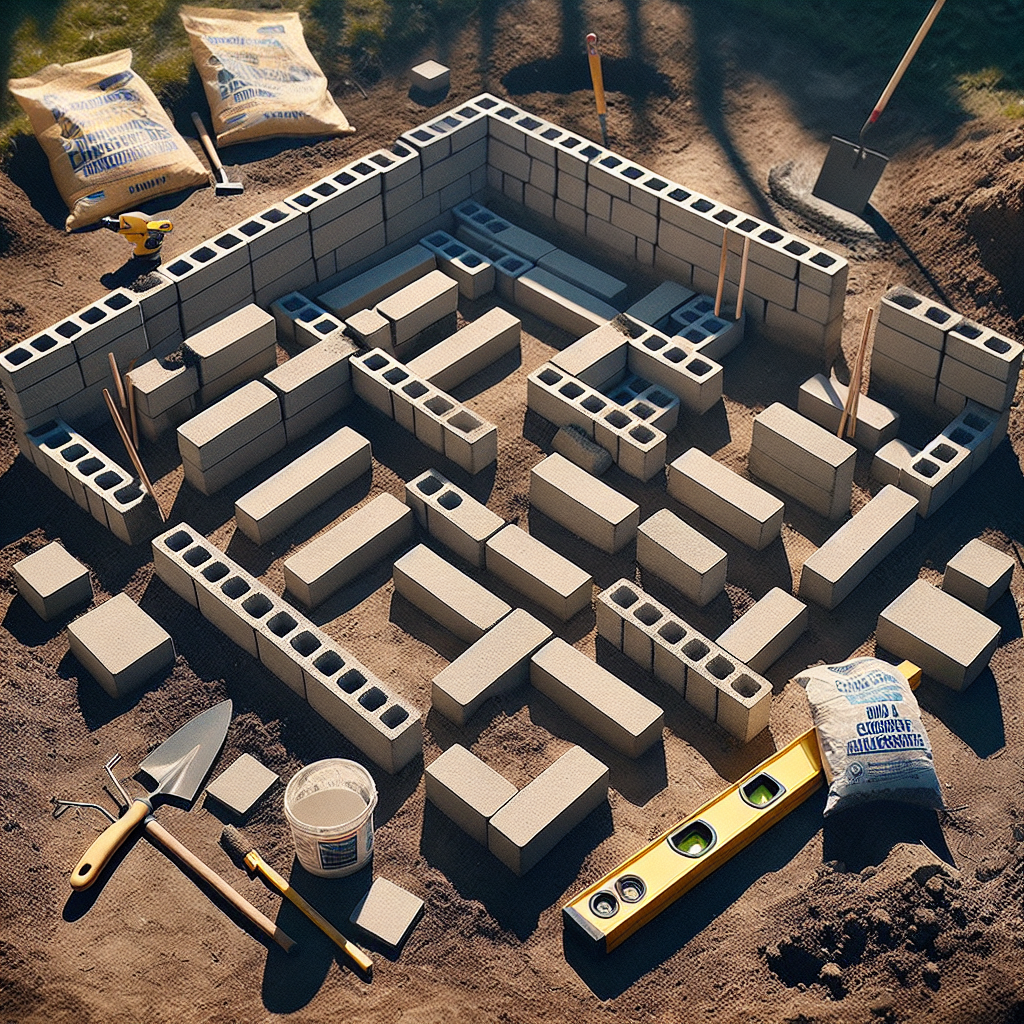
Before we dive into the process of how to build a shed base with concrete blocks, it’s important to first gather all the necessary materials. Preparing your materials ahead of time will make the process smoother and more efficient.
Concrete Blocks: To begin with, you’re going to need concrete blocks. The size and number of blocks you’ll need will depend on the size of your shed. For a standard-sized shed, you’ll typically need around 12 to 15 concrete blocks. These blocks are your foundation and will provide a sturdy base for your shed.
Plywood or Metal Sheeting: Plywood or metal sheeting is laid across the top of the concrete blocks to provide a level surface for the shed. The thickness and amount needed will also depend on the size of your shed.
Pegs and String: Pegs and strings are used for marking out where the concrete blocks will go, ensuring that they’re evenly spaced out and aligned correctly.
Spirit Level: A spirit level is used to check that your foundation is completely level. This is vital in ensuring that your shed will stand straight and secure.
Gravel or Crushed Stone: Gravel or crushed stone is used as an extra layer under the concrete blocks, to allow for better drainage and prevent sagging over time.
Weed Barrier Fabric: A weed barrier fabric can be placed under the gravel layer to prevent weeds from growing under your shed base.
Cement, Sand, and Water: You’ll need these three ingredients mixed together in appropriate proportions to create mortar, which is essential to hold your concrete blocks in place.
Trowel: A trowel is used to spread and smooth out the mortar between the blocks.
Shovel: A shovel is necessary for preparing the ground before placing your concrete blocks, including removing grass and leveling off the top soil.
Now that you have all your materials prepared, you’re ready to move onto the next step in the process of how to build a shed base with concrete blocks.
Remember, safety should always be your top priority when carrying out any building work. Always wear appropriate safety gear, including sturdy gloves and safety glasses, and make sure your working area is clear and safe before beginning your project.
Choosing the Right Location
Choosing the right location is an integral part of learning how to build a shed base with concrete blocks. This process is fairly straightforward, but there are several vital factors to consider when determining the best position for your shed base.
One of the first things to consider is your local building codes. Some states and cities may have specific rules and regulations regarding where and how you can construct a shed. For instance, they might stipulate that a shed should be at least a certain distance from property lines, septic tanks, or other structures. Before starting work, check with your local council or homeowners’ association to ensure you’re compliant with all rules.
Next, consider the ground conditions. The ideal spot should be flat and level as it provides the most stable base. If your chosen area isn’t level, you will need to do some groundwork before starting your shed base project. This might involve removing topsoil, incorporating gravel for drainage, or compacting the soil.
The type of soil also plays a role in determining the ideal location. Hard-packed clay soils are generally better as they offer more stability than sandy or rocky soils. Remember that concrete blocks require a firm and stable ground to prevent shifting or cracking over time.
Once you’ve assessed your ground conditions, think about accessibility. Your shed should be easily accessible from your home and close to any utilities you plan on installing. This might include electricity for lighting or power tools, or water for gardening purposes.
Lastly, consider the purpose of your shed. If it’s going to be used as a workshop or hobby room, you might want it closer to your house for convenience. In contrast, if it’s going to store potentially noisy equipment like lawnmowers or power tools, placing it further away from living areas could be advisable.
In conclusion, understanding how to build a shed base with concrete blocks is only part of the equation. Choosing the right location is just as crucial, as it can impact everything from the stability of your shed to its ease of access. Make sure to take into account local regulations, ground conditions, accessibility, and the purpose of your shed when deciding on the perfect spot.
Preparing the Ground
Before we dive into the specifics of how to build a shed base with concrete blocks, it is important to focus on the initial stage, which is often overlooked – preparing the ground. For any building project, proper preparation is key to achieving a firm, level base that will support your structure over time. When it comes to building a shed base with concrete blocks, this entails selecting an appropriate area and treating the ground accordingly.
The first step in preparing the ground is choosing where you want your shed to be located. Whether you’re aiming for a certain aesthetic or functionality, ensure the area you choose has good drainage and isn’t prone to flooding. The location should also be flat and level to help ensure stability for your shed. If the land is uneven, you will have to invest additional time and resources into leveling it before you proceed.
Once you have selected an appropriate location, the next step is to mark out the area where your shed base will sit. Use wooden stakes and builder’s line to mark the outer edges of your future shed base. This ensures that you work within the specified area and provides a visual guide for where your concrete blocks will go.
After marking out your area, it’s time to remove any vegetation or debris from the site. Grass, weeds, rocks or other debris can affect how evenly your concrete blocks sit on the ground and can compromise their long-term stability. To prevent this, make sure your site is free of such obstructions before proceeding.
The final step in preparing your ground is leveling. Depending on how uneven your chosen site is, this may involve scraping away high areas, using a spade or digger to remove excess soil, or filling in low areas with extra dirt. A spirit level will help you check if it’s level across its surface. Ensuring that your ground is level before progressing with building a shed base with concrete blocks is crucial. If the ground isn’t level, your shed could lean to one side or become unstable over time.
Now that your ground is prepared, you are ready to learn how to build a shed base with concrete blocks. This groundwork will ensure that your shed has a strong and secure foundation, giving you peace of mind about its durability for years to come.
Laying the Concrete Blocks
With your site prepared, it’s time for the most critical part of the process – Laying the Concrete Blocks. How to build a shed base with concrete blocks isn’t overly complicated if you follow these steps.
Firstly, ensure that you have the necessary materials. You’ll need enough concrete blocks for the size of your shed base, a spirit level, a rubber mallet, and some gravel or sand for leveling. The number of concrete blocks will naturally depend on the dimensions of your shed, so make sure you’ve calculated this accurately.
Begin by placing your first concrete block at one corner of your marked-out area. It’s essential to start with the corners to ensure that your shed base is square. Use your spirit level to check that the block is both level along its length and its width. This first block sets the level for all subsequent blocks, so take your time to get it right.
Once you’re happy with the position and level of your first block, move onto the next corner. Repeat this process until all four corners have been set. At this stage, it’s wise to check that all corners are at the same height. If they aren’t, you may need to remove some or add more gravel or sand underneath.
Now you can start laying the rest of your concrete blocks in a line between each corner block. As you lay each block, use your rubber mallet to tap it gently into place and adjust as necessary with gravel or sand beneath it to keep it level.
It’s crucial during this stage to consistently check that each block is level – not just on its own but also in relation to the blocks adjacent to it. A shed base that isn’t flat will lead to problems further down the line when you start building your shed.
Finally, once all your blocks are laid, it’s a good idea to go around one last time with your spirit level to check that everything is still as it should be. Any minor adjustments can be made by using your mallet and adding or removing a small amount of gravel or sand underneath as necessary.
Learning how to build a shed base with concrete blocks is a straightforward process if you take your time and pay close attention to detail. A well-laid concrete block shed base will provide a solid and long-lasting foundation for your new shed.
Leveling the Base
One of the most essential steps when learning how to build a shed base with concrete blocks is leveling the base. A level base is crucial for the overall durability and stability of your shed. If you overlook this step, your shed could tilt or even collapse over time due to an uneven weight distribution. So do ensure that you give this part of the process the attention it deserves!
To begin with, you need to decide on where you want your shed to be located. Once you’ve decided on the location, clear the area of any debris or vegetation. Having a clean surface makes it easier to observe any obvious dips in the ground that might need extra attention during the leveling process.
The next step is to start laying your concrete blocks. Arrange them in a square or rectangle depending on the size and shape of your shed. The blocks should be positioned at every corner, with additional ones spaced evenly around the perimeter in order to distribute weight efficiently.
Once you have laid out your blocks, it’s time for leveling. Place a long straight edge (like a 2×4) across multiple blocks and use a spirit level to check for evenness. If any block is too high, remove some soil beneath it. If it’s too low, add some gravel or sand underneath until it’s level with the other blocks.
Keep repeating this process for all blocks until they are perfectly level with each other. This can be a lengthy process requiring patience and precision, but remember that this foundational work is fundamental to building a sturdy and long-lasting shed.
Once all blocks are evenly leveled, compact the soil around them. This provides extra stability and prevents future movement caused by seasonal changes in ground moisture levels.
Finally, check one last time with your spirit level across all blocks. If everything is still level, congratulations! You have successfully provided a strong, level base for your shed. This solid foundation will ensure the longevity and stability of your structure.
So that’s how to build a shed base with concrete blocks and level it properly. Remember that this is just one step in the entire process and each phase is equally important.
Finishing Touches
Now that you’ve understood the basic process of how to build a shed base with concrete blocks, it’s time to add the finishing touches to your project. Keep in mind that these final steps will give your shed base a professional look and ensure its longevity, making all your hard work truly count.
To begin with, check again to ensure that all the installed concrete blocks are level. You can do this using a spirit level. Any minor discrepancies can be adjusted by adding or removing some of the sand underneath the blocks. This step is crucial as an even shed base will result in a sturdier and safer shed.
Once you’re satisfied with the levelness of your shed base, it’s time to apply mortar between the blocks. This will provide additional strength and stability to your base. Mix the mortar according to the instructions on the package, then apply it with a trowel into the gaps between each block. Smooth out the excess mortar for a clean finish.
The next step in finalising how to build a shed base with concrete blocks is sealing. Sealing your concrete blocks is highly recommended because it prevents moisture from seeping into the concrete over time, which can lead to cracking and splitting. Use a high-quality concrete sealer for this purpose; simply follow the instructions on the product for best results.
Lastly, it’s time to add gravel. Covering your concrete block shed base with a layer of gravel will not only give it a neat appearance but also aid in drainage and prevent any unwanted plant growth. Distribute an even layer of gravel around and on top of your shed base using a rake.
In conclusion, while knowing how to build a shed base with concrete blocks is important, learning about these finishing touches is equally essential for completing a solid, functional and long-lasting shed base. Remember that patience and attention to detail will pay off in the end, providing you with a shed base that serves its purpose efficiently for years to come.
Maintenance Tips
Now that you have mastered ‘how to build a shed base with concrete blocks’, it is important to also understand the necessary maintenance required to keep your shed base in optimal condition. Concrete blocks, though durable and reliable, still require care. Here are some essential tips to help you maintain your concrete block shed base.
Regular Inspection
Conduct regular inspections of the concrete blocks for visible signs of damage such as cracks, chips, or any form of wear and tear. This is important because minor damage can escalate into major problems if left unchecked. It’s recommended you carry out these inspections at least twice a year.
Proper Drainage
Ensure that the area around your shed base has proper drainage. Waterlogging around the concrete base can lead to erosion over time and weaken the foundation. If necessary, consider installing a French drain system or slope the ground away from your shed base to direct water away.
Sealing The Blocks
Sealing your concrete blocks can greatly increase their lifespan by providing an extra layer of protection against harsh weather conditions. You can use a quality concrete sealer, which will penetrate into the concrete blocks and create a protective barrier against water penetration and salt damage.
Clean Regularly
Regularly sweep or hose off dirt, leaves, and other debris from your shed base. If not removed, these materials can trap moisture against your concrete blocks which could lead to mold growth and staining.
Repair Damages Promptly
If you notice any damages during your inspections, repair them immediately. Small cracks can be fixed using a concrete patching compound while larger damages might require replacing individual blocks or sections of your shed base.
In conclusion, the durability and longevity of your shed base significantly depend on its maintenance. With the proper care and attention, your concrete block shed base can last for many years, providing a strong and sturdy foundation for your shed.
Conclusion
In conclusion, learning how to build a shed base with concrete blocks is not only a rewarding activity but also an essential knowledge for any homeowner. It is a practical skill that enhances the longevity of your shed, keeping it stable and reliable for many years to come.
Throughout this blog post, we have systematically walked through the process of building a shed base using concrete blocks. We’ve covered everything from the materials you will need, to preparing the site and constructing the base itself. Remember that patience and careful planning are important in attaining a level, sturdy base that will support your shed effectively.
The benefits of using concrete blocks for your shed base are numerous. They offer durability, strength and stability that wooden bases may not provide. Also, they are relatively easy to work with and can withstand varying weather conditions. However, bear in mind that quality matters; ensure you obtain high-quality concrete blocks and other materials for efficient results.
As emphasized earlier, a well-constructed shed base does more than just provide stability; it also keeps your stored items safe from environmental elements like rain or snow. It prevents moisture from seeping into your shed, ensuring that your tools and equipment remain dry and rust-free.
In case you encounter any problems while following our guide on ‘how to build a shed base with concrete blocks’, don’t hesitate to seek professional advice. Experts can provide valuable insights and troubleshooting tips that can help ensure the success of your project.
It’s our hope that this guide has empowered you with concise, straightforward information about building a solid concrete block shed base from scratch. With this newfound knowledge, we encourage you to take on this DIY project. Not only is it a cost-effective solution but it also offers an opportunity to hone your construction skills.
At the end of the day, once you see your sturdy, reliable new shed sitting on a base that you constructed yourself, you’ll feel an immense sense of accomplishment and satisfaction. So why wait? Start planning your shed base project today!