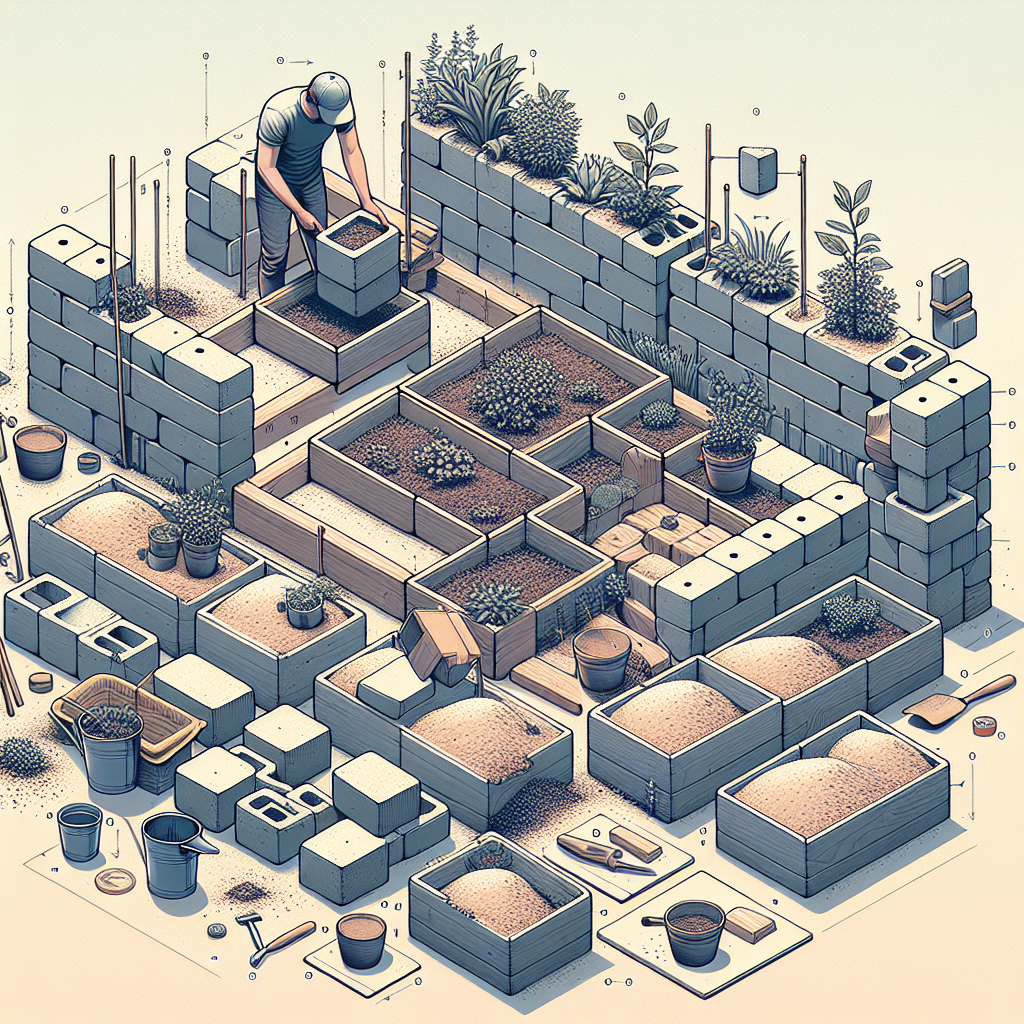
Introduction
Are you an avid gardener looking to elevate your gardening game, both literally and figuratively? Or perhaps you’re a beginner trying to find innovative yet inexpensive ways to start your own little green space? Then this blog post is just for you. Here, we will be learning about ‘How to build raised beds with concrete blocks’, an ingenious and sustainable approach to gardening.
Raised bed gardening is a growing trend among green enthusiasts. It not only helps in creating an organized garden but also offers numerous other benefits like improved soil condition, better drainage, easy accessibility, and most importantly, it can significantly enhance the aesthetic appeal of your garden.
While there are various materials that you can use to build raised beds, such as wood or metal, using concrete blocks comes with its own unique set of advantages. They’re highly durable and resist rotting, something that wooden frames often struggle with over time. They’re easy to assemble – no advanced carpentry skills required here – and can be built to any size or shape that suits your needs. Moreover, concrete blocks are relatively inexpensive and often readily available.
However, if you’ve never tried your hand at construction before, the thought of ‘how to build raised beds with concrete blocks’ might seem quite daunting. Worry not! Our step-by-step guide is designed for beginners and will help you every step of the way. So get ready with your gardening gloves and let’s dive into the world of raised bed gardening!
In this blog post, we will go over everything from choosing the right place for your raised bed garden, gathering necessary materials including concrete blocks and soil mixtures, building the bed itself; to finally planting and nurturing your favourite plants. By the end of this guide, you will have all the information and confidence you need to build your very own raised bed garden with concrete blocks.
So, whether you’re on a mission to transform your backyard into a lush green haven, or just wanting to try out a new DIY project, learning ‘How to build raised beds with concrete blocks’ can be an exciting and rewarding venture!
Benefits of Raised Beds
There’s a growing recognition among gardeners, both novice and experienced, that using raised beds can provide numerous advantages for your crops and flowers. Learning how to build raised beds with concrete blocks can be an invaluable skill for anyone looking to start or improve their home garden.
Raised garden beds increase the possibility of an earlier planting season. The soil in raised beds tends to warm more quickly compared to ground-level garden soils. This makes it possible to plant seeds and young plants sooner in the spring.
Improved drainage is another significant benefit of raised beds. The elevation allows water to drain off more effectively which is particularly useful in areas with heavy clay or compacted soil. This prevents water-logging and root rot, thereby creating optimal growing conditions.
Pest control also becomes easier with raised beds. The height of the bed can deter some ground-dwelling pests like slugs, snails, and some types of beetles. Furthermore, if you’re building your raised bed with concrete blocks, the solid barrier can provide an additional line of defence against burrowing critters such as moles or gophers.
A well-built raised bed can also reduce back strain and other physical discomforts often associated with gardening. No longer will you need to bend or kneel as much when tending to your plants. Plus, you’re able to create pathways between the beds making your garden more accessible.
Furthermore, raised beds can help you manage your soil better since you’ll be filling them up with a custom mix. You can tailor this mix to suit whatever you are growing, allowing for improved nutrient availability and pH management. And if you’re wondering how to build raised beds with concrete blocks, don’t worry! The process is straightforward, even for those without much DIY experience.
Overall, the benefits of raised bed gardening are vast and varied. From a longer growing season and better pest control to improved accessibility and soil management, it’s easy to see why more and more gardeners are opting for this approach. Whether you’re an experienced green thumb or just starting out, consider using concrete blocks to build your own raised beds – your back, and your plants, will thank you.
Materials Needed for Building Raised Beds with Concrete Blocks
When planning how to build raised beds with concrete blocks, it’s crucial to gather all necessary materials beforehand to ensure a smooth and efficient construction process. Here are the primary materials you’ll need:
Concrete Blocks
To start, you’ll need concrete blocks. These are the main building components for your raised bed. Depending on the size and height of your bed, determine the number of blocks required. An average-sized bed usually requires about 20-30 blocks. Ensure to choose blocks that are sturdy and in good condition, as they will be holding the weight of the soil and plants.
Topsoil and Compost
The next vital components are topsoil and compost, which forms the growing medium for your plants. The amount needed will depend on the size of your concrete block raised bed. The topsoil provides a base for your plants, while the compost enriches the soil with essential nutrients required for plant growth.
Construction Adhesive
A high-quality construction adhesive is used to bond the concrete blocks together. This adds an extra layer of stability to your raised bed, keeping it intact throughout different weather conditions. Make sure to choose a waterproof and durable adhesive that can withstand outdoor elements.
Landscape Fabric
You’ll need landscape fabric to line the inside walls of your raised bed. This helps to suppress weeds from growing into the bed and prevent soil from washing out through the holes in the cinder block.
Measuring Tape and Level
A measuring tape is required to ensure that you construct your bed with accurate dimensions, while a level ensures that your bed is flat and even. This is crucial because uneven beds can result in poor water distribution in the soil.
Plywood and Cuts of Lumber
If you’re planning to add a capstone on top of your concrete block raised bed, cuts of lumber or plywood are required. The addition of capstone enhances the aesthetic appeal and can also double as a seating area for gardeners.
With all these materials at your disposal, you’re well on your way to learning how to build raised beds with concrete blocks. Remember, proper preparation is key to a successful build.
Choosing the Right Location for Your Raised Beds
When considering how to build raised beds with concrete blocks, one of the first steps is deciding on the appropriate location for these structures. The location of your raised beds can significantly influence plant growth and productivity.
The first factor you need to consider is sunlight exposure. Most vegetables and flowers require at least 6-8 hours of direct sunlight each day for optimal growth. When choosing a location for your raised beds, it would be best to select a site that receives ample sunlight throughout the day. If your yard has some shady areas, remember that leafy greens and herbs may tolerate these conditions better than fruiting plants like tomatoes or peppers.
The next aspect to consider is accessibility. Raised beds should be in a location that’s easily accessible for watering, weeding, harvesting, and other maintenance tasks. Think about how close the garden bed is to a water source because lugging heavy watering cans across the yard can become tedious. Also, consider how easy it will be to reach all parts of the bed without straining; a width of about four feet is typically recommended, as most people can reach about two feet into a raised bed from either side.
Drainage is another crucial factor in determining the right position for your raised beds. If you’re learning how to build raised beds with concrete blocks, remember that although these structures elevate your garden off the ground, poor yard drainage could still affect your plants. Avoid areas where water tends to pool after heavy rain.
Lastly, think about aesthetics. Raised beds should not only be functional but also visually pleasing. Consider how they will look in various parts of your yard and how they’ll integrate with other elements such as trees, paths, or patios.
In summary, selecting the right location for your raised beds is a crucial step in the process of building them with concrete blocks. With careful consideration of sunlight, accessibility, drainage, and aesthetics, you can determine the perfect spot in your yard for these structures.
Preparing the Ground
Before we delve into the specifics of how to build raised beds with concrete blocks, it is crucial to dedicate some time to preparing the ground. This step may seem simple or even unnecessary, but laying the right foundation can make the difference between a thriving garden and a struggling one. So let’s take a closer look at what this process involves.
The first duty is to select an appropriate site for your raised bed. You should choose a location that receives at least six to eight hours of sunlight a day, as this is essential for most vegetables and flowering plants. The area should also have access to water, and be clear of any underground utilities. If there are unwanted plants, remove them before you start.
Once you’ve chosen your location, the next step in preparing the ground is levelling it. When building raised beds with concrete blocks, having a flat base is crucial. Not only does this help to keep the blocks level and stable, but it also ensures that water will evenly distribute throughout the bed. You can level the ground using just a shovel and spirit level. Simply dig out any high spots and fill in any low ones until the area is as even as possible.
The size of your planned bed dictates how much area you need to level. Concrete blocks typically measure 16 inches long by 8 inches wide, so plan your bed size accordingly. Remember that it’s usually best not to make a bed wider than four feet so you can easily reach into the middle without stepping on the soil.
In addition to levelling, it’s wise to consider what’s below the surface of your chosen site. If you’re building on grass or weeds, it’s advisable to put down a layer of weed-blocking landscape fabric or cardboard before setting up your blocks. This will suppress unwanted growth from coming up through your new bed.
Finally, before you learn ‘how to build raised beds with concrete blocks’, it is essential to ensure that the ground is well-drained. If your chosen spot tends to pool water, you may want to consider adding gravel or sand below your blocks to improve drainage. After all, while plants need water, they don’t appreciate waterlogged roots.
With these steps completed, you’ll have a level, weed-free, and well-drained ground ready for your concrete block raised bed. Remember, taking the time to prepare properly will pay dividends in the future health and productivity of your garden.
Laying the First Layer of Concrete Blocks
After you’ve prepared the site for your raised bed, the next significant step in ‘How to build raised beds with concrete blocks’ is laying the first layer of concrete blocks. This stage is crucial as it forms the foundation of your raised bed and determines its levelness, sturdiness, and overall durability.
Firstly, mark out the perimeter of your raised bed using a string or a garden hose. Ensure that your measurements are correct and that the area is square or rectangular, depending on the desired shape. This will serve as a guide on where to place your concrete blocks. Keep in mind that standard concrete blocks are usually 16 inches long, so plan your dimensions accordingly.
Start by placing one of your concrete blocks at one corner of the marked area. Make sure it’s level by using a carpenter’s level; this will ensure that your bed won’t tilt over time due to uneven weight distribution. If necessary, you might need to dig into the ground slightly or add some sand underneath to achieve a level surface.
Once the first block is level, continue laying down the remaining blocks along your marked lines. It’s essential to check each block for levelness before moving onto the next one. Also, make sure that each block is touching the previous one; this will provide additional strength and stability to your raised bed.
As you lay each block, use a rubber mallet to lightly tap it into place. This helps seat the block firmly in its position. However, remember not to hit too hard as it can crack the block or throw off its level.
After completing a full round of blocks for your first layer, double-check that everything is still aligned and level. You may also want to measure diagonally across your bed from corner to corner to ensure that it’s square. If everything checks out, congratulations, you’ve successfully laid the first layer of concrete blocks for your raised bed!
Remember, the goal in this step is to create a solid and level base for your raised bed. It might take some time and patience, but it’s worth it. The more accurately you lay the first layer of blocks, the easier it will be to add subsequent layers and ultimately have a sturdy and attractive concrete block raised bed.
Building Additional Layers
After you’ve laid the foundation for your raised beds, you may need to add additional layers, depending on the height you want. In this section of ‘How to build raised beds with concrete blocks’, we’re going to discuss how you can successfully build those extra layers.
Adding more layers to your bed is not a complicated process. However, it requires careful attention to ensure stability and longevity. Firstly, start by placing the first layer of concrete blocks directly on top of the foundation layer. Make sure that they are properly aligned with the blocks below. This is crucial to maintain the strength and integrity of the structure. If one block is not correctly aligned, it could compromise the entire bed.
In addition, remember to stagger your joints. Much like brickwork, offsetting each subsequent layer of blocks (also known as ‘breaking the joints’) helps to increase the stability of your bed, making it less likely to collapse or shift over time. This means that each block should be centered over the seam between the two blocks beneath it.
When building up these layers, keep in mind that every few layers (about every third layer), you should add some rebar or steel rods into the hollow cores of the blocks for added stability. These rods should be long enough to go through all your layers and about 12 inches into the ground. After inserting these rods, fill in the remaining space in these cores with gravel or more concrete mix. This will provide additional support to your raised bed and help prevent shifting or collapsing due to weight or weather conditions.
If you plan on adding more than three layers, consider using construction adhesive between layers for additional security. Just apply a bead of adhesive along the top edge of each block before placing the next one on top. This will bind them together and create a stronger structure.
Finally, always check your levels as you build. Use a spirit or laser level to ensure each layer is perfectly horizontal. This not only maintains the aesthetics of your raised bed but also ensures that water will be evenly distributed when you start planting.
Building additional layers in raised beds with concrete blocks can be a bit labor-intensive, but the end result is well worth it. With careful attention to detail and a little patience, you’ll have a durable, long-lasting raised bed ready for your planting needs.
Securing the Blocks Together
When learning how to build raised beds with concrete blocks, one of the most crucial steps is securing the blocks together. This step ensures that your raised bed garden is sturdy, durable, and safe. Let’s delve into what this process entails.
The first thing you need to do is lay out the first layer of concrete blocks. These should be arranged in your preferred shape and size for your raised bed directly on the ground. The blocks should be closely aligned to each other for stability. Make sure each block is level and evenly spaced to ensure a solid foundation.
Once the first layer of blocks is in place, it’s time to secure them. Some gardeners might choose to use construction adhesive designed for bonding concrete blocks. This adhesive, available in tubes at home improvement stores, can be applied using a standard caulk gun. Apply a generous amount of adhesive on the top ridge of each block where the next block will sit, then press down firmly to bond them together.
However, not everyone may be comfortable with using adhesive on their garden structures due to potential chemicals. An alternative method involves simply stacking the blocks with no adhesive but filling the holes in each block with soil or gravel. This approach relies on gravity and the weight of the materials inside the blocks to hold things together which makes it a more natural way of securing them.
The third method combines both techniques mentioned above for an extra secure and sturdy structure. After stacking each block, fill their hollow centres with either soil or gravel, then apply construction adhesive between each layer of blocks.
In all these methods, remember to check that each layer of blocks is level before adding another one on top. Repeat the process of adding layers until your raised bed reaches your desired height.
Securing the blocks together may not seem like a big deal, but it is actually an important part of how to build raised beds with concrete blocks. A well-constructed raised bed will withstand the elements and last for many years, providing a healthy and productive environment for your plants.
Preparing the Inside of the Bed for Soil
Now that you’ve mastered how to build raised beds with concrete blocks, the next crucial step is preparing the inside of the bed for soil. Remember, a successful gardening endeavour largely depends on a well-prepared gardening bed.
Begin by removing any existing grass or weeds in the area. If your raised bed is situated over lawn or weed-prone ground, you may want to lay down a layer of landscape fabric or cardboard at the base of your bed. This suppresses any existing grass or weeds and prevents them from growing into your garden bed. It will also help to improve water drainage, an essential factor in maintaining healthy plants.
Next, consider the depth of your concrete block bed. The beauty of knowing how to build raised beds with concrete blocks is that you can tailor them to your needs. For most plant types, a soil depth of 12 inches would suffice. However, for root vegetables, you might want to consider a deeper bed.
The choice of soil is also fundamental. You can’t just use any dirt in these beds; it has to be fertile and rich in nutrients for the plants to grow well. A mix of topsoil, compost, and other organic matter usually gets great results. You can also add a slow-release granular fertilizer to give an extra nutrient boost.
When filling your raised bed, ensure there’s about a 2-inch space between the soil surface and the top edge of your blocks. This slightly lower level prevents water from spilling over during watering or rainfall.
Finally, you need to make sure that the soil is properly compacted but not too dense. The perfect balance allows roots to easily penetrate through the ground while retaining enough moisture for healthy growth. You can achieve this by lightly tamping down the soil after filling. Remember to keep it loose enough for roots to easily move and grow.
Now that you know how to prepare the inside of your concrete block raised beds, you’re one step closer to enjoying fresh vegetables or beautiful flowers grown right in your backyard!
Choosing the Right Soil for Your Raised Bed
When learning how to build raised beds with concrete blocks, selecting the appropriate soil is just as important as the construction process. Remember that the soil serves as a foundation for your plants – it feeds and nurtures them. Hence, the success of your gardening efforts largely depends on the type of soil you use in your raised bed.
The best soil for a raised bed should have good drainage, hold moisture well and be rich in nutrients. It’s crucial to aim for a balance between garden soil, which is rich in nutrients, and potting soil, which has excellent drainage. Most experienced gardeners recommend a mix of 60% topsoil, 30% compost, and 10% potting mix. This blend provides excellent drainage while ensuring your plants have plenty of nutrients to thrive.
Topsoil is the base ingredient. It provides the mass you need to fill your raised bed. However, it can be heavy and lacks good drainage. That’s where potting mix comes in. It usually contains perlite or vermiculite to help with water retention and improve air circulation around plant roots.
Compost is another critical component when considering how to build raised beds with concrete blocks. It adds organic matter to your soil mix, improving its structure and fertility. Compost also brings beneficial microorganisms that help break down organic material into nutrients that plants can absorb.
If you find sourcing these ingredients separately too much of a hassle, pre-mixed raised bed soils are available in most garden centers. These pre-mixed soils are designed specifically for raised beds, ensuring a balanced blend of all necessary components.
It’s also worth considering the types of plants you plan on growing in your raised bed as they may require different soil conditions. For instance, root vegetables might need a loose, well-draining soil, while leafy greens may prefer a more nutrient-rich mix. A little research on your chosen plants will go a long way in helping you determine the right soil composition.
In conclusion, understanding the importance of choosing the right soil when learning how to build raised beds with concrete blocks will ensure your gardening efforts are rewarded with healthy and vibrant plants. By focusing on creating a balanced blend of topsoil, compost, and potting mix, you’ll provide your plants with the best possible growing conditions.
Planting in Your New Raised Bed
Now that you have learned how to build raised beds with concrete blocks, it’s time to move on to the next exciting part – planting. This step is where you will see your labor beginning to bear fruit, literally and figuratively. Raised bed gardening has several benefits, including improved soil quality and better drainage, but the success of your garden ultimately depends on your planting strategies.
Before you begin planting, fill your new raised bed with a blend of topsoil, compost, and other organic matter to create a rich, fertile environment for your plants. This kind of well-draining, nutritious soil is one of the biggest advantages of raised-bed gardening.
Take some time to plan out what you wish to plant. Consider factors like the amount of sunlight your bed gets each day, the hardiness of the plants you want, and how much produce you’re hoping to harvest. It’s also essential to understand that different plants have different spacing needs. Therefore, ensure you arrange your plants in such a way that they have enough room to grow without competing for light or nutrients.
Planting in a raised bed also allows for the ‘Square Foot Gardening’ method. In this approach, the bed is divided into square foot sections, and each section is planted with a different crop. This method maximizes space and simplifies crop rotation.
If this is your first time working out how to build raised beds with concrete blocks, it may be advantageous to start with easy-to-grow plants that do not require too much maintenance. Lettuce, beets, radishes, and zucchini are all great choices for beginners.
Once your plants are in the ground, water them at the base rather than from above to avoid washing away seeds or damaging delicate stems. As your garden grows, continue to monitor and maintain it. Depending on the plants you’ve chosen, you might need to stake or trellis them as they grow. And remember, the key to a successful raised bed garden is consistency in care and patience.
Building raised beds with concrete blocks can feel like quite the project, but the rewards are well worth it. Not only does this method give you control over soil conditions and improve water drainage, but it also takes the back-bending labor out of gardening. With these tips in mind, you’ll be well on your way to enjoying a bountiful harvest from your new raised bed garden.
Maintenance Tips for Raised Beds
If you’ve followed our guide on ‘How to build raised beds with concrete blocks’, then kudos to you! You are now ready to grow your organic vegetables, herbs, or flowers. However, your job doesn’t stop at merely planting your seeds and waiting for them to sprout. Raised beds made from concrete blocks require maintenance in order to keep them fit for use for several seasons. Here are some handy maintenance tips to help you out.
1. Regular Inspection:
Regularly inspect your raised beds for cracks or damages. Concrete blocks can last for years, but with the impact of weather and regular watering, they can develop flaws over time. If you notice any signs of wear and tear, address them promptly to avoid further damage.
2. Keep Them Clean:
Dirt, grime, or moss can accumulate on your concrete blocks over time, making your raised bed look unattractive and possibly affecting the health of your plants. Cleaning the blocks is a simple task that can be done using a mixture of water and dish soap. Scrub the blocks gently with a brush and rinse them off with a hose.
3. Weed Management:
Weeds are the enemies of any garden. They compete with your plants for nutrients and space. Make sure to regularly check your raised beds for weed growth and remove them as soon as possible. To prevent weed growth between the concrete blocks, consider sealing the gaps with sand or soil.
4. Soil Care:
The soil in your raised bed is just as important as the plants growing in it. Therefore, it’s essential to replenish the nutrients in the soil each season by adding compost or organic matter. Also, don’t forget to check the pH levels of your soil routinely to ensure it is suitable for your plants.
5. Pest Control:
Lastly, always be vigilant for any signs of pest infestation. Common pests that affect raised beds are snails, slugs, aphids, and certain types of beetles. If you notice an infestation, address it immediately using organic pesticides or other environmentally-friendly methods.
Maintaining your raised beds will take some effort, but the rewards will be worth it in the form of a flourishing garden full of healthy, vibrant plants. Remember that ‘How to build raised beds with concrete blocks’ is just the first step towards your gardening journey.
Conclusion
In conclusion, learning how to build raised beds with concrete blocks is an investment in your own productivity and self-satisfaction. It’s a process that requires careful planning, preparation, and execution, but the end result is well worth the time and effort spent. A well-built raised bed can add a unique aesthetic appeal to your garden, providing a neat and organized space for your plants to thrive.
Constructing raised beds with concrete blocks not only ensures that your plants have access to nutrient-rich soil, but it also helps in maintaining the health of your plants by providing better drainage and preventing soil compaction. Moreover, these durable structures offer long-term solutions for challenging gardening spaces and prove to be cost-effective in the long run.
Although building raised beds with concrete blocks may seem intimidating at first, it’s manageable if you break down the project into smaller tasks. Start with the planning phase where you decide on the location, size, and number of raised beds you want. Then move to gathering materials and preparing the site. Following these steps will help simplify the assembly process.
While constructing, remember it’s crucial to keep each layer of blocks level for stability. Adding reinforcing bars can provide additional support. Once your structure is complete, fill it with a good quality soil mix for optimal plant health.
The versatility of concrete blocks also allows for customization according to personal taste or specific gardening needs. So whether you’re a novice gardener or a seasoned green thumb exploring new possibilities in gardening design, understanding how to build raised beds with concrete blocks can open up new horizons for creativity in your outdoor space.
To sum it up, this comprehensive guide on ‘How to build raised beds with concrete blocks’ aims to equip you with all the knowledge and skills requisite for creating robust and functional raised beds for your garden. So why wait? Get started on your new gardening project and enjoy the multitude of benefits that raised beds have to offer!