Introduction
Welcome to our latest blog post titled ‘How to make a cement block‘. For those of you who are new to this world of DIY projects, you might wonder why on earth would anyone want to make their own cement block. Well, the answer is simple – it can save you money and it’s also fun to do something with your own hands. Plus, having this skill in your arsenal could come in handy for various projects around your home or garden.
A cement block, sometimes referred to as a concrete masonry unit (CMU), is a standard size rectangular block used in building construction. These blocks are made from a mixture of cement, aggregate, and water. As simple as it may sound, the process requires precision and a certain level of technical know-how for the end product to be structurally sound.
The good news is, anyone can learn how to make a cement block, and we are here to guide you through the process. Whether you’re looking to embark on a small DIY project at home or you’re a contractor aiming to save on construction costs, this guide will provide step-by-step instructions on how to produce high-quality cement blocks.
It’s important to note that safety measures should always be taken when working with cement. Always use gloves and protective eyewear while making your blocks. On that note, let’s dive in and discover ‘How to make a cement block’.
Materials Needed
The process of learning how to make a cement block is not as daunting as it may initially seem. The first and perhaps the most critical step in this DIY project is gathering all the necessary materials. Here is the list of items you will need:
- Cement: This is the primary ingredient in your project. Portland cement is commonly used for making cement blocks due to its durability and weather-resistant properties.
- Sand: Sand acts as an aggregate in the mixture, helping to increase the strength and stability of your cement blocks. Coarse sand is often preferred for this purpose.
- Aggregate: This is another crucial component in making a cement block. Gravel or crushed stones, often referred to as aggregates, are combined with sand and cement to give the block its sturdiness.
- Water: Water is needed to mix all these ingredients into a consistent “paste”. It triggers a chemical reaction known as hydration, which causes the cement mixture to harden and set into shape.
- Mold: Molds are used to shape and form the cement mixture into blocks. They come in various styles and sizes, so you can choose a mold that suits your specific needs.
- Trowel: A trowel is a hand tool used for scooping or spreading the cement mixture evenly into the mold. It helps ensure that your block has smooth surfaces and sharp edges.
- Gloves and Safety Glasses: Personal protective equipment (PPE) such as gloves and safety glasses are essential to protect yourself from potential hazards when working with cement.
These are the core materials you will need to make a cement block. Depending on whether you’re adding any special features or enhancements to your block, you might need additional materials. Nevertheless, having these materials at hand will get you off to a good start in your cement block making project.
Safety Precautions
In learning ‘How to make a cement block’, it is equally important to understand and strictly adhere to safety precautions. Cement making can be a fun and satisfying DIY task, but it also involves certain risks that can lead to injuries if not properly managed. Here are some crucial safety precautions to follow:
Personal Protective Equipment (PPE)
Always wear appropriate personal protective equipment. This includes safety glasses or goggles to protect your eyes from cement dust, which can cause serious eye irritation. A mask or respirator is essential to prevent inhalation of cement dust, which can harm your respiratory system. Wear protective clothing like long pants and long-sleeved shirts to protect your skin from cement burns. Also, always wear gloves and rubber boots to keep your hands and feet safe.
Ventilation
Cement contains substances that can be harmful if inhaled. Always ensure you are working in a well-ventilated area when mixing or working with cement. If you’re indoors, open windows or use fans for proper air circulation.
Safe Handling of Tools and Materials
Carefully handle all the tools and materials you’ll be using when making a cement block. This includes properly storing sharp tools when not in use and cautiously handling bags of cement to avoid unnecessary strain or injury.
First Aid Kit
Always have a first aid kit nearby when you’re making cement blocks. This is vital in case of any minor injuries such as cuts or splinters.
Proper Training
If you’re new to the process of how to make a cement block, take time to learn and understand each step before starting the project. Incorrect handling of materials or misuse of tools can lead to accidents.
Remember, safety should always be your top priority when engaging in any DIY project. By taking these precautions seriously, you can enjoy the process of making a cement block while ensuring your safety and wellbeing.
Steps to Make Cement Block
Learning how to make a cement block is not as difficult as it might seem, and it can be an incredibly useful skill, especially for those interested in DIY projects. In this section, we’ll walk you through the necessary steps to create your cement block.
The first step in making a cement block involves gathering all the necessary materials. You will need Portland cement, sharp sand, gravel (preferably 3/8â€), water, and a bucket or wheelbarrow for mixing. Additionally, you’ll need a mold for your cement block. This could be a specialized block mold or a simple wooden box of the desired size.
Once you have everything ready, begin by mixing one part of cement with three parts of sand and two parts of gravel in your bucket or wheelbarrow. This is your dry mix. Stir them together until they are thoroughly combined. If you’re making multiple blocks, multiply these proportions accordingly.
Next, gradually add water into the dry mixture. Slowly stir the water into the mix until it reaches a thick consistency like oatmeal or peanut butter. It’s crucial not to add too much water at once; if your mixture becomes too runny, you’ll have to add more dry materials to balance it out.
When your mixture is ready, it’s time to pour it into your mold. Ensure that you fill every corner of the mold and smooth out the top with a trowel or flat piece of wood. After filling the mold, tap the sides lightly to remove any trapped air bubbles – this strengthens the final product.
The last step is patience – allow your newly formed cement block to cure and harden. It’s essential to keep it moist during this period by lightly spraying it with water once or twice daily for at least seven days. After this curing period, you should have a solid, durable cement block ready for use!
These steps might look overwhelming when you read them for the first time, but with practice and patience, you’ll find that the process becomes second nature. Not only will you save money by making your own cement blocks, but you’ll also have the satisfaction of creating something with your own hands. So go ahead, and give it a try!
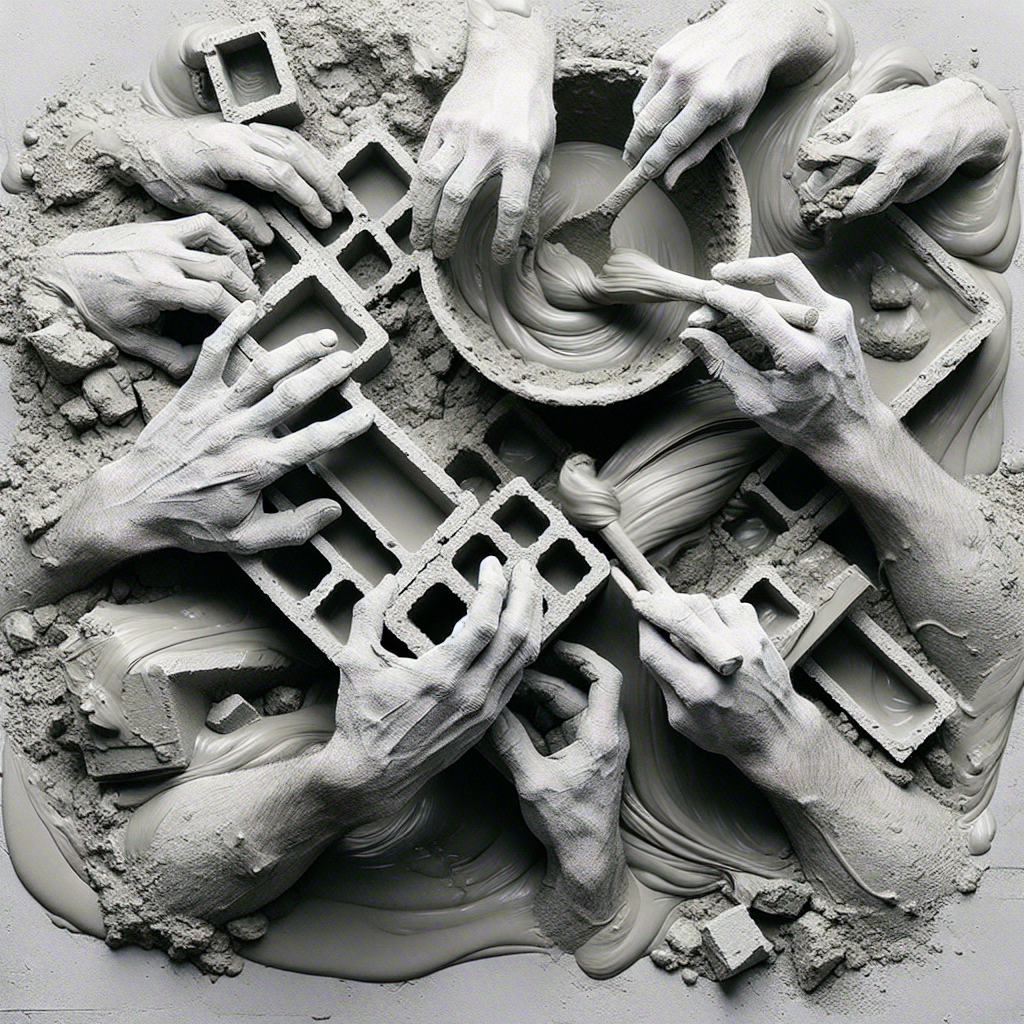
Molding the Cement Block
So you’re interested in ‘How to make a cement block?’ Let’s dive into the molding process. After preparing your cement mixture, which typically includes cement, water, and aggregate (a mix of sand, gravel, or crushed stone), the next key step is molding it into the desired shape and size.
To start with, you will need a mold. A mold is basically a hollow container used to give shape to molten or hot liquid material when it cools and hardens. In this case, the mold will give your cement the desired block shape. Molds come in various shapes and sizes depending on the type of block you are looking to manufacture. You can either purchase a ready-made mold from a store or make one yourself using materials such as plywood and steel.
Once you have your mold ready, it’s time for the actual molding process. Begin by pouring your cement mixture into the mold. The cement should fill up to the top of the mold but be careful not to overfill it as this could leave you with uneven blocks.
After pouring in the mixture, use a trowel to spread it evenly within the mold and remove any excess cement. This is called screeding, and it ensures that your block will be flat and level when it dries. For proper screeding, move the trowel in saw-like motions across the surface of the mold until all areas are level.
The next step is compacting or tamping down the mixture inside the mold to remove any air pockets that may have formed during filling. This is done using a hand tamper or a vibratory plate compactor depending on the size of your project. Compacting not only helps to get rid of air pockets but also aids in strengthening your cement block.
Then comes one of the most important steps: curing. After compacting, let the cement block cure for some time, typically 24 hours. Curing allows the cement to harden and reach its maximum strength. This process involves maintaining adequate moisture within the block, either by covering it with damp cloths or plastic sheets or by regular misting.
Once your block has cured, you can then remove the mold and voila! You have successfully molded a cement block. However, the block might still need a few more days to dry out completely before it’s ready for use.
Molding a cement block may seem like a daunting task, but with the right tools and steps, it’s definitely achievable. So why not give it a try for your next construction project?
Curing the Cement Block
Now that we’ve covered the initial steps of ‘How to make a cement block’, it’s time to move on to one of the most critical stages – curing the cement block. This stage is crucial in determining the overall durability and strength of your concrete block.
Curing refers to the process of maintaining adequate moisture content in a newly formed cement block for a specific period, allowing it to fully harden and achieve its optimal strength. It’s essential to note that curing doesn’t just imply hardening. Instead, it involves a chemical reaction called hydration, where water combines with cement to form crystals that interlock and strengthen the mixture.
The curing process starts immediately after casting and continues for a minimum of seven days under ideal conditions. However, for maximum strength, professionals recommend extending this period up to 28 days, especially in dry and hot climates.
So how do you cure a cement block effectively? The simplest method is water curing. All you have to do is keep the cement block damp for the curing duration. You can achieve this by spraying water on the block multiple times each day or by wrapping it in damp cloth or burlap. If you opt for the latter, remember to consistently re-wet the material to prevent it from drying out.
An alternative method is steam curing, which accelerates hardening by exposing the concrete blocks to steam at controlled temperatures. However, this technique is commonly reserved for commercial production due to its complexity and cost.
It’s important to understand that skipping or rushing through the curing process can lead to a weak cement block, prone to cracks and disintegration over time. Thus, patience is key here. While it may be tempting to expedite this lengthy process, remember that proper curing forms an integral part of making a high-quality, durable cement block.
By now, you should have a clear understanding of the cement block making process, from the initial mixing to the final curing. With this knowledge at hand, you are ready to produce your cement block that boasts durability and strength.
Remember, practice makes perfect, and don’t shy away from seeking professional advice if needed. Be patient and attentive to each stage in the process – your success in creating a sturdy cement block depends on it.
Tips and Tricks for Perfect Cement Blocks
Mastering the art of how to make a cement block is both a practical and rewarding skill. These building materials are essential for many construction projects, and creating your own can save time and money. Here are some insider tips and tricks to help you craft perfect cement blocks every time.
Materials Quality: The quality of your cement blocks heavily depends on the quality of the materials used. Always choose high-quality cement, fine aggregate, and course aggregate for optimal results. When purchasing these materials, ensure they are free from impurities like dirt, wood, paper, or other foreign objects.
Mixing Technique: The mixing process plays a crucial role in producing a sturdy cement block. The mixture should consist of cement, sand, stone chips in the ratio 1:3:6. Too much water can weaken your block. A good tip is to aim for a consistency that holds its shape when moulded but is still workable.
Moulding: Pour the cement mixture into mold boxes up to the brim and pack it tightly using a tamping rod. This will remove air pockets and result in denser, stronger blocks. To achieve an even surface finish, level off excess mixture with a straight edge.
Curing Process: After de-moulding your blocks, it’s crucial to properly cure them for at least seven days before usage. This involves keeping them damp under a shade or sprinkling them with water regularly, which helps achieve maximum strength.
Quality Check: After curing, it’s vital to check your cement block’s quality before using it in construction. One simple way is by knocking two blocks together; a hollow sound indicates good quality whereas a dull sound may suggest the block is either too dry or not properly cured.
Proper Storage: While learning how to make a cement block, it’s also essential to store them properly. Stacking them on a flat, hard surface and covering them with a waterproof cover helps maintain their shape and protects them from the weather.
In summary, knowing how to make a cement block is not enough; understanding the best practices in blending the right quantity of materials, moulding, curing and storing blocks is equally important. It’s this combination that guarantees strong, durable cement blocks for construction purposes. So next time you decide to create your own cement blocks, keep these tips in mind for perfect results every time.
Troubleshooting Common Issues
Designing your own DIY projects using cement blocks can be a fun and fulfilling task. However, sometimes problems may arise that can hinder the process and the end product. This section on ‘Troubleshooting Common Issues’ is dedicated to helping you navigate through any potential obstacles you might encounter when figuring out ‘how to make a cement block.’ Let’s delve into some of these common issues.
One of the most frequent issues that arise is a lack of consistency in the cement mix. The proper ratio between water and cement is crucial to ensure that your block has the right texture and strength. If there’s too much water, it can result in a poor bond, reducing the overall strength of your block. On the other hand, too little water may cause difficulties in mixing and could result in an uneven texture. It’s always good practice to follow the manufacturer’s instructions for mixing ratios and start with less water, then gradually add more until you reach the right consistency.
Another common problem is cracking or crumbling of the cement blocks after they’ve dried. This issue often arises from removing the cement blocks from their molds too early, before they’ve had adequate time to dry and harden. Therefore, patience plays an integral part in this process; always allow ample time for curing before attempting to move or use your blocks.
Surface voids or “bug holes” is another issue that many novices face when learning how to make a cement block. These small holes or pits on the surface of your concrete block are usually caused by air bubbles trapped in the mixture during pouring. To avoid this, ensure you adequately tap or vibrate your mold after pouring in the mixture to remove any entrapped air.
In conclusion, mastering ‘how to make a cement block’ does involve overcoming some challenges. But with knowledge about potential pitfalls, patience, and practice, it becomes an achievable task. Always remember, the key to a smooth cement block making process lies in the consistency of your mix, adequate curing time, and proper air removal techniques.
Conclusion
In conclusion, learning ‘how to make a cement block’ is an empowering skill that can have numerous applications for anyone interested in the world of construction, whether as a hobby or professionally. The process may seem intimidating initially, but once you’ve got the hang of it, you’ll find it quite straightforward and even enjoyable.
Like any other skill, making a cement block requires patience and practice. As you continue to make more blocks, you will naturally improve your technique and the process will become quicker and smoother. It’s important to remember that safety should always be a priority. Always wear the appropriate protective gear to safeguard against any potential hazards.
Whether you’re building a garden shed, constructing a house, or just creating a walkway in your backyard, knowing how to produce your own cement blocks can significantly cut costs. Not only does this skill save you money, but it also gives you the satisfaction of knowing that you’ve created something with your own two hands.
The versatility of cement blocks is another aspect that makes this skill valuable. Beyond construction of buildings or pathways, they can be used for a variety of creative projects such as outdoor fire pits, seating areas, raised garden beds and so much more. With some imagination and creativity, the possibilities are endless.
Keep refining your skills and don’t be afraid to experiment with different sizes and designs of blocks. The ability to customize your blocks could prove invaluable in specific projects. Remember also to take care of your tools and equipment as they are key to ensuring consistent output quality every time you venture into making cement blocks.
The knowledge on how to make a cement block is indeed an essential tool in one’s DIY arsenal. We hope this blog post has been informative and has piqued your interest in taking up this rewarding activity.
Happy building!