Introduction
Whether you’re looking to add a touch of charm to your garden or simply make a functional addition, understanding ‘how do you make a gravel path’ can help transform your outdoor space. Creating a gravel path may seem like a daunting task for the uninitiated but, with the right tools and guidance, it can be a rewarding DIY project that enhances the aesthetics and accessibility of your garden.
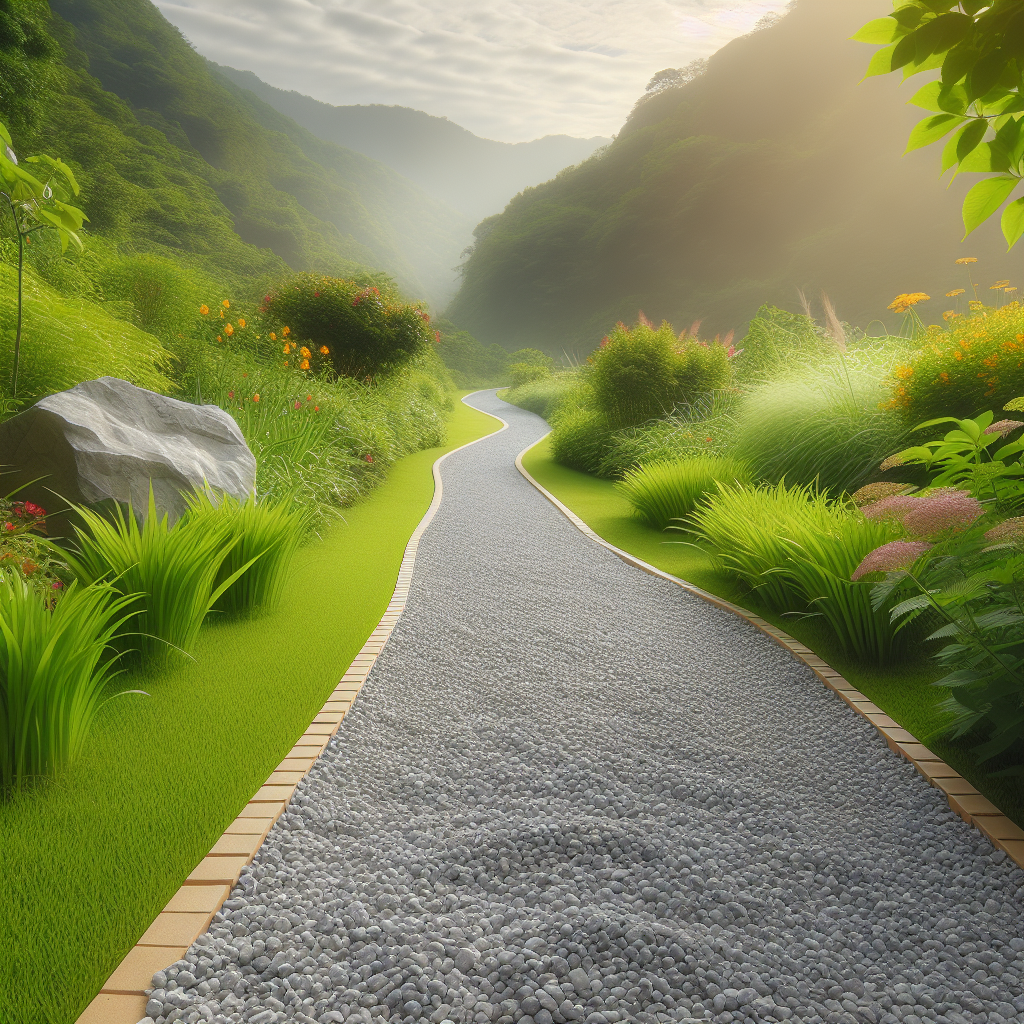
Gravel paths are not just practical, they can also form an important part of your garden’s design. They can guide visitors through different sections of your yard, leading them on an enchanting journey through your love of nature. With different types and colours of gravel available, you have the opportunity to get creative with your pathway. On the practical side, gravel paths are typically less slippery than concrete or brick alternatives, providing a safer walking surface in wet weather conditions.
The beauty of creating a gravel path is that it does not require specialized skills or extensive building experience. Almost anyone can create their own with careful planning and preparation. This blog post aims to guide you step-by-step on how to make a gravel path in your own garden. From the initial design process through to choosing the right gravel and edging materials, all aspects will be covered. Just imagine how satisfying it will be to walk down a beautiful path that you have designed and created yourself.
So if you’re wondering ‘how do you make a gravel path’, read on! You’ll find everything you need to know right here in this blog post.
Choosing the Right Gravel
One of the most crucial steps in the process of ‘how do you make a gravel path’ is choosing the right type of gravel. The kind of gravel you choose can significantly affect not only the appearance and functionality of your pathway but also its upkeep and longevity.
Gravel is available in a wide variety of sizes, colors, and materials, so it’s essential to select a type that complements your landscape and fits into the overall design aesthetic of your property. While some people might prefer natural, rustic looking pathways using crushed stone or pebble gravel, others may opt for a more polished look with marble chips or decomposed granite.
The size of the gravel is another important factor to consider. Larger stones are less likely to be displaced by foot traffic or weather conditions, ensuring a smoother and more stable walking surface. Conversely, smaller gravels may create a more refined look but can shift more readily underfoot.
The choice of material also impacts the path’s durability. Crushed stone or limestone are popular choices as they compact well and provide solid footing. Decomposed granite, on the other hand, offers a softer appearance but needs regular maintenance due to erosion. River rock or pea gravel are smooth and rounded but may pose a challenge to walk on due to their tendency to shift.
Furthermore, you should consider regional availability when choosing your gravel. Locally sourced materials are usually more affordable and eco-friendly than out-of-area options. Plus, they tend to blend better with your native landscape.
When deciding on how much gravel you need, take into account the size and depth of your path. A good rule of thumb is to have at least a 3-inch layer of gravel for pedestrian paths.
To sum up, picking the appropriate gravel for your pathway involves considering the overall look you want to achieve, the practical functionality of different gravel types, and the local availability of materials. By doing so, you ensure that your gravel path will serve its purpose while enhancing the beauty and value of your property.
Measuring and Marking the Path
One of the most crucial steps in any construction project, including when you’re wondering ‘how do you make a gravel path’, is the initial planning. Measuring and marking out your desired path is fundamental not only to ensure your path goes where you want it to but also that it’s the correct size and shape. This process can be time-consuming, but it’s worth doing properly to avoid problems later down the line.
Firstly, you need to decide on the overall direction and shape of your path. Using a garden hose or a length of rope can be an excellent tool for marking out curved paths, while straight edges are easily marked with wooden stakes and string. Remember to consider how the path will be used; a meandering pathway may be beautiful but might not be practical as a shortcut to the garage!
Once you’ve decided on the rough layout of your path, now is the time to measure more accurately. You’ll need a tape measure for this step, and possibly some help to hold the other end if your path is very long! Measure along the centre line of your proposed path, and note down the measurements. It’s usually best to take measurements in both meters and feet, as some materials are sold in one measurement but not the other.
You should also measure the width of your path at regular intervals. These measurements will help you calculate how much gravel you’ll need later on. A good rule of thumb to remember is that paths should typically be at least 1 meter (or 3 feet) wide, allowing two people to pass comfortably side by side.
Now that you’ve got all your measurements, you can begin marking out your path more accurately. Use wooden stakes or similar markers at key points along your path (where it changes direction, for example) and then join them up using string or spray paint designed for marking out grass. Be sure to mark out the full width of your path, not just the centre line, as this will ensure you dig out the correct amount of soil in the next stage.
With the path measured and marked, you have taken a critical step towards creating your gravel path. This careful planning process is crucial in ensuring your finished product is not only aesthetically pleasing but functional and well-proportioned too.
Preparation of the Ground
Before jumping into the specifics of ‘How do you make a gravel path’, it’s crucial to discuss the importance of preparing the ground. This critical preparatory stage lays the foundation for your new path and ensures its longevity and functionality. Missing or skimping on this step could lead to issues down the line, such as an uneven surface, poor drainage, or premature wear and tear.
To begin with, you need to clearly mark out the area where your path will lie. Use landscape paint or stakes with string to outline the pathway. This helps you visualise your pathway and also makes your work easier as it provides a guideline when excavating. The width of your path is entirely up to you, but a standard width is about 3 feet.
Once you’ve marked out your path, the next step is to clear away any obstacles in the way. This includes vegetation, rocks, roots, or debris that could interfere with the stability of your gravel path. If there are large rocks or tree roots in the path of your projected pathway, you might need to adjust your plan accordingly as removing these can be challenging.
After clearing the ground, it’s time to dig down to create space for your gravel and underlayment. A depth of about 4-6 inches is recommended. This might seem like a lot, but remember that this will be filled in with your base layer material (usually crushed stone), landscape fabric to prevent weed growth, and finally topped with decorative gravel.
When digging, ensure that your pathway has a slight slope to facilitate water runoff; a general rule of thumb is a two percent slope for every ten feet of path. Water should never pool on top of or around your gravel path; proper water management ensures that your path remains stable and dry all year round.
The final step in ground preparation involves compacting the ground. You can do this using a hand tamper for small paths or a mechanical plate compactor for larger paths. The goal of compacting is to create a firm and stable base for the gravel path. A loose or un-compacted ground can lead to an unstable path, causing the gravel to shift and become uneven over time.
In conclusion, adequate preparation of the ground is a crucial step when contemplating ‘How do you make a gravel path’. By following these steps diligently, you ensure that your gravel path will be as durable, functional, and beautiful as possible.
Laying Down Weed Barrier
Once you have carefully prepared your path area, the next step in ‘How do you make a gravel path’ is to lay down a weed barrier. This essential layer prevents weeds from growing through the gravel and disrupting your path. Laying down a weed barrier may seem like a small detail, but it can have a significant impact on the longevity and maintenance of your gravel path. So, let’s delve into how to properly implement this.
To start, you’ll need to purchase a high-quality weed barrier fabric from any garden store or online. The barrier should be durable and permeable to allow water to drain through but robust enough to prevent weed growth. It’s always better to get a bit extra fabric than what you think you might need, just in case of miscalculations or tears during the process.
Begin by unrolling the fabric across the width of your prepared path. If your path is wider than your fabric, don’t worry. Just overlap each piece by a few inches as this helps ensure that no weeds sneak through the seams. Don’t forget to secure the edges of the fabric with landscape staples or pins every few feet along the sides and seams. This stops the fabric from moving around while you’re working on it and helps hold everything in place over time.
If your path has curves, you’ll need to cut slits into the fabric and overlap it onto itself to accommodate the bends without causing bunching or gaps. Remember, any voids can become potential places for weed growth. The goal is to have a smooth surface where water can freely pass while blocking sunlight that encourages weed germination.
Once you’ve covered your entire gravel path with the weed barrier, take a moment to double-check your work before moving on to adding gravel. Ensure there are no rips or tears in the fabric, and there aren’t any areas where weeds could potentially penetrate. This is your last chance to make any necessary adjustments before laying down the gravel.
Laying down a weed barrier might seem like an extra step in making a gravel path, but it will save you a lot of time and effort in the long run. By preventing weed growth from the get-go, you’ll have less maintenance to worry about later, and your pathway will stay beautiful and functional for years to come.
Spreading and Leveling the Gravel
Once you’ve outlined your path and prepared the base, the next step in the process of ‘How do you make a gravel path’ is spreading and leveling the gravel. This step is crucial for creating a smooth, flat surface that’s comfortable to walk on. The type of gravel you choose will play a significant role in this stage. Pea gravel is often an excellent choice for paths as it’s small, smooth, and easy to walk on.
To begin, you’ll need to shovel the gravel onto your path. It’s advisable to use a wheelbarrow to transport the gravel from its storage spot to the path. You’ll want to ensure that you pour enough gravel to fill your path up to the top of the edging. This typically requires a layer about 1-2 inches thick depending on your personal preference and the size of your gravel.
Once you’ve laid all the gravel down, it’s time for leveling. Using a rake, spread out the gravel over your path evenly. Raking helps distribute the gravel across your pathway and into all corners and curves effectively. While raking, be mindful of any uneven sections or possible dips where water could collect after a rainstorm. If necessary, add more gravel to these areas.
Leveling is an essential part of making a gravel path because it ensures stability underfoot and guarantees that your pathway will drain properly when it rains. If your path isn’t level, water can pool in certain areas and cause damage over time, not to mention creating a potential slipping hazard.
In addition to raking, you might also want to consider using a tamper or roller to compact the gravel. This process will create a firmer surface that’s less likely to shift underfoot when you walk on it.
The last step in spreading and leveling the gravel is to walk on your path! This helps to identify any areas that may need more gravel or leveling. Pay attention to how the gravel feels under your feet. If it shifts too much, add more gravel until you are satisfied with the stability.
In conclusion, spreading and leveling the gravel in your path requires careful attention to detail but isn’t overly complicated. With a little time and effort, you’ll soon have a beautiful and functional gravel path in your garden.
Compacting the Gravel
The most integral part of creating a gravel path, often underestimated, is compacting the gravel. Without proper compaction, your path may sink, become uneven or shift over time, leading to ongoing maintenance or even the need for a total rebuild. Thus, understanding ‘how do you make a gravel path’ encapsulates more than just pouring gravel into a dug-out path; it involves ensuring a solid, compacted base and gravel layer.
Once you have dug out your path and laid down your landscaping fabric (to prevent weed growth), you will need to lay down and compress your base layer. Typically, this layer is composed of crushed stone or road base. The depth of this base depends on the type of soil in your area but generally should be around 4-6 inches.
Use a rake to spread the base evenly across your path. It’s crucial to maintain an even layer as any inconsistencies can lead to uneven compaction which can cause issues down the line. Once your base layer is smooth, it’s time to compact it. A plate compactor is the best tool for this job. If you don’t own one, you can usually rent one from a local hardware store.
After the base has been compacted you’re ready to add your gravel layer. Pour the gravel on top of the base until it’s approximately 3 inches deep. Rake this layer too, ensuring it’s even before beginning to compact it similarly.
Ensure that you wet down the gravel prior to compacting as this helps it settle into place and aids in compaction. Pass over the entire path with your plate compactor multiple times until there’s little visible movement in the gravel when you walk over it.
To finish, rake your path again lightly, adding more gravel if necessary. It might take a couple of times of adding and compacting gravel to get the desired level. Remember, it’s better to add too little gravel at the start and add more later than to add too much at once.
Compacting the gravel requires some effort, but it’s a critical step in ‘how do you make a gravel path’ that will extend its lifespan and maintain its aesthetic appeal. With your path now compacted, you can enjoy the beauty and functionality it brings to your outdoor space with peace of mind knowing it will last for years to come.
Adding Edging to Your Path
The question, ‘How do you make a gravel path?’ is quite a common one for those who take pride in their garden. A beautiful pathway can be the perfect addition to any outdoor space, offering both functionality and aesthetic appeal. One crucial aspect of creating an impressive gravel path is adding suitable edging.
Edging is not just a decorative feature; it plays a crucial role in maintaining the integrity of your gravel path. It keeps the gravel contained, preventing it from spreading into your lawn or flower beds. Furthermore, it provides a clear boundary and creates a visual contrast that can make your path stand out.
To begin installing the edging, decide what type of material you want to use. There are various options to choose from, each offering a different aesthetic appeal. Some popular choices include brick, stone, wood, or metal. Consider the overall style of your garden when making this decision to ensure that your path will blend seamlessly with its surroundings.
Once you’ve chosen your edging material, it’s time to install it. Start by marking out where the edging will go using a string line or spray paint. This will ensure that your edgings are straight and even. Then dig a trench along this line that’s deep enough to hold half the height of your chosen edging material. Be sure to compact the bottom of the trench with a tamper or the back end of a rake to create a solid base for your edging.
Place the edging into the trench, making sure they’re level with each other and half-buried in the ground for stability. Backfill around them with soil and compact it firmly to keep them in place.
Finally, spread your gravel within the confines of your newly installed edging. The contrast between the gravel and the edging will add a beautiful touch to your garden landscape, and you will have successfully answered the question of ‘How do you make a gravel path?’
Remember that creating a gravel path with edging requires diligence and attention to detail. However, the result is well worth the effort, as it not only adds charm to your garden but also increases its functionality.
Maintenance and Care for Your Gravel Path
Once you’ve successfully navigated the process of ‘How do you make a gravel path’, it’s essential to understand how to maintain and care for it. A well-cared-for gravel path can be an attractive, functional, and durable addition to your landscaping. Here are some simple steps to ensure your gravel path remains in excellent condition.
Regular Raking
Raking is one of the most basic yet critical aspects of maintaining your gravel path. With time and use, the stones can become displaced, creating an uneven surface. Using a garden rake, redistribute the gravel evenly along the path, ensuring that high spots are leveled out. This should ideally be done every week or after a heavy downpour.
Weed Control
Despite the weed barrier installed during construction, there is still a possibility of weed growth over time. Regular inspection and timely removal of any emerging weeds are crucial. Consider using a weed killer or pulling them out manually to keep them from spreading and creating an unsightly appearance on your path.
Replenishing Gravel
Even with regular care, some gravel could get washed away with rain or displaced with constant use. Make a habit of replenishing your path with fresh gravel as needed to maintain its look and functionality. The replenishment frequency would depend on the usage and local weather conditions.
Edging Maintenance
The edges of your gravel path require attention too. They help keep the gravel contained while also giving your pathway a neat and tidy look. An occasional check for any loose or broken edgers, followed by immediate replacement or repair, will greatly enhance the longevity of your pathway.
Sweeping
Gravel has a tendency to spill over onto nearby lawns or flower beds. Regular sweeping can help keep the gravel in its place and prevent it from mixing with the soil in your garden.
Remember, ‘How do you make a gravel path’ is only the first part of the journey. The maintenance and care that follow are just as important in ensuring that your gravel path remains an appealing feature of your outdoor space for many years to come.
Conclusion
In conclusion, creating a gravel path can be an enjoyable and fulfilling project that adds aesthetic value to your landscape while also offering a practical solution for maintaining your outdoor space. With the correct materials and tools, a bit of planning and some hard work, any homeowner can accomplish this task.
The question “how do you make a gravel path” has several answers depending on the specific needs and tastes of each person. However, the general steps include: choosing your path, marking it out, digging the trench, installing edging, laying landscape fabric, and finally adding the gravel. This is a process that allows for personal customization in terms of size, shape, type of gravel and path edging. It is also an opportunity to add your own personal touch through small details like lighting or ornamental plants.
Creating a gravel path is not only about fashioning an attractive walkway. It also has functional benefits. Gravel paths are wonderful for drainage as they allow water to filter through instead of pooling on top like concrete or asphalt paths do. Moreover, they require minimal maintenance compared to other types of paths.
Remember that while the process may seem labor-intensive at first glance, it becomes more manageable when broken down into these clear steps. And the effort pays off! Every time you walk down your gravel path or see it winding charmingly through your yard or garden, you’ll feel the satisfaction of having created something beautiful and durable with your own hands.
So next time someone asks “how do you make a gravel path”, why not invite them over to see yours in all its glory? Better yet, share your new knowledge and maybe even offer to help them create their own. Happy gardening!