Introduction
Welcome to our blog post, ‘How do you make concrete stepping stones?’. This is a question that many budding garden enthusiasts and DIY-ers alike may have asked themselves. Today, we will explore this topic in depth, providing a clear and concise guide on how to create your very own durable, stylish, and cost-effective concrete stepping stones.
Concrete stepping stones are an attractive and functional addition to any outdoor space. Not only do they provide a safe and clean pathway through your garden or yard, but they can also add a touch of charm and individuality. They can be made in many different shapes and sizes, adorned with pebbles, glass tiles or even your children’s handprints for a truly personal touch. Concrete stepping stones are also incredibly durable, able to withstand the elements and the passage of time far better than many other materials.
But how exactly do you go about making these unique features? Can it be done at home with no prior experience? And what materials will you need? We’ll answer all these questions and more as we delve into the incredible world of concrete stepping stone creation. If you have been searching for a new DIY project or simply wish to upgrade your garden’s aesthetics, this guide is sure to inspire you.
In this blog post, we will walk you through a step-by-step process on ‘How do you make concrete stepping stones’. From preparing the mold to pouring the cement and adding decoration, we’ve got every stage covered. So let’s roll up our sleeves and embark on this creative journey together!
Materials Needed
The process of making concrete stepping stones is quite simple and a rewarding DIY project you can try in your spare time. But before we delve into the step-by-step guide, let’s first discuss the list of materials needed for this project. Understanding ‘how do you make concrete stepping stones’ require an understanding of the components involved in this process.
- Concrete mix: This is the main ingredient for your stepping stones. You can purchase ready-to-use bags from any local home improvement store or create your own mix using one part cement, two parts sand and three parts gravel.
- Molds: These will shape your stepping stones. You can buy commercially-made molds or use items around your house like an old cake pan or even a large leaf. Choose your mold depending on the size and shape of stepping stone you want to create.
- Water: You will need water to mix with your concrete. The amount will depend on how much concrete you are making.
- A mixing tool and container: This can be as simple as a shovel and wheelbarrow or it could be a handheld concrete mixer. The aim is to ensure that all components are thoroughly mixed together.
- Decorative elements: This can include anything from colored glass and mosaic tiles to pebbles, shells, or even handprints and footprints for a more personalized touch.
- Protective gear: The process of mixing concrete can be messy and inhaling cement dust can be harmful. Make sure to have rubber gloves, safety glasses, and a dust mask available.
- Lubricant: Cooking spray or petroleum jelly can be used to lubricate the molds, ensuring easy removal of the hardened stones.
Once you have all these materials, you’re ready to start with your project. It’s all about mixing the concrete, pouring it into your chosen mold, adding any decorative elements, and then waiting for it to dry before unveiling your finished stepping stone. With the right materials at hand, making concrete stepping stones can indeed be an easy and fun venture.
Remember, the beauty of this DIY project is that you are only limited by your imagination. So gather your materials and let’s get started on exploring ‘how do you make concrete stepping stones’ in the next section.
Selecting the Right Concrete
Before you start asking yourself ‘How do you make concrete stepping stones?’, it’s critical to first understand the importance of selecting the right concrete. Concrete is the foundation of your stepping stone project, and different types can lead to different results.
When choosing the type of concrete to use, you need to consider your project’s needs along with the desired finish. Quikrete and other similar brands offer a variety of concrete mixes that are perfect for projects like stepping stones. Their basic concrete mix is a tried-and-true choice that contains Portland cement, sand, and gravel. This mix is easy to work with and sets up relatively quickly.
If you’re new to working with concrete or want a smoother finish, consider using a bagged mix specifically designed for stepping stones. These mixes often include finer particles that result in a smoother surface, which may be more comfortable underfoot and can provide a more polished look. However, they may also take longer to set than standard concrete mixes.
Color is another element to consider when asking ‘How do you make concrete stepping stones?’. While many people appreciate the natural gray color of traditional concrete, others prefer something with a bit more personality. You can achieve this by adding liquid or powder colorant during the mixing process. This allows you to customize the color of your stepping stones to match your landscaping or other outdoor decor.
You should also consider whether or not you want your stepping stones to have an aggregate finish. This type of finish exposes small rocks on the surface of the stone, providing added texture and visual interest. To achieve this look, opt for a mix that includes aggregate such as pea gravel.
In addition, it is important to note that weather conditions can affect the setting time and overall quality of your stepping stones. Very hot or cold temperatures can either speed up or slow down the setting process. It’s always a good idea to check the packaging for any temperature-related instructions or warnings.
Finally, keep in mind that safety is paramount when working with concrete. Always wear protective gear such as gloves and safety glasses. And remember, wet concrete can burn the skin, so rinse it off immediately if you come into contact with it.
By taking the time to select the right concrete for your project, you set the stage for success in answering ‘How do you make concrete stepping stones?’
Mixing the Concrete
In the process of making concrete stepping stones, mixing the concrete is a crucial step. But how exactly do you go about it? In this part of our blog post ‘How do you make concrete stepping stones’, we delve into the nitty-gritty of mixing concrete.
First, gather your materials. You will need concrete mix (which you can purchase at your local home improvement store), a large bucket or wheelbarrow for mixing, and water. It’s also recommended that you have a sturdy stick or a garden hoe to properly mix the material.
Begin by pouring your concrete mix into the bucket or wheelbarrow. When it comes to the amount of concrete mix, keep in mind the size and number of your stepping stones. The bag of mix will typically give you guidelines on how much water to add per volume of dry mix, but as a general rule of thumb, aim for a ratio of 1:3 or 1:4 (water to concrete).
Next, add water gradually. This is where many people go wrong, as adding too much water at once can make your mix too runny and not strong enough for stepping stones. It is advisable to start with smaller amounts, stirring as you add, until you get a consistency similar to thick pancake batter.
The stirring process should not be rushed. Thorough mixing ensures that all the particles in the mixture are evenly hydrated. This improves the durability of your stepping stones. You can tell that the mixture is ready when it holds its shape when squeezed in hand and has no pockets of dry powder.
It’s important to remember safety during this process too. Concrete mix contains Portland cement which can cause burns if it comes in contact with your skin. Therefore, always wear protective gear like rubber gloves and safety glasses when mixing and handling the concrete.
Once your mix is ready, pour it into your mould immediately to prevent it from hardening. Should you find that your mix has become too hard before you’re able to pour, add a little bit more water. However, be careful not to make it too runny as this will affect the strength of your stepping stones.
And there you have it! That’s how you mix concrete for stepping stones. Stay tuned for our next section where we’ll discuss how to pour and shape the mixed concrete into your moulds.
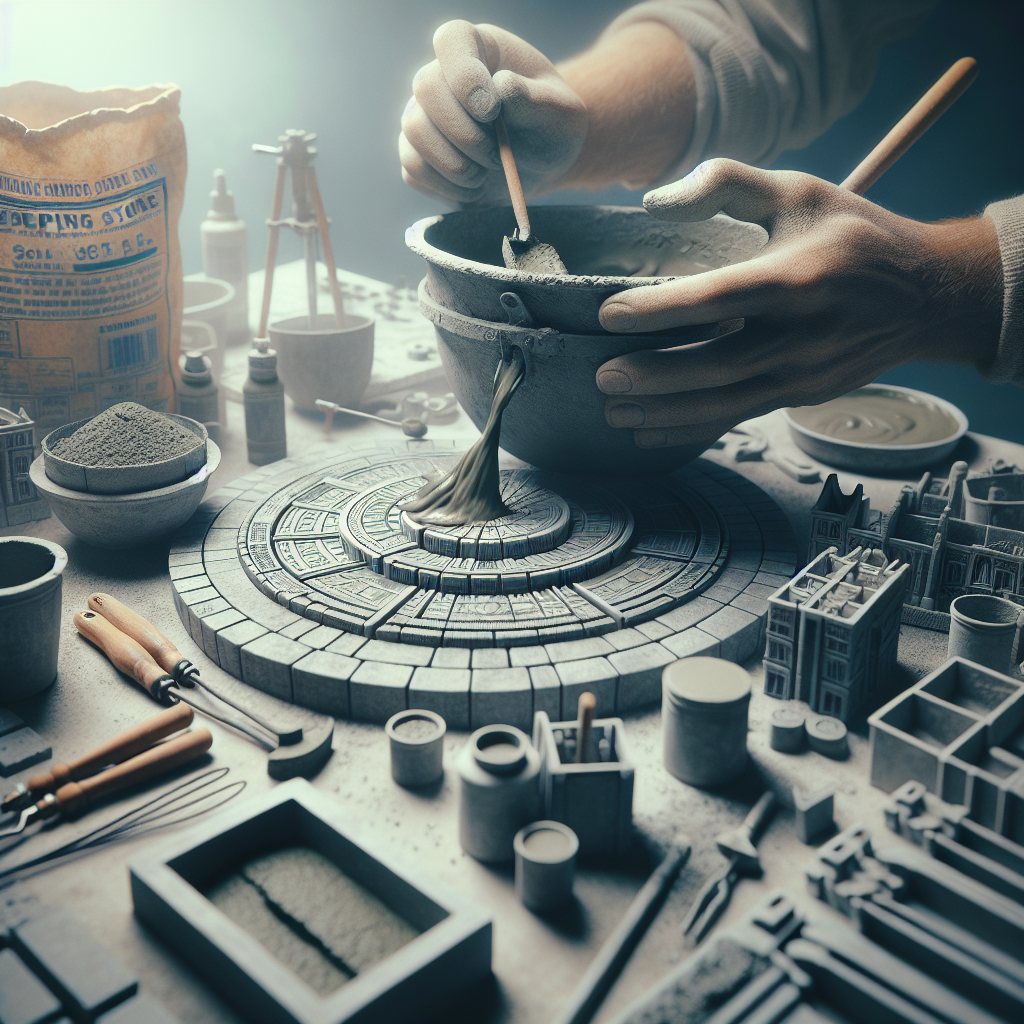
Making the Mold
The first step in answering the question, ‘How do you make concrete stepping stones?’ involves creating a mold. The mold is vital as it will define the size, shape, and overall look of your stepping stone. You can get as creative as you want with this step by using different objects as molds.
For a simple, straightforward stepping stone, a round cake pan or a square baking dish would work well. If you desire more unique shapes, you can explore your local crafts store for different types of molds. The critical thing to remember is to choose a mold with a smooth interior surface to ensure your stepping stones come out smoothly.
Once you have your mold ready, it’s time to prepare it for the concrete. First, apply a layer of cooking oil or petroleum jelly on the inner surface of the mold. This added layer makes the process of removing the hardened concrete from the mold much easier. It also prevents any accidental sticking that may ruin your finished product.
Another method to prevent sticking is by using a plastic bag or wrap. Simply line the inside of your chosen mold with plastic wrap before adding in your concrete mix. The plastic creates an effective barrier between the mold and the concrete and makes removal after drying an absolute breeze.
If you plan to add decorative elements to your stepping stone—like mosaic tiles, colored glass, or even small keepsakes—you will need to place these items at the bottom of your prepared mold before pouring in the concrete mix. Remember that whatever you place in your mold will end up being the top surface of your stepping stone once it’s unmolded and flipped over.
Pouring the concrete into the mold is a delicate process that requires patience and precision to avoid any air bubbles or uneven surfaces. You should aim to fill about 2 inches of the mold with the concrete mix for sturdy stepping stones. After you’ve filled the mold, gently shake or tap it to remove any trapped air and smooth out the surface.
Now that you have successfully made your mold and filled it with concrete mix, your stepping stone is ready for drying and curing. This process is crucial to making a durable, long-lasting stepping stone. But we’ll dive into that topic in the next section.
In conclusion, making a mold is a critical step in the process of ‘How do you make concrete stepping stones’. It allows you to create unique designs and shapes, adding an artistic touch to your garden or walkway.
Pouring the Concrete
Once you have gathered your materials and prepared your molds, the next vital step on ‘How do you make concrete stepping stones’ is actually pouring the concrete. This step may seem a bit intimidating to beginners, but with a little patience and precision, you’ll be making your own beautiful stepping stones in no time.
Firstly, begin by preparing your concrete mix. Follow the instructions given on the bag for best results. Typically, you will need to add water a little at a time and stir until the mix reaches the consistency of brownie batter. It is crucial to not make the mixture too watery, as this will weaken it.
Before pouring the concrete into your mold, lightly coat the interior of your mold with a non-stick cooking spray or petroleum jelly. This will help when it comes time to remove the stepping stone from the mold.
Now we reach the most exciting part — pouring the concrete! Pour slowly and steadily until it fills about half of the mold. Tap gently on the sides of the mold to help release any trapped air bubbles which can create imperfections in your finished project. Then continue filling until the mold is full.
If you want to include decorative elements such as mosaic tiles, marbles, or handprints into your stepping stone, now is the right time to add them. Gently press these items into the wet concrete and ensure they are adequately embedded so they won’t fall out once it’s dry.
Once you have poured your concrete and added any embellishments, use a piece of scrap wood or a trowel to smooth out the top surface of your stepping stone. If desired, you can slightly overfill and then round off the top for a more organic shape.
In regards to questions like ‘How do you make concrete stepping stones?’, one important thing to remember is to let your stepping stones cure properly. Leave the stones in a cool, dry place for at least 48 hours to harden. After which, carefully remove the mold. Allow the stone to further cure for approximately one week before walking on it.
Now that you’ve successfully poured your concrete stepping stone, you’re well on your way to creating a beautiful and functional addition to your garden or pathway.
Adding Designs and Textures
Now that we’ve understood the basic process of ‘how do you make concrete stepping stones?’ let’s move to the exciting part – adding designs and textures. This is where your creativity can truly shine, transforming the plain concrete into a beautiful garden feature.
The process of adding designs and textures should ideally begin when the concrete is still wet. This allows you to mould it easily, creating impressions that will last. But don’t rush – you need to wait until the concrete has set a little but isn’t completely hardened. Test it by gently pressing your finger on the surface. If it leaves a slight indent without sinking in entirely or disturbing the surface, it’s ready.
To add texture, you might consider using materials found naturally in your surroundings such as leaves, pebbles or shells. Press these objects gently into your wet concrete and leave them there until the concrete sets completely. You can then remove them to reveal an imprint of their shape and texture on the stone.
If you’re looking to add more intricate designs, craft or hardware stores sell a wide variety of stamps specifically made for use on concrete. These are easy to use – all that’s required is pressing them down onto the concrete’s surface before it dries completely.
Another technique is engraving your patterns onto the stepping stone. Tools such as a screwdriver can be used for this purpose. Draw your design with a pencil before engraving to have a clear path to follow. Remember, your engravings should be deep enough to withstand the elements but not so deep as to weaken the stepping stone.
For those who want to add colour, there are several options available. Concrete dye can be added during mixing, resulting in coloured stones. Alternatively, after the stones have dried completely, acrylic patio paints can be used to paint designs. Top this off with a concrete sealer to ensure your designs stay vibrant and protected for longer.
The techniques of adding designs and textures to your concrete stepping stones are only limited by your imagination. The satisfaction of creating something beautiful and functional for your garden is unparalleled. So, why not experiment with different materials, colours, and patterns? The more creative you get, the more unique your garden pathway will be.
Curing the Concrete
Once you’ve made your stepping stone, an essential final step in the process of how you make concrete stepping stones is curing the concrete. Curing is not as complicated as it may sound—it simply means allowing the concrete to dry thoroughly over a specific period. This crucial process ensures that your stepping stones will be durable and hold up well underfoot.
After pouring the concrete into your mold and allowing it to begin setting, you might think that the hard work is done, but don’t be fooled! The curing process is critical to creating a solid, durable stepping stone. Curing allows the chemical reactions that happen within the concrete mix to complete, resulting in a harder and more resilient final product.
Typically, immediately after the stepping stone has been shaped and any decorative elements added, it should be left undisturbed for at least 24 hours. This initial setting period allows the concrete to harden enough so it can be safely moved without risking deformation or damage.
However, this doesn’t mean that the curing process is over. For optimal strength and durability, concrete should ideally be cured for a minimum of one week before it’s exposed to high levels of foot traffic. During this time, it’s crucial to maintain a proper moisture level within the concrete as it continues to cure. Too much moisture can lead to a porous and weak stone, while too little may cause cracking or flaking.
To properly cure your stepping stones, cover them with a plastic sheet or tarp immediately after the initial set. This helps retain moisture within the mix and prevents too rapid drying. If you’re making your stepping stones during hot weather or in an arid climate, consider lightly misting them with water once or twice daily before re-covering them. In cold or very humid environments, it’s best to allow for a longer curing period.
In conclusion, understanding how to cure the concrete is an important aspect of how you make concrete stepping stones. By taking the time to cure your stepping stones correctly, you’re not only ensuring their long-lasting durability but also maximizing your creative investment. After all, you want your stepping stones to last for years, creating a beautiful pathway and a lasting impression in your garden or yard.
Removing the Stones from the Molds
Once you’ve followed the necessary steps on ‘how do you make concrete stepping stones’, and your concrete has had enough time to set, it’s time for one of the most crucial steps: Removing the stones from their molds. This step requires a delicate touch to avoid damaging your beautiful creations.
Firstly, you will need to determine if your concrete stepping stones are indeed ready to be removed from their molds. Generally, 24-48 hours after pouring is an adequate length of time for them to solidify completely. However, this can vary based on factors such as the size of your stepping stones and the temperature and humidity conditions in which they were drying. If your stones still feel damp or look darker in color than fully cured concrete, it’s best to give them a little more time.
Once you are confident that your stepping stones are fully set, begin by carefully turning over the mold. You can gently tap the bottom to encourage the stone to loosen. If your mold is flexible (like silicone), you can gently push on the bottom of each stone. Be careful not to force it out, as this could cause breakage or deformities in your stone. Patience is key in this step.
If you find that your stone isn’t easily releasing from the mold, don’t panic. Sometimes they need a little coaxing! You can use a utility knife around the edges of the mold where it meets the stone to help free it.
After successfully removing the stones from their molds, it’s essential to let them cure for an additional week before placing them in their final location. This extra time allows any remaining moisture within the concrete to evaporate fully, ensuring that your stones are as strong and durable as possible.
How do you make concrete stepping stones that are durable and attractive? Careful removal from the molds and a proper curing period are crucial steps in the process. With patience and a gentle touch, you can create beautiful stepping stones that will enhance your outdoor spaces for years to come.
Finishing Steps
Once you have successfully poured and shaped your concrete mix into your desired mold, the process of making concrete stepping stones is not yet complete. There are a few finishing steps necessary to ensure your stepping stones are ready for use. Here, we detail the final instructions on ‘How do you make concrete stepping stones.’
The first finishing step involves allowing your stepping stones to completely dry and harden. This crucial curing stage typically takes approximately 48 hours or more, depending on the size and thickness of your stone. During this time period, it is important to keep the stepping stones moist to prevent the concrete from drying out too quickly, which can cause cracks. You can achieve this by lightly dampening the surface with a spray bottle filled with water several times a day or covering them with a damp cloth.
After your stones have fully cured, now comes the time for popping them out of their molds. Carefully turn over each mold and gently tap it until the stone releases itself. Be sure not to force the stone out as it could break if it hasn’t cured all the way.
Next, check for any sharp edges or imperfections on your stepping stones. If there are rough spots, use sandpaper or a concrete rubbing stone to smoothen these areas. Remember to wear safety gloves while doing this task to protect your hands from potential scratches.
If desired, you can apply a sealant to your stepping stones at this point. Sealants provide further strength and durability, besides offering weather resistance to your outdoor decor elements. Choose a sealant suitable for outdoor use and follow the application guidelines provided by the manufacturer.
Finally, once your concrete stepping stones are dry and sealed, they are ready to be placed in their new home in your garden or pathway. Lay them down in your chosen pattern, ensuring each stone is level and securely positioned. If needed, you can place a bit of sand beneath each stepping stone for extra stability.
By following these finishing steps, you’ll be well on your way to adding a personal touch to your outdoor space with custom-made concrete stepping stones. Remember, patience is key in this process – do not rush the curing or drying times, and always handle your creations with care to ensure they can be enjoyed for years to come.
Safety Precautions
Creating decorative and functional elements for your garden can be an exciting and fulfilling DIY project. However, when it comes to projects like ‘how do you make concrete stepping stones’, safety should always be your priority. This section will cover some important safety precautions that you should take while making concrete stepping stones.
Before starting your project, it is essential to gather all the necessary personal protective equipment (PPE). The main components of PPE for this project are safety goggles, gloves, and a dust mask. Safety goggles protect your eyes from dust or any concrete splashes that might occur while mixing the concrete. Wearing gloves will protect your skin from direct contact with the concrete mix, which can cause skin irritation due to its alkaline nature. A dust mask is also crucial as inhaling cement dust can harm your respiratory system.
Next, ensure that you are working in a well-ventilated area. The process of mixing concrete can release small particles into the air that could be harmful if inhaled over extended periods. If you’re working in a closed environment, consider using a fan or opening windows to increase airflow.
Another key aspect of safety when working on ‘how do you make concrete stepping stones’ is tool handling. Only use tools that are in good condition and ensure they are safely stored when not in use. Be particularly careful with sharp tools to avoid accidental cuts or punctures.
Mixing the concrete is an essential step in this project, but it can also pose some risks if not done correctly. Always add water to the dry mix slowly and gradually while stirring continually to avoid creating too much dust or having the mix splash onto your skin or clothing.
Also, remember never to attempt removing dried concrete from your skin by rubbing or scraping it off as this can cause severe abrasions. Instead, wash it off as quickly as possible with plenty of water.
Finally, always have a first-aid kit on hand. Accidents can happen even with the most meticulous safety measures, and having a first-aid kit nearby will enable you to respond quickly to any minor injuries that may occur.
In conclusion, safety should never be compromised when undertaking DIY projects such as making concrete stepping stones. By following these precautions, you can ensure a safe and enjoyable project experience.
Conclusion
In conclusion, ‘How do you make concrete stepping stones?’ is a question that comes with a surprisingly simple answer. With a little bit of effort and creativity, you can create beautiful and functional stepping stones to enhance your garden or backyard.
Concrete stepping stones are not only practical by providing a pathway through your outdoor space, but they also add an artistic touch to your environment. By following the steps outlined in this post, you can easily create these stones yourself. Remember, it’s all about preparing the right materials, creating your mold, mixing and pouring the concrete, and then adding your artistic touch before letting it all set.
Don’t be afraid to experiment with designs and textures, because this is what will make your stepping stones unique. Practice makes perfect; don’t be discouraged if your first few attempts aren’t flawless. With each new stone, you’ll refine your technique and learn more about how the concrete behaves under different conditions.
The creation of concrete stepping stones can even become a fun project for the whole family. Let children play designer roles by creating patterns with pebbles or mosaic tiles. This is a fantastic opportunity to spend quality time together while creating something beautiful for your home.
Finally, remember that safety should always come first when handling concrete or any other building material. Make sure to wear protective gear and follow all safety instructions. Ensure that the site where you’re working is safe and free from any hazards.
‘How do you make concrete stepping stones?’ is no longer a mystery for you; now it’s time to put this knowledge into action. Have fun creating your customized stepping stones!