Introduction
Have you ever found yourself enchanted by the tranquil beauty of a koi pond? If the answer is yes, then this blog post: ‘How to build a koi pond with concrete blocks’ may be an exciting read for you! Whether you are an avid gardener looking to enhance the aesthetic appeal of your outdoor space or an individual seeking a new DIY project, building a koi pond can be an immensely gratifying endeavor. Plus, it brings a touch of nature right to your backyard, providing a serene space where you can unwind and relax.
Building a koi pond is not as intricate as it might seem. While there are professional services available, creating one on your own using concrete blocks can be cost-effective and a fun experience. It might demand a bit of manual labour and time, but the end result – a beautiful and calming water feature teeming with vibrant, graceful fish – is worth every bit of effort invested.
The purpose of this blog post is to provide you with comprehensive step-by-step instructions on ‘How to build a koi pond with concrete blocks’. We will guide you through each stage of the process, from planning and design, choosing the right location in your garden, selecting suitable concrete blocks and other required materials, to the actual construction process. Furthermore, we will also share some helpful tips on how to maintain your koi pond once it’s up and running.
Before we dive into the technicalities of building a koi pond with concrete blocks, let’s briefly understand what we are setting out to create. A koi pond is primarily designed as a habitat for koi fish, which are colorful ornamental varieties of domesticated common carp often kept for decorative purposes in outdoor ponds or water gardens. These ponds are usually made deeper than typical water gardens because koi fish require more space to grow and thrive.
Building a koi pond with concrete blocks is not only an affordable option but it also offers flexibility and durability. Concrete blocks allow you to customize the size and shape of your pond more easily than preformed liners, and they stand up well against wear and tear.
By the end of this post, you will be equipped with all the knowledge you need to take on this exciting project. Let’s embark on this journey together, and transform your garden into a tranquil oasis with a self-made koi pond!
Understanding the Basics of Koi Ponds
Koi ponds are striking features in any garden, offering a tranquil and serene environment that can also serve as an aesthetic centerpiece. Before diving into the process of how to build a koi pond with concrete blocks, it is important to understand the basics involved in creating a thriving ecosystem for your fish.
At its core, a koi pond is more than just a water-filled hole in the ground. It has to be carefully designed and properly maintained to provide a healthy and supportive habitat for the koi fish. This requires careful consideration of factors such as pond size, depth, filtration system, water quality, and climatic conditions.
The size and depth of your koi pond matter greatly. A typical koi pond should be at least 3 feet deep to protect the fish from predators and harsh weather conditions. The pond’s capacity should ideally hold at least 1,000 gallons of water to ensure ample space for your fish to swim freely. However, these dimensions can vary depending on the number and size of fish you plan to keep.
Water quality is another critical factor in a koi pond. Koi fish are sensitive creatures that demand clean water for survival. Therefore, a robust filtration system is required to remove waste, control algae growth, maintain an optimal pH level, and ensure overall water cleanliness.
The climate also plays a significant role in the well-being of your koi fish. Koi fishes thrive in temperatures between 15°C and 25°C. In areas with extreme weather conditions, you may need to consider installing heating or chilling systems.
Knowing how to build a koi pond with concrete blocks is not enough; understanding the basics behind maintaining a healthy living environment is equally important. The concrete blocks act as the main structure of the pond providing the much-needed durability and strength. Picking the right concrete blocks and knowing how to assemble them correctly will be crucial in building a safe and long-lasting koi pond.
With a solid understanding of these basics, you are well on your way to creating a beautiful and healthy koi pond. Remember, the key to a successful koi pond lies in careful planning and ongoing maintenance, ensuring that your fish have everything they need to thrive.
Required Materials and Tools
Before diving into the step-by-step guide on ‘How to build a koi pond with concrete blocks’, it’s crucial to assemble all the necessary materials and tools for the project. Having everything at hand will ensure a smooth construction process, making your work both easier and more efficient.
Firstly, you need concrete blocks which will form the primary structure of your koi pond. The number of blocks will depend on the size and depth of your pond design. These blocks are readily available in various sizes at home improvement stores or online.
You’ll also need a pond liner. This is an essential material to prevent water from seeping into the ground. The liner should be durable and puncture-resistant, typically made from EPDM (Ethylene Propylene Diene Monomer) rubber or PVC (Polyvinyl Chloride).
Next comes cement and sand for mortar to bind your concrete blocks together. Purchase a bag of ready-mix cement and masonry sand to make this process easier. If you plan on adding designs or borders, you might want to get concrete pavers or bricks as well.
For filtration, heating, and oxygenation of the water in your koi pond, you’ll need a pond pump and filter system. Remember that koi fish require specific water conditions for their health, so choosing an appropriate pump is vital. Also consider investing in a pond heater if you live in a colder region.
As for tools, some basics include a shovel for excavation, a trowel for applying mortar, a spirit level for ensuring the blocks are even, and protective gloves to keep your hands safe during work. A tape measure is essential for accurate dimensions, while a wheelbarrow would be helpful in transporting materials.
In addition, you may require a rubber mallet for adjusting the blocks, a concrete saw or angle grinder for cutting blocks to size (if needed), and a hose for filling the pond with water.
The aesthetics of your koi pond would be greatly enhanced by including plants and fish-safe decorations. Choose aquatic plants that will thrive in your local climate and add beauty to the pond. These items can usually be found at pet stores or garden centers.
Remember, the key to successfully building a koi pond with concrete blocks lies in proper preparation. Have a clear plan, gather all necessary materials and tools, and you’re well on your way to creating an attractive home for your koi fish.
Site Selection and Preparation
The first key step on how to build a koi pond with concrete blocks is site selection and preparation. This initial phase is crucial and requires careful thought, planning and assessment of the available area. Factors to consider when choosing the right place for your koi pond include practicality, aesthetics, accessibility, and safety.
Practicality should be taken into account to ensure that the construction of your koi pond will not interfere with any present infrastructure like underground cables, pipes or septic tanks. Aesthetics play a role in determining how well the pond fits within your overall landscape design. You would want to place your pond where it can be seen easily, enhancing the beauty of your garden or yard. Accessibility is important too; building a koi pond where you can get to it easily will make maintenance less of a chore. Lastly, consider safety – especially if you have small children or pets – by ensuring the pond area isn’t too slippery when wet and that its edges aren’t too sharp.
Once you’ve chosen your ideal site, preparation looms next. Start by outlining the shape of your pond with spray paint or a garden hose. This will give you a clear vision of how it will look and how much space it will take up. It’s also at this stage that you should decide how deep your pond will be. Keep in mind that Koi ponds are generally deeper than typical garden ponds because Koi fish need more space to swim around.
After marking out the shape and size of the pond, begin excavation. The depth should reflect what was decided previously but bear in mind that a deeper pond makes for healthier Koi as it provides better temperature control during winter and summer months. When digging, make sure that the sides slope slightly towards the center to prevent soil erosion.
Next comes soil evaluation. For a concrete block Koi pond, the soil should be firm enough to support the weight of the blocks and the water it will hold. It might be necessary to tamp down the soil or lay a concrete footing for added support. If your ground is excessively sandy or filled with organic material, you might need to consult a professional for advice.
Lastly, remove any rocks or sharp objects from the dug-out site that could potentially puncture your pond liner before laying it down. The liner serves as a barrier between the pond water and the concrete block, preventing alkalis from leaching into the water and affecting its pH level. It’s worth taking your time in this stage to ensure a long-lasting koi pond.
The site selection and preparation stage is perhaps the most labor-intensive part of how to build a koi pond with concrete blocks. However, taking your time to choose the right location and properly preparing it can ensure a smoother building process and result in a beautiful and functional Koi pond.
Designing Your Koi Pond
When setting out your plan on how to build a koi pond with concrete blocks, the design phase is crucial. This preliminary step will determine the size, shape, depth, and location of your future koi pond. Without a well-planned design, you may end up with a pond that is difficult to maintain or unsuitable for koi.
Firstly, location is key. Choose a spot in your garden where the pond will receive at least 4-6 hours of sunlight per day but won’t be excessively exposed to extreme weather. You should also consider accessibility for maintenance and the proximity of electricity for running pumps and filters. Avoid areas with numerous tree roots underground or overhead branches to minimize leaf litter in the pond.
The next decision is about the pond’s shape and size. Koi ponds are typically larger and deeper than other types of garden ponds due to the size and needs of koi fish. A rectangular or square shape is recommended when building a koi pond with concrete blocks because these shapes are straightforward to construct. A minimum depth of 3 feet is suggested to protect the koi from predators and severe weather conditions; however, many enthusiasts prefer depths of 4 feet or more.
In terms of size, bear in mind that koi grow relatively fast and need plenty of space to swim freely. As a rule of thumb, plan for at least 1,000 gallons per mature fish, though greater space will promote healthier growth.
Once you have decided on these basics, think about the layout inside the pond. Will you include ledges or shelves for plants? How about hiding spots for your koi? Design your pond with both aesthetics and fish welfare in mind.
Finally, take into account how you will incorporate essential equipment into your design. You will need a place to install your pond’s filtration system and pump, which should be easily accessible for maintenance. You will also need to design a drainage system for water changes and consider how you’ll hide any visible equipment to maintain the natural appearance of your pond.
Remember, building a koi pond is a significant project that requires precise planning and design. However, the reward of watching your koi swim happily in their new home is well worth the effort.
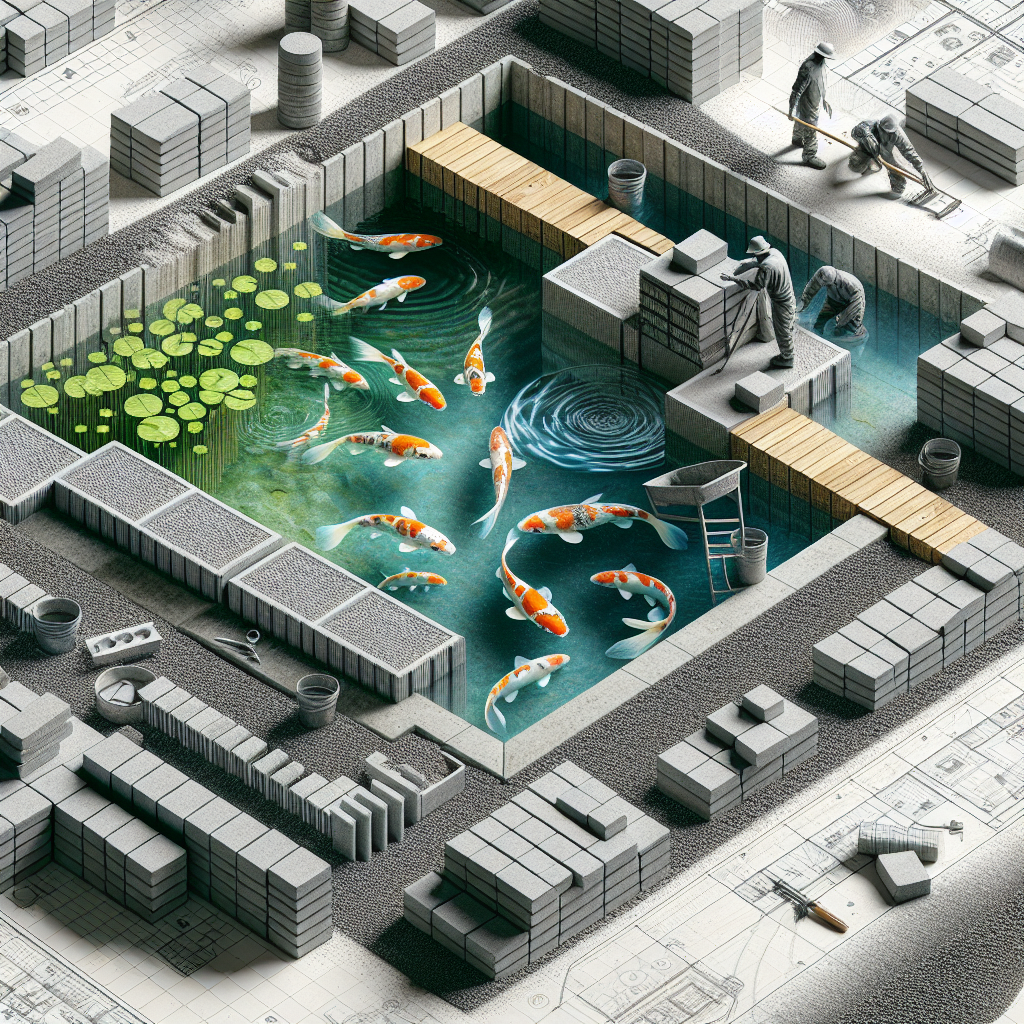
Laying Out the Concrete Blocks
After determining the size and location of your koi pond, purchasing all necessary materials, and preparing the ground, it’s finally time for what is arguably the most important step: laying out the concrete blocks. This section will guide you through this crucial process as we continue to discuss how to build a koi pond with concrete blocks.
Start by outlining your desired pond shape in the prepared area using spray paint or a garden hose. Once satisfied with the form, begin placing the first row of concrete blocks following this outline. It’s essential to ensure each block is level and firmly set in place before moving on to the next. Keep in mind the old adage “measure twice, cut once,” as making adjustments after the fact can be both time-consuming and challenging.
When laying each block, apply a thin layer of mortar to the sides that will be in touch with other blocks. This holds them together and creates a more solid structure. Make sure to stagger the blocks as you build up each layer – similar to bricklaying – for added structural integrity. The corners are particularly important; make certain they’re square and tightly joined.
For building the walls of your koi pond, continue adding layers until you reach your desired height. Remember that koi need plenty of space to thrive; generally, a depth of at least 3 feet is recommended. Depending on your design, you might want to incorporate shelves within the pond walls for plants or decorative elements.
As you lay your concrete blocks, consider leaving spaces for overflow drains or skimmers if they’re included in your design plan. These features require careful planning but can greatly enhance the functionality and maintenance ease of your koi pond.
Once all blocks are laid out and have set properly, it’s time to apply waterproofing sealant on both sides of the wall to prevent water leakage. Make sure to follow the manufacturer’s instructions and let it cure for the recommended time.
Building a koi pond with concrete blocks requires patience and attention to detail, but the result is worth it. With the concrete block structure correctly laid out and sealed, you’re well on your way to creating a wonderful, thriving koi pond that will provide beauty and serenity for years to come.
Installing the Pond Liner
Now that you’ve got your concrete blocks arranged and the foundation of your koi pond set, it’s time to move on to the next crucial step: installing the pond liner. Outlining this process, we’ll help answer the question of ‘how to build a koi pond with concrete blocks’. A pond liner is essential because it creates a waterproof barrier that keeps the water inside your pond instead of seeping into the ground.
Before you start, ensure you have a high-quality, durable liner. Polyethylene, PVC, and EPDM are all great choices for koi pond liners due to their durability and flexibility. The size of your liner should be larger than the actual dimensions of the pond to account for overlap and adjustment.
To begin, carefully spread out your chosen liner across the inside of your concrete block structure. Make sure it covers the entire surface area of the pond including its corners and edges. It’s advisable to have a second person assist you during this step as you want to avoid accidentally tearing or damaging the liner.
Once you’ve laid out your liner, you can start pushing it into the corners and sides of your pond structure. The goal is to get it to conform as closely as possible to the shape of your pond. It’s okay if there are some wrinkles or folds in the liner; they won’t harm your fish or impact the functionality of your pond. However, do try and smooth out any major lumps or creases as these could potentially interfere with water flow.
After fitting your liner into place, trim off any excess using a pair of sharp scissors. You should aim for a bit of an overlap around all edges – about 6 inches should suffice.
Once trimmed, secure the edges of your liner by placing them under heavy rocks or attaching them to the top edge of your concrete blocks with a strong adhesive. This will prevent the liner from slipping and moving when you start to add water and will also help keep it in place once your pond is operational.
Overall, installing the pond liner is a step that requires patience and precision. If executed properly, it forms an effective barrier that ensures your koi pond retains its water and creates a suitable habitat for your fish. Building a koi pond with concrete blocks is a satisfying project that can ultimately provide you with a beautiful and tranquil backyard feature.
Filling and Testing the Pond
Once you have completed the construction phase in your adventure of ‘how to build a koi pond with concrete blocks’, the next step includes filling and testing it. This is an essential process to ensure that your pond is ready and safe for the koi fish.
Before you begin filling the pond, make sure that all your groundwork – including installing the filtration system and any lights or equipment you want to include in your pond – is properly installed. It is crucial to do these installations before filling because it can be quite difficult and time-consuming to implement these features once water is added.
To fill your koi pond, use a garden hose and start adding water slowly. While the pond is being filled, carefully observe and check for any leaks or areas where water might escape. If you notice any seepage or leaks from the concrete blocks, it may mean that there are gaps in your concrete block assembly or your sealant has not been applied correctly. If this happens, drain the pond, allow it to dry completely, then repair as needed before refilling.
When the water level reaches about half-way up the sides of the pond, take a pause and test your water pump and filtration system, making sure they are working effectively. Also, you can check any underwater lights or other gadgets that you’ve installed to ensure they function correctly while submerged.
Once everything is functioning as it should, continue filling the pond until it reaches the desired depth. Keep in mind that koi fish require a depth of at least 3 feet for them to thrive and grow properly. After filling up, leave the pond to settle for a day or two. This will help you identify if there are changes in water level suggesting possible leakage points.
It’s important to note that tap water is often treated with chemicals that can be harmful to fish. To make it safe for your koi, you’ll need to treat the water with a dechlorinator, which neutralizes chlorine and other harmful chemicals. After treating the water, test it using a pond water test kit to ensure it has the correct pH levels and is safe for your koi.
By following these steps in the process of ‘how to build a koi pond with concrete blocks’, you will create a beautiful and safe environment for your koi fish. Remember that building a koi pond is more than just construction; it’s creating a home for your fish where they can thrive and provide you with joy and tranquility.
Adding Plants and Fish to Your Koi Pond
Once you’ve followed the steps on how to build a koi pond with concrete blocks, the next thrilling task is adding life into your newly built pond. This phase involves introducing suitable plants and, of course, the charming koi fish into their new habitat.
The addition of plants to your pond serves more than just aesthetic purposes. They provide shade, contribute to a healthy ecosystem within the pond, and serve as natural filters by absorbing excess nutrients that can stimulate algae growth. However, selecting the correct plants is crucial.
You can decide to use both marginal plants and aquatic plants. Marginal plants are those that grow around the margins of the pond where water meets land. Some examples include iris, rush, and pickerel. Alternatively, aquatic plants live entirely underwater and help oxygenate your pond; these include hornwort and elodea.
When adding these plants into your koi pond, ensure they are safe for your fish and will not take over the entire water space. Do not forget to arrange them strategically so they do not only enhance the beauty of your pond but also create hiding spots for your fish.
After successfully adding plants to your koi pond built with concrete blocks, it’s time for the most exciting part – introducing the koi fish. It’s advisable to allow a few weeks after setting up before bringing in your fish to allow the ecosystem to establish itself.
When introducing koi into their new home, do not rush the process. Place the bag containing your new koi gently onto the water surface of your pond. Let it float for about 15-30 minutes to allow for temperature equalization between the water in the bag and that in your pond. After this period, you can then carefully release them into their new environment. It’s important to note that sudden changes in temperature can be harmful to your koi fish.
With the right combination of plants and fish, you can transform your DIY project from ‘how to build a koi pond with concrete blocks’ into a vibrant and colorful aquatic garden. As you add these elements to your pond, remember that balance is key. The right number of fish, combined with the perfect selection of plants, will ensure your pond not only looks beautiful but also maintains a healthy ecosystem for your koi to thrive in.
Maintenance Tips for Koi Ponds
Building a koi pond with concrete blocks is an exciting project, but maintaining it to ensure the health and well-being of your koi is an ongoing task. Here are some useful tips to maintain your koi pond, keeping it in its best possible condition.
Firstly, ensure that you regularly clean the pond filters. The filters play a crucial role in maintaining water clarity and removing harmful substances from the water. You should clean mechanical filters weekly and biologically active filters monthly. Never clean all filters at once as you might disrupt the beneficial bacteria colonies.
Monitoring water parameters is also vital. Regular testing of the water for pH, ammonia, nitrite, and nitrate can help identify problems before they harm your fish. Always ensure that the pH level remains between 7.0 and 8.6; ammonia and nitrite levels should be zero, while nitrate levels should be kept below 50 ppm.
Another important aspect of koi pond maintenance is controlling algae growth. Algae can quickly proliferate in ponds exposed to direct sunlight or with excessive nutrients. Use UV sterilizers and algae-eating fish or add floating plants to provide shade and absorb excess nutrients.
When it comes to feeding your koi, do not overfeed them as uneaten food will decay and pollute the water, leading to poor water quality which can make your fish sick. It’s better to feed small amounts more often than a large amount at once.
Finally, monitor your koi’s health on a regular basis. Look out for signs of stress or disease such as changes in behavior, eating habits or physical appearance. Early detection can help prevent diseases from spreading among your fish population.
Maintenance Related to Concrete Block Koi Ponds
In relation to How to build a koi pond with concrete blocks, it’s crucial to check the concrete blocks regularly for any signs of deterioration. Concrete can sometimes crack or chip over time, and these imperfections can cause leaks or injure your fish. Always repair any visible damage immediately.
Moreover, during the winter months, if your pond is situated in a cold climate, consider using a pond heater or de-icer. This will prevent the surface of the pond from freezing over completely, providing necessary gas exchange to keep your fish healthy.
Remember, a well-maintained koi pond not only ensures the health and happiness of your fish but also enhances the aesthetic value of your garden or outdoor space. Regular maintenance is key to enjoying all the benefits that a concrete block koi pond offers.
Conclusion
In conclusion, learning how to build a koi pond with concrete blocks can be a fulfilling and rewarding project. Not only will you have the satisfaction of creating a beautiful addition to your garden landscape, but you also get the joy of seeing your koi thrive in their new environment.
The process may be labor-intensive and require some skill, especially when it comes to ensuring the structural integrity of the pond and maintaining the right conditions for the koi. However, the results are well worth every effort. By using concrete blocks, you can create a robust and durable structure that can withstand various elements and provide a safe haven for your prized fish.
Moreover, building a koi pond with concrete blocks offers you ample room for creativity. You can decide on the size, shape, and design of your pond based on your preferences or available space. You can even add decorative elements such as waterfalls or aquatic plants to enhance the aesthetic appeal of your pond.
Remember, it’s crucial to do plenty of research before starting your project to ensure that you are prepared for every step of the process. This includes understanding how to properly lay concrete blocks, how to seal them effectively against leaks, and how to create a conducive environment for your koi through proper filtration and water treatment.
So whether you’re an experienced DIY enthusiast or a beginner willing to learn new skills, this guide on ‘how to build a koi pond with concrete blocks’ offers a comprehensive blueprint for creating an amazing home for your koi fish.
Finally, always remember that building a koi pond is not just about the physical structure but also about creating an environment where your fish can thrive. So take time to understand the needs of your koi fish, follow all the necessary steps in constructing their home carefully, and soon enough, you’ll have an impressive koi pond that is both a visual treat and a happy haven for your koi.