Introduction
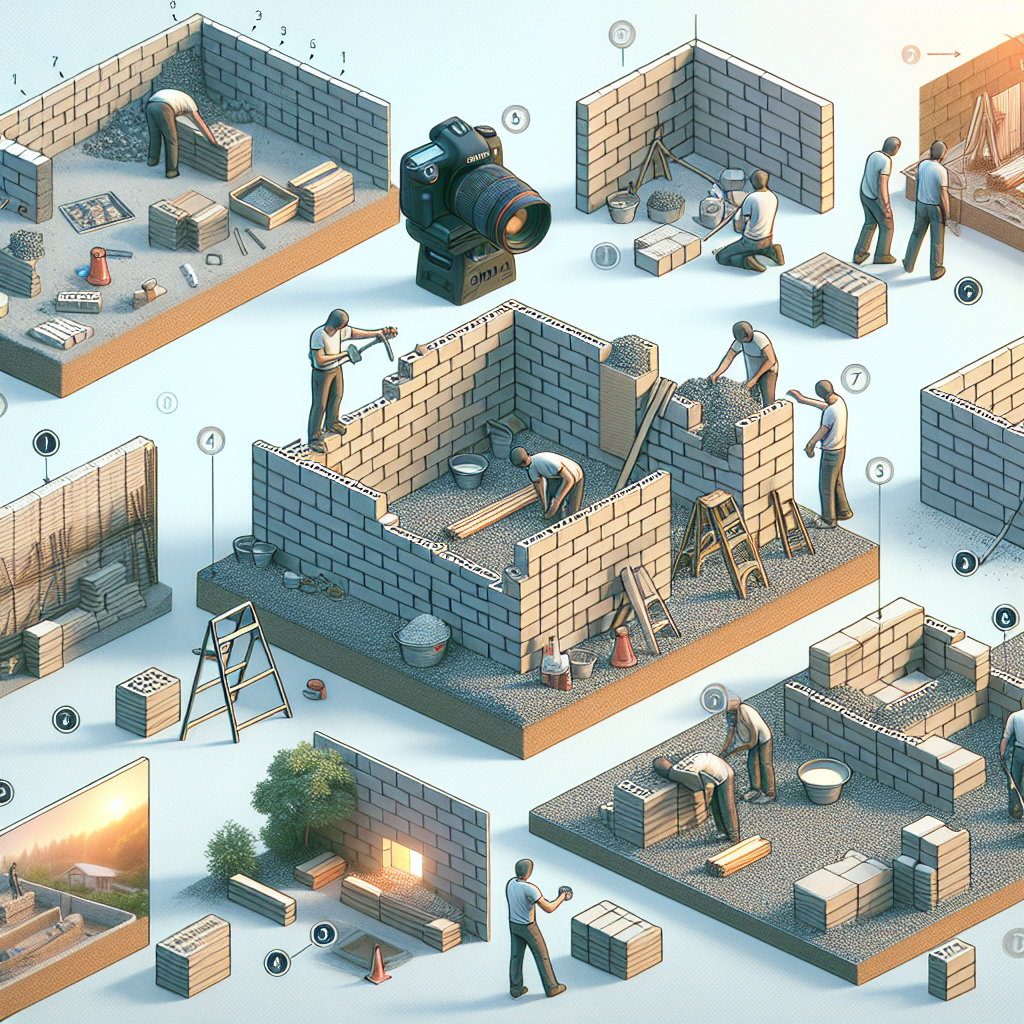
Welcome to our latest blog post on ‘How to make a block wall’. It’s a fantastic do-it-yourself project that can greatly enhance the aesthetics of your home and garden. Whether you’re looking to build a retaining wall for your garden bed, add some privacy to your yard, or even construct a sturdy foundation for a new building, learning how to make a block wall is an invaluable skill.
Before delving into the nitty-gritty of the process, it is important to understand what exactly a block wall is and why it’s such a popular choice. A block wall, also known as a concrete block wall or cinder block wall, is essentially constructed from cement blocks stacked and bonded together with mortar. Its popularity stems from its durability, strength, and versatility. These walls are fire-resistant, weather-resistant, and can be used both outdoors and indoors for various purposes like partitioning rooms or building retaining walls.
This guide on ‘How to make a block wall’ will provide you with step-by-step instructions which are easy to follow. You don’t necessarily need any previous experience in construction or masonry; all you require is patience, precision, and the right tools. Also remember that safety should always come first whenever involved in such projects.
Building your own block wall can be an incredibly satisfying project. You’ll gain a new skill set and save money by doing it yourself rather than hiring professionals. Plus, you’ll have the freedom to customize it according to your needs and preferences. So without further ado, let’s dive into the world of block wall construction!
Materials Needed
Making a block wall can be an interesting DIY project for many homeowners. The following are the materials that you will need to make a block wall:
- Blocks: The first and most obvious material required is the blocks themselves. When choosing blocks, take into consideration the size and weight which will affect both their handling and the strength of the finished wall. Concrete blocks are most commonly used for this type of project.
- Mortar Mix: This is what holds your blocks together. You can either buy premixed mortar or make batches yourself with sand, cement, and lime.
- Masonry Tools: These include a trowel for applying mortar, a spirit level to ensure your wall is straight and level, a string line to keep your block courses straight, and a hammer and bolster chisel for splitting blocks.
- Safety Gear: Safety should always be a priority when working on any construction project. You’ll need safety glasses to protect your eyes from flying debris, sturdy gloves to protect your hands while handling rough materials, and work boots to protect your feet from heavy falling objects.
- Buckets & Wheelbarrow: Buckets will be needed for carrying mortar and water. A wheelbarrow is useful for moving blocks around your site.
- Stiff Bristled Brush: This will be used for cleaning excess mortar off the blocks once they have been laid.
- Concrete Foundation: If you are building a load-bearing wall, it will need to be set on a solid concrete foundation. This should be planned out and poured prior to starting the block work.
Acquiring all these materials is your first step in learning how to make a block wall. Remember to plan your project carefully and ensure you have all the necessary tools and safety equipment prepared before starting. This will not only make your project move along more smoothly but also ensure a safer working environment.
Choosing the Right Blocks
Knowing how to make a block wall begins with the critical step of selecting the right blocks. Your choice of blocks will greatly impact not only the structural integrity but also the visual appeal of your wall. There are a variety of blocks available in the market, each offering different strengths, sizes, colours, and finishes. Here are some important considerations to make when choosing your blocks.
The first thing to consider is the size and weight of your blocks. The size of your blocks will affect how quickly you can build your wall – larger blocks, naturally, will cover more area faster but may be more difficult to handle and place accurately. Smaller blocks may take longer to lay out but can offer more precision and control in your design.
Next, consider the material of your block. Concrete blocks are popular for their strength and durability, making them suitable for load-bearing walls. They are also fire-resistant and offer good insulation against heat and cold. However, they can be quite heavy and hard to work with.
Lightweight aerated concrete blocks are easier to handle and cut than standard concrete blocks but offer similar levels of strength and insulation. Brick blocks, on the other hand, are lighter still and offer a traditional aesthetic, but they may not be as weather-resistant or insulating as concrete.
Finally, consider the visual aspect of your block choices. The colour and finish of your blocks should complement your overall design aesthetic. You can choose from a wide range of colours from natural grey concrete to terracotta or even coloured concrete. The finish can also vary from smooth and polished to rough and textured for a rustic look.
In conclusion, knowing how to make a block wall involves more than just stacking blocks on top of each other – it’s about choosing the right materials for your specific needs and aesthetic preferences. Take the time to research different block options and consult with professionals if necessary before embarking on your project.
Preparing the Wall Area
One of the most crucial steps on how to make a block wall is preparing the wall area. This involves several procedures to ensure that your block wall will not only be sturdy and durable but also aesthetically pleasing. It’s not an overly complex process, but it requires attention to detail and careful planning.
First, you need to identify the area where you need to build the block wall. You must consider factors such as the purpose of the wall, whether it’s for privacy, security or just for enhancing your landscape. The location will also determine the number of blocks needed and the time it will take to complete the construction.
Once you have determined the area, it’s time to clear the site. Remove any vegetation, rocks, or debris from the area to prevent any obstructions during construction. Any existing structures on this site may need to be demolished or relocated. It’s also important at this stage to check for any utility lines underground and obtain necessary permissions if needed.
Before starting with actual construction, it’s advisable to lay out the area with stakes and string lines. They will serve as guides on where exactly your wall should stand. Make sure that your lines are straight and levelled; any inaccuracies at this stage could lead to a crooked or unstable block wall.
Another vital part of preparing the wall area is ensuring proper drainage. Ignoring this step might lead to water damage and structural instability over time. The typical approach is to grade the base of your wall slightly away from it, allowing water to flow away naturally. Alternatively, you can install a weep hole or a proper drainage system, especially for larger walls.
Lastly, create a solid foundation for your block wall. This generally involves digging a trench that’s deep and wide enough for your footing — a mixture of cement, sand and gravel. The size of your footing will depend on the size and height of your block wall. Once the trench is ready, pour your footing and ensure it’s levelled and compacted properly.
To sum up, preparing the wall area isn’t just about finding a spot and starting to lay blocks. Knowing how to make a block wall involves careful planning, clearing and marking the site, setting up proper drainage, and creating a solid foundation. Remember that the time you invest in this stage will undoubtedly pay off in the long run, resulting in a sturdy and durable block wall that meets your needs.
Laying the First Row of Blocks
Any successful building project begins with a solid and level foundation, and learning how to make a block wall is no exception. For a block wall to endure time and elements, the first row of blocks, also known as the base course, should be properly laid.
Before setting any blocks in place, ensure the foundation is up to par. It should be sturdy enough to support the weight of your wall and leveled perfectly. If the base is uneven, it may result in an unstable wall that’s prone to leaning or collapsing. Once your foundation is prepared, it’s time to start laying down the first row.
The first step in laying the first row of blocks is applying a bed of mortar onto the foundation where you will set your first block. The mortar layer should be about 1 inch thick. Then, take your first block and gently set it into place on the mortar bed. Press down lightly ensuring it’s level both ways—front to back and side to side.
After placing each block, use a trowel to remove any excess mortar that squeezes out from under the block. This process is essential because any excess or spilled mortar can harden and interfere with ensuring a level second row.
Continue this process for each additional block, making sure that they are aligned correctly with each other. Use a level tool after every two or three blocks to ensure your row is level. If one block is slightly higher than another, tap it down with a rubber mallet until they are even. Spaces between the blocks should ideally be similar all through for uniformity.
Remember that the corner blocks are very crucial when building a block wall because they guide the rest of your construction. They should be meticulously leveled and aligned because any minor discrepancy can throw off your entire project.
After you have finished laying the first row, allow the mortar to set according to the manufacturer’s instructions before proceeding with the next row. This process is crucial to ensure that your block wall will be strong and stable.
By taking the time to carefully lay the first row of blocks, you set the stage for a successful project. Just like constructing any other structure, learning how to make a block wall requires patience, precision, and attention to detail. So make sure each block is aligned and level for a sturdy, long-lasting wall.
Applying Mortar
Continuing our guide on ‘How to make a block wall’, the next vital step is ‘Applying Mortar’. This section will provide a detailed insight into the correct technique of applying mortar, which plays a crucial role in securing the blocks and ensuring a strong and sturdy wall.
Firstly, you will need to prepare the mortar mix. Typically, this is a blend of sand, cement, and water. Follow the instructions on your bag of mortar mix to get the right consistency, which should be similar to peanut butter. Ensure that the mix is not too dry or too wet for effective application.
Before applying the mortar, it’s vital that both the surface of the block and your trowel are damp (not soaking wet) to ensure good adhesion. Start by scooping up some mortar on one side of your trowel, sweep it onto the block in a thick layer, typically around 1 inch thick. When you’ve applied it evenly across the surface of one block, you can proceed with stacking another block on top.
The key here is to apply just enough pressure to slightly compress the mortar without squeezing it all out from between the blocks. This might take a bit of practice but you’ll get the hang of it soon enough. Next, using your trowel edge, scrape off any excess mortar that may have squeezed out from the sides. It’s important to do this while the mortar is still wet as it’s much harder to remove when it dries.
When creating a corner or ending a wall, apply an extra amount of mortar to form a ‘mortar joint’. This joint acts like a sealant preventing any moisture from getting into your wall and causing damage over time.
You might also want to use a jointer tool once the mortar starts drying (but isn’t fully dry) to smoothen out the mortar joints. This gives your block wall a more professional and finished appearance. It’s worth keeping in mind that the drying time can vary depending on the type of mortar, temperature, humidity, and other factors.
Remember, how well you apply the mortar will directly impact the durability and strength of your block wall. Be patient, take your time, and don’t rush the process. With a bit of practice and precision, you’ll be able to master this step in making a block wall.
Making mistakes is part of learning. If you do mess up a bit, simply scrape off the mortar and start again. The most important thing is to keep trying until you get it right.
Stacking Additional Rows
Once you’ve mastered laying the foundation blocks, the next step in ‘How to make a block wall’ is to start stacking additional rows. By employing the basic principles of construction, you can build a sturdy and long-lasting wall. The process might require a little patience and precision, but it’s pretty straightforward once you get the hang of it.
To start stacking additional rows, begin by applying a layer of mortar on the top surface of your first row of blocks. Spread the mortar evenly using a trowel and ensure that it covers the entire surface. This will act as an adhesive to hold and bond the next row of blocks securely.
Next, place the first block of the new row carefully on top of the existing one. It’s essential to align it perfectly with the block underneath, as misalignment can tamper with the overall stability and appearance of your block wall. Use a level to check that your blocks are even both horizontally and vertically.
The corner blocks are particularly important because they set the line for each course or layer. Therefore, ensure that these are square and level, setting a good foundation for the rest of your wall. By using a builder’s line or chalk line, you can keep your wall straight. Simply fasten one end at one corner, stretch out the line tautly, and fix it at the second corner point.
One key tip when thinking about how to make a block wall is to stagger the joints. This means that each block in every second row should sit precisely above and below the half-point of two blocks in other rows. Staggering gives your wall added strength and prevents weak points which could lead to structural problems in future.
You will need to add more mortar every few rows, keeping an eye on the vertical joints to ensure they remain sealed. If you notice any gaps, you can apply more mortar to fill them. This will not only stabilize your wall but also make it water-resistant.
Finally, remember to clean as you go. Remove excess mortar before it dries out to prevent a messy finish. Use a soft brush to sweep away the debris, giving your block wall a neat and professional look.
In conclusion, stacking additional rows is all about patience, precision, and adhering to good construction practices. Observe these steps diligently, and you’ll have a solid and visually appealing block wall in no time.
Finishing the Block Wall
Once you’ve laid several courses of blocks and ensured that they are level, it’s time to tackle the final step in learning how to make a block wall: finishing the block wall. This process involves capping the wall, filling the cores with mortar or concrete for additional stability, and applying a finish that complements the aesthetics of your overall design.
Begin by placing cap blocks on top of the last course of your wall. These cap blocks should be made from the same material as your block wall to provide a uniform look. Use a trowel to spread a bed of mortar on the top course of blocks and then carefully place each cap block into position. Make sure that each cap block is level and aligned with the course below.
Next, you’ll want to fill the cores of your block wall. Filling every other core with rebar and concrete will greatly enhance the strength and integrity of your wall. Start by inserting pieces of rebar into each alternate core, cutting them so that they are flush with the top of your cap blocks. Then, mix up enough concrete to fill these cores. Pour the concrete into each core, making sure it surrounds the rebar and reaches the very bottom. Once filled, smooth out the top of the concrete with a trowel.
Finally, decide what type of finish you want for your block wall. This could be as simple as applying a coat of paint or as complex as adding stucco or a decorative stone veneer. Regardless of what you choose, make sure it complements your home’s exterior and is appropriate for your climate conditions.
Learning how to make a block wall may seem like a daunting task at first glance but with careful planning, attention to detail, and patience, you can build a beautiful and durable structure that will serve its purpose for many years to come. The finishing process is the icing on the cake, allowing you to put your personal touch on the project and truly make it your own.
Remember to always wear appropriate safety gear when working with concrete blocks and mortar, as these materials can be abrasive and potentially harmful if not handled properly. Building a block wall is a significant home improvement project that requires careful planning and attention to detail. But with patience and dedication, you can create a robust and attractive structure that enhances the value and appeal of your property.
Curing the Wall
Once you’ve constructed your block wall, the next step in the process of ‘how to make a block wall’ is the curing of the wall. Curing is essentially a process that ensures that your block wall dries properly and gains strength over time. This process is crucial, as inadequate curing can lead to weak walls thereby compromising the structural integrity of your project.
The curing process starts immediately after you have finished laying your blocks. It involves maintaining adequate moisture and temperature conditions to ensure that hydration, which is necessary for the hardening of cement, continues effectively. Proper curing can prevent cracking and increase the durability of your block wall.
To start with, it is important to understand that curing doesn’t mean letting your wall dry out. Rather, it requires maintaining sufficient moisture on the surface of the blocks for a significant period of time. This can be achieved by various methods such as misting, covering with wet burlap or using certain chemical curing compounds easily available in hardware stores.
Misting is perhaps one of the easiest methods to cure block walls. This involves spraying a fine mist of water on the walls several times a day for at least 7 days. Be careful not to flood or soak the wall – a light misting will do just fine. This method helps keep the blocks moist thereby allowing the cement in them to harden properly.
If you reside in an area with high temperatures or strong winds that can cause fast evaporation, then covering your wall with wet burlap or canvas after spraying water could be beneficial. These materials not only retain moisture but also help in maintaining a cooler temperature, which aids in proper curing.
Using chemical curing compounds is another effective way of retaining moisture during curing. These are special chemicals that form a thin layer on the surface of blocks when sprayed on them and reduce evaporation from their surface. They come in both water-based and solvent-based forms and are extremely easy to apply.
Remember, curing is not an optional step, it’s a must-do. Spending time on proper curing can make your block wall stronger and more durable. The patience you put into this step will pay off in the form of a sturdy and long-lasting block wall!
Tips for a Durable Block Wall
Creating a lasting, sturdy block wall requires careful planning and execution. Here are several key tips to ensure your block wall endures the test of time.
1. Choose Quality Materials: To make sure your block wall lasts, you should invest in high-quality materials. Remember, the sturdiness of your wall ultimately depends on the strength of the blocks and mortar you use. Therefore, ensure you purchase from reputable suppliers and check the quality before making a purchase.
2. Proper Foundation: Just like any other structure, a block wall needs a solid base to stand on. Excavate and level the ground before laying your first row of blocks. This helps in ensuring that the block wall is levelled and has a strong foundation to support its weight. Without a proper foundation, your wall may not stand up to stress or adverse weather conditions.
3. Adequate Drainage: Poor drainage can lead to moisture build-up which can weaken your block wall over time. Ensure you have effective drainage systems in place to avoid water logging that could damage your wall.
4. Regular Maintenance: Regular maintenance is critical if you want your block wall to last long. This includes checking for cracks or signs of wear and tear, cleaning out any debris that might accumulate, and repairing any damage as soon as it’s noticed.
5. Seek Professional Help If Needed: If you’re unsure about how to make a block wall that’s durable and sturdy, don’t hesitate to seek professional help. Experts can provide valuable advice and guidance throughout the process, helping ensure the longevity of your wall.
In conclusion, knowing ‘how to make a block wall’ is not enough, understanding how to make it durable is equally important. By adhering to these tips, you can construct a block wall that not only looks good but also stands strong for many years to come.
Conclusion
In conclusion, understanding ‘how to make a block wall’ is an invaluable skill for any DIY enthusiast or homeowner. With the right tools, proper safety measures, and precise measurements, you can turn a pile of blocks into a robust and visually appealing wall that not only enhances the aesthetic of your home but also serves a functional purpose.
A block wall can be used as an accent wall in your garden, a privacy fence, or even as a foundation for your house. Regardless of its purpose, the building process will be much more satisfying when you know you’ve created it with your own hands. Remember, patience and precision are key – it may take some time to complete, but the end result will surely be worth it.
While this guide has been comprehensive, it’s important to remember that block wall construction is a project that should not be undertaken lightly. It involves significant physical labor and requires a keen eye for detail. If you’re unsure about any steps or if you’re dealing with complex structures (like retaining walls), don’t hesitate to seek professional help. It’s better to invest in expert advice than to risk damaging your property or injuring yourself.
Finally, remember that practice makes perfect. Your first block wall might not be perfect, but don’t let that discourage you. Each project you undertake contributes to your skills and experience, making each subsequent project easier and better executed.
Now that you know ‘how to make a block wall’, why not plan out your next DIY project? Remember, the feeling of accomplishment when looking at your completed work is truly priceless!