Introduction
Welcome to our latest blog post on ‘How to make a concrete block retaining wall.’ A well-built retaining wall not only serves a functional purpose, but can also significantly enhance the aesthetic appeal of your outdoor space. Retaining walls are primarily used to combat soil erosion, but they also add an element of texture and structure to your landscaping. One of the most durable and long-lasting types of retaining walls can be made from concrete blocks.
Building a concrete block retaining wall might seem like a daunting task, but with the right tools, materials, and a bit of patience, it’s a project you can undertake yourself without having to hire professionals. This process not only provides satisfaction and self-accomplishment but also allows you to customize the wall to your preferred style and function. Whether you want to create a raised garden bed, secure a sloping landscape, or just add some visual interest to your yard, knowing how to make a concrete block retaining wall is a useful skill.
In this blog post, we will guide you step-by-step on how to erect your own concrete block retaining wall. We’ll discuss everything from planning your project and preparing the site to laying the blocks and securing them in place. We’ll also cover important considerations like ensuring proper drainage and applying the finishing touches for a professional-looking result.
No matter whether you are an experienced DIY enthusiast or a beginner looking to take on a new challenge, our comprehensive guide will equip you with the knowledge and confidence you need to successfully build your own concrete block retaining wall.
So why wait? Let’s dive in and start learning about ‘How to make a concrete block retaining wall’.
Materials Needed
Building your own concrete block retaining wall can be a rewarding project, and with the right tools and materials, it’s definitely within reach. Before we begin to discuss ‘How to make a concrete block retaining wall’, let’s first outline the necessary materials you’ll need to accomplish this task.
Concrete Blocks: These are the primary material for your retaining wall. The size and type of block will depend on the scale of your project. Choose a standard concrete block (which is commonly 16 inches long, 8 inches high and 8 inches wide) for a modest, residential-grade wall. However, if you’re creating a larger or commercial-grade wall, you might need bigger blocks or interlocking blocks for added strength.
Mortar Mix: This is used to secure the blocks together and keep them in place. Consider using a type S mortar mix, which is known for its durability and strong bonding capabilities which makes it perfect for outdoor applications.
Rebar and Gravel: The rebar will provide additional stability to your wall structure while backfilling with gravel will ensure proper drainage and prevent damage from soil pressure.
Landscape Fabric and Drainage Pipe: These items are critical in maintaining the longevity of your wall by preventing soil from escaping through the blocks and ensuring water drains away from the wall.
Tools: You’ll also need a variety of tools such as a shovel for digging, a level to ensure your rows of blocks are straight, a trowel for applying mortar, safety glasses, a rubber mallet to position the blocks, and a wheelbarrow or other means to transport your materials. A power saw may be necessary if you need to cut any blocks to fit.
Safety Gear: Always remember to protect yourself while working on your project. Safety glasses, work gloves, and sturdy footwear are recommended when handling heavy materials and equipment.
Once you have gathered all these materials, the process of building a concrete block retaining wall can begin. This project requires some physical labor and a good amount of time, but with patience and precision, you’ll end up with a sturdy and functional wall that will serve its purpose for many years.
Now that you’re equipped with information about the materials needed, let’s move on to the steps on ‘How to make a concrete block retaining wall’ in the next section.
Safety Precautions
When learning how to make a concrete block retaining wall, safety should never be overlooked. One must always prioritize personal safety and the stability of the structure. It’s important to note that while making a concrete block retaining wall may seem like a straightforward task, there are potential risks involved if proper safety measures are not taken.
Firstly, always wear appropriate personal protective equipment (PPE). This includes sturdy work gloves to protect your hands from abrasions and cuts, safety goggles to shield your eyes from flying debris and dust, steel-toed boots to protect your feet from falling objects, and a hard hat in case of larger projects where there’s a risk of head injury.
Also, consider the weight of the materials you will be working with. Concrete blocks can be heavy and can cause serious injury if they are not handled correctly. Always use correct lifting techniques: bend at your knees, not your waist, and do not attempt to lift more than you can handle. If possible, use equipment to help move these items or ask for assistance.
Additionally, ensure you work in an adequately ventilated area when mixing concrete. The process can generate dust that is harmful when inhaled. Always wear a dust mask or respirator for protection.
In terms of structural safety, it is crucial to properly plan out your retaining wall before starting construction. Consider factors such as the wall’s height, width, location, soil conditions and load it will retain. For larger retaining walls, it is recommended to consult with a professional engineer or contractor to ensure the wall’s stability and safety.
Lastly, remember to take regular breaks during the construction process as fatigue can lead to accidents. Stay hydrated especially when working under the sun.
In summary, knowing how to make a concrete block retaining wall involves more than just construction techniques and design. It’s equally important to prioritize safety – your own, others around you, and the durability of the wall you’re constructing.
Ground Preparation
One of the most crucial steps on ‘How to make a concrete block retaining wall’ is preparing the ground. An adequately prepared ground ensures that your retaining wall will be both sturdy and long-lasting. Neglecting this step can lead to a wall that is unstable and could potentially poses a risk rather than serving its intended function.
The first step in preparing the ground is choosing the right location. The retaining wall should be built in an area where it can provide optimal support for the soil it’s intended to hold back. After selecting a suitable location, mark out the area where you plan to build the wall. You can use wooden stakes and strings for marking.
Once you’ve marked out the area, the next step is excavation. You need to dig a trench that’s deep enough to accommodate the first course of concrete blocks, plus an additional 6 inches for gravel base. The width of the trench should be at least 1 foot wider than the size of the blocks. As an essential tip, always ensure that your trench is level. A spirit level can be indispensable for confirming this.
After digging, prepare a solid footing for your wall by adding gravel into your trench. The recommended type of gravel for a retaining wall base is typically ¾ inch processed gravel or ‘road base’ which contains various sizes of rock and dust particles that compact together better than pure gravel or sand. Next, compact it using a hand tamper or plate compactor (for larger projects). The gravel serves as a stable base for your concrete blocks to sit on.
Now that we have a compacted gravel base in our trench, it’s essential to ensure everything is level once more. Leveling at this stage—both lengthwise and widthwise—is vital for the overall stability of your retaining wall.
On top of your gravel base, you may choose to add a layer of landscape fabric. This material serves as a barrier which prevents soil from seeping through the blocks and helps in drainage. It’s not a compulsory addition, but it can enhance the lifespan and functionality of your retaining wall.
In sum, ground preparation is an essential aspect of how to make a concrete block retaining wall. It involves proper location selection, trenching, gravel base preparation, and careful leveling. Adequately prepping your ground can be the difference between a retaining wall that stands strong for years and one that crumbles under pressure.
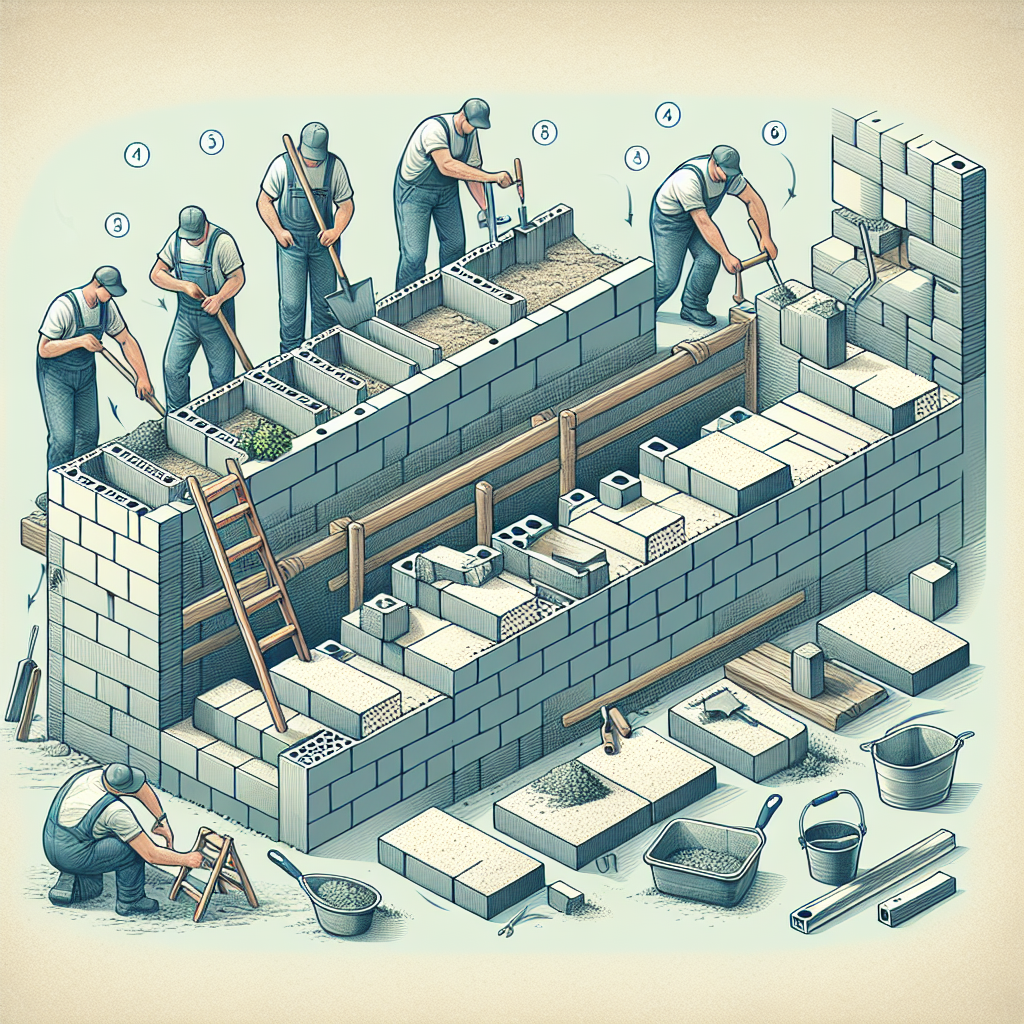
Laying the First Course of Concrete Blocks
Building a retaining wall begins with careful preparation and planning, but the actual fun begins when you start laying the first course of concrete blocks. In this section, we will guide you through the process of how to make a concrete block retaining wall by laying the first row of blocks correctly.
Before you start, ensure that your trench is level and compact, as this is crucial for the stability of your wall. The first course of blocks sets the tone for the rest of the wall – if they’re not level, the subsequent layers will not be either.
Once your footing is ready, start at one end of the trench. Position your first concrete block in the trench and use a level to check for plumb and levelness, making necessary adjustments with a rubber mallet. Fill the hollow cores and 12 inches behind the block with gravel. This assists with drainage and prevents water from building up behind the wall, which could cause damage over time.
Continue laying down your blocks end-to-end, checking their alignment with a string line to ensure they are straight. Check each block for levelness before moving on to the next one. It’s important to take your time in this stage and achieve precision; remember, this first course is your foundation for everything that comes next.
In some cases, depending on how you want your wall to look or function, you may need to cut a block. Use a masonry saw for precision cutting or a chisel if you prefer hand tools.
Once all blocks of the first course are laid and leveled correctly, fill any gaps between the blocks and backfill with soil or gravel. Compact it well before starting on your second row.
Learning how to make a concrete block retaining wall can be a bit challenging, but with patience and precision during the crucial first course laying process, you can set a solid foundation for a strong and sturdy retaining wall. Remember, every successful project starts with a well-laid base.
Installing the Drainage System
One of the crucial steps in learning how to make a concrete block retaining wall is the installation of the drainage system. The drainage system is significant because it prevents the build-up of hydrostatic pressure, which could pose a threat to the stability and durability of your retaining wall. Here’s a step by step guide on how you can incorporate the drainage system.
Firstly, you need to dig a trench along the length of the wall. This trench would be positioned at the base of your concrete block retaining wall and should be approximately 12 inches wide and 18 inches deep. This size should be adequate for most residential retaining walls, but for larger, more complex projects, it might be necessary to consult with an engineer.
After digging the trench, line it with a layer of landscaping fabric, extending it up the sides of the trench. This fabric acts as a barrier to prevent soil from clogging your drain pipes and diminishing their effectiveness over time. It’s important to ensure that this layer overlaps at its seams by at least 6 inches to avoid any potential gaps.
Next, fill the lined trench with about 3 inches of coarse gravel or crushed stone as a base. Then, lay perforated drain pipe along this gravel base, ensuring that it slopes away from your wall for proper drainage. The slope doesn’t have to be drastic; a 1% slope (which equates to roughly an inch of fall for every eight feet) will suffice.
With your pipe securely in place, cover it with additional gravel until you’re approximately three-quarters full in your trench. After this, fold over the excess landscape fabric on top of the gravel. This effectively creates a barrier that lets water filter through while keeping soil out of your gravel and drain pipe.
The final step in installing the drainage system when making a concrete block retaining wall is to backfill your trench with soil up to the original ground level. Remember to compact the backfill soil as you go, to prevent any future settling.
In conclusion, a well-installed drainage system is integral to the longevity and effectiveness of your concrete block retaining wall. While it may seem daunting at first, with a bit of patience and dedication, you can achieve this critical aspect of the project successfully.
Building Additional Courses
To understand how to make a concrete block retaining wall, it’s crucial to learn the process of building additional courses. Once you’ve completed your first course, the next step is the addition of successive layers or courses. This process is what builds the height of your concrete block retaining wall.
Before you start, ensure that the first course is perfectly level because it serves as the foundation for the entire wall. Any irregularities or imperfections on the first course will be magnified as you add more courses on top.
You begin each new course with a half block to ensure that the vertical seams are staggered between courses. This technique, known as ‘running bond’, adds strength to the construction and helps prevent cracking. To create a half block, simply measure and mark a standard block to half its length and then cut using a masonry saw.
With your half block ready, add a thin layer of mortar on top of the first-course blocks. The mortar should be spread evenly using a masonry trowel. Place your half block at the end of the wall and continue by adding full-size blocks along the course, ensuring each block is level before adding another one. Repeat this process until you reach the desired height of your wall.
It’s important to keep checking for level and plumb (vertical alignment) as you go. If a block isn’t level, tap it gently with a rubber mallet until it fits perfectly. To ensure proper alignment, use a level and string line across the tops of blocks regularly.
Remember to leave spaces for drainage every few feet in lower courses if your retaining wall is holding back soil. You can create these spaces by leaving out mortar in certain areas, or by including specific drainage blocks onto these courses.
In learning how to make a concrete block retaining wall, patience is key. Each course needs to be allowed sufficient time to cure before proceeding with the next one. This waiting period prevents the weight of the additional courses from pushing down and deforming the lower courses while the mortar is still wet. The curing time may vary based on the type of mortar used, but a safe bet would be to wait for 24 hours between courses.
By following these guidelines, you can successfully build additional courses for your concrete block retaining wall. This will not only ensure the durability and longevity of your wall but also add an aesthetic appeal to your property.
Applying the Finishing Touches
Once you have constructed the foundation and assembled the blocks of your concrete retaining wall, the next step in ‘How to make a concrete block retaining wall’ is to apply the finishing touches to your project. These final steps are crucial as they give your wall its final appearance and provide additional stability.
The first thing to be done in this phase is to fill in any gaps between the blocks. Gaps can weaken the structure over time, allowing water and soil to seep in. Therefore, it is essential to fill them with concrete or mortar. Once filled, smooth out the surface using a trowel. This will not only strengthen your wall but will also provide a neat and finished look.
After filling the gaps, you will need to cap the top of your wall for a finished look. Retaining wall caps are specialized bricks that create a smooth, flat top for your wall. They can be attached using a strong construction adhesive. Ensure that you align them properly as misaligned caps can spoil the aesthetic look of your wall.
In addition to these functional enhancements, aesthetic upgrades can also be made to your concrete block retaining wall. You could consider painting or staining the blocks to match the surrounding landscape or architectural style of your home. Waterproof sealants can also be applied to provide extra protection from weathering and erosion.
Lastly, ensure that you clean up any excess mortar or concrete from the front of your blocks before it dries completely. It may seem like an insignificant detail, but it makes a huge difference in providing a professional finish.
Applying these finishing touches might seem tedious, but they are essential for the long-term durability and aesthetics of your concrete block retaining wall. Without such attention to detail, you risk having a wall that looks unfinished or is structurally weak. So take this final step seriously in your project of ‘How to make a concrete block retaining wall’ as it truly perfects and completes your construction.
Even though these steps seem simple, they require careful execution. By following them diligently, you will surely have a concrete block retaining wall that is not only robust and functional but also visually pleasing.
Maintenance Tips
Once you have successfully learned how to make a concrete block retaining wall, it’s important to understand how to maintain it properly to ensure that it lasts for as long as possible. Here are some maintenance tips that you should take into consideration.
1. Regular Inspection: The key to maintaining your retaining wall is regular inspection. This doesn’t have to be a complex or time-consuming task. Simply walk around the structure and look for any noticeable cracks, shifts in the blocks, or areas of efflorescence (white, chalky residue). These could be signs of potential issues that need to be addressed immediately.
2. Drainage: It’s also important to check the wall’s drainage system periodically. Retaining walls are built with weep holes and drainage pipes to prevent water build-up behind the structure, which can cause significant pressure and eventually lead to failure. Ensure these systems are not blocked and are working adequately so standing water doesn’t become an issue.
3. Cleaning: Over time, dirt and grime can accumulate on the surface of your concrete block retaining wall, making it less attractive. A simple washing with a power washer can restore its clean appearance. However, make sure you use a gentle setting on the power washer so that you don’t damage the concrete blocks or dislodge the mortar between them.
4. Weed Control: Plants and weeds can grow in and around your retaining wall, their roots potentially causing damage over time. Regularly remove any visible vegetation growing out of the wall, and consider using a weed killer to prevent growth in the future.
5.Repairs: If during your inspection you identify any cracks or movement in your blocks, these may need to be repaired promptly. Small cracks can often be filled with a suitable masonry caulk, while larger areas of damage may need to be replaced. If the issues are significant or you’re not confident in handling them yourself, it may be worth obtaining professional advice.
In conclusion, with the right care and maintenance, your concrete block retaining wall can remain strong and reliable for many years. Remember that preventive measures are always easier and more cost-effective than dealing with serious problems after they occur. So keep an eye on your wall, address small issues promptly, and enjoy the benefits it brings to your property.
Conclusion
In conclusion, learning how to make a concrete block retaining wall is not as daunting as it may seem. With the right materials, a good plan, and some elbow grease, you can create a functional and attractive structure that will last for years. Despite the physical exertion involved, constructing your own retaining wall can be an empowering experience that gives you a sense of accomplishment.
The process of making a concrete block retaining wall entails a number of steps such as preparing the ground, determining the wall layout, digging the trench, applying the foundation, assembling the blocks, and backfilling the wall. Each step requires attention to detail and precision to ensure the security and durability of the wall. It’s also essential to pay attention to safety precautions during construction.
Remember that this project might take several days or even weeks to complete depending on your pace and the size of your wall. Therefore, patience is key. You need to allow enough time for each layer to set before proceeding with the next one. This will help ensure that your concrete block retaining wall is as sturdy and durable as it can be.
If you encounter any struggles or uncertainties while constructing your concrete block retaining wall, don’t hesitate to seek professional advice or assistance. There are numerous resources available online or at your local hardware store that can provide guidance. After all, this project is not only about enhancing your landscape but also about ensuring safety and stability for years to come.
Ultimately, knowing how to make a concrete block retaining wall gives you a practical skill that can significantly enhance your home’s outdoor space. It’s an investment of time and effort that pays off in terms of both aesthetics and functionality. So why wait? Gather your tools, roll up your sleeves, and start building!