Introduction
Whether you’re a seasoned DIY enthusiast or an aspiring home-improvement novice, the concept of constructing your own driveway can seem like a daunting task. But fear not, because our guide on ‘How to make a gravel driveway’ is here to break down this seemingly complex project into manageable step-by-step instructions. With a little bit of planning, some hard work, and a splash of creativity, you’ll be able to create a functional, durable, and attractive driveway that perfectly complements your property.
Gravel driveways are an increasingly popular choice among homeowners and it’s easy to see why. Not only do they look great, providing a rustic charm to any landscape, but they are also cost-effective and relatively easy to install compared to other types of driveways. Furthermore, gravel driveways require minimal maintenance and are environmentally friendly as they allow for rainwater absorption. However, like any home improvement project, creating the perfect gravel driveway requires some knowledge and understanding of what goes into its construction.
Our ‘How to make a gravel driveway’ guide will walk you through exactly what materials you need, how to properly prepare the ground, how to lay the gravel in the most efficient and effective manner possible and how to maintain your new driveway once it’s installed. Regardless of whether your motivation is financial savings or the satisfaction of completing the job yourself, this guide will provide you with all the information necessary to confidently embark on this rewarding project.
We will discuss everything from the benefits and drawbacks of different types of gravel to tips on preventing weeds and maintaining your new driveway in pristine condition. So whether you’re looking for practical advice on installation or just want some design inspiration for your new driveway, we’ve got you covered.
So strap on your work boots, grab your tools and let’s delve into the world of gravel driveways. By following our guide on ‘How to make a gravel driveway’, you’ll be equipped with the knowledge and confidence to create an attractive and functional driveway that adds value to your property. You might even find the process more enjoyable than you anticipated!
Choosing the Right Location
When pondering ‘How to make a gravel driveway’, the first step is choosing the right location. The location of your driveway isn’t just about where you’d like it to be; there are several factors you need to consider before making your decision. For instance, is the location accessible? Will it become a nuisance during harsh weather conditions? Is it convenient for parking and maneuvering vehicles? These are some of the key questions to ask yourself when finding the right spot for your gravel driveway.
The terrain of your proposed driveway location is of utmost importance. Gravel driveways work best on flat or gently sloping areas. If you’re considering a spot with a steep slope, you might have issues with erosion, which could lead to excessive gravel loss and an unsteady surface over time. Also, remember that water runoff needs to be directed away from buildings and neighboring properties, so observe how water flows in potential locations during rainy conditions.
Certain local laws could also influence your choice of location. Before picking a spot for your driveway, check with your local municipality or homeowners’ association to understand any restrictions or required permits. There might be zoning laws dictating how close driveways can be to property lines, buildings, and public roads. Breaking these rules can result in fines or even removal of the driveway.
Another crucial aspect is the size and type of vehicles that will use the driveway. If you expect larger vehicles like trucks or RVs, consider making a wider and stronger gravel driveway. Plus, if children will play on or near the driveway, pick a safer place away from busy roads.
Lastly, think long-term when choosing a location for your new gravel driveway. Consider how this decision will impact future landscaping projects that could add value to your property. You might want to align it with trees or a specific part of your house for aesthetic purposes.
In conclusion, understanding how to make a gravel driveway involves more than just knowing the materials and construction steps involved. The right location plays a significant role in ensuring the functionality, durability, and aesthetics of your gravel driveway. So, take the time to analyze all these factors to ensure you’re choosing the best spot for your investment.
Gathering Necessary Materials
As the adage goes, ‘Well begun is half done.’ The same applies when thinking about how to make a gravel driveway. One of the most crucial steps is to ensure that you have gathered all the necessary materials before starting. This not only saves time and effort but also ensures a smooth and seamless process without any unnecessary interruptions.
Firstly, you will need a good quantity of gravel. The type of gravel you choose largely depends on your personal preference and budget. Crushed stone gravel is a popular choice due to its durability and rustic look. Pea gravel, with its rounded shape, is another option if you prefer something more decorative. You can talk to your local landscaping supply companies who can guide you on the amount needed based on the measurements of your driveway.
Next, you’ll need a weed barrier or landscape fabric. This plays a crucial role in preventing weeds from growing up through your driveway and pushing the gravel out of place. Make sure to get enough to cover the entire surface of your planned driveway.
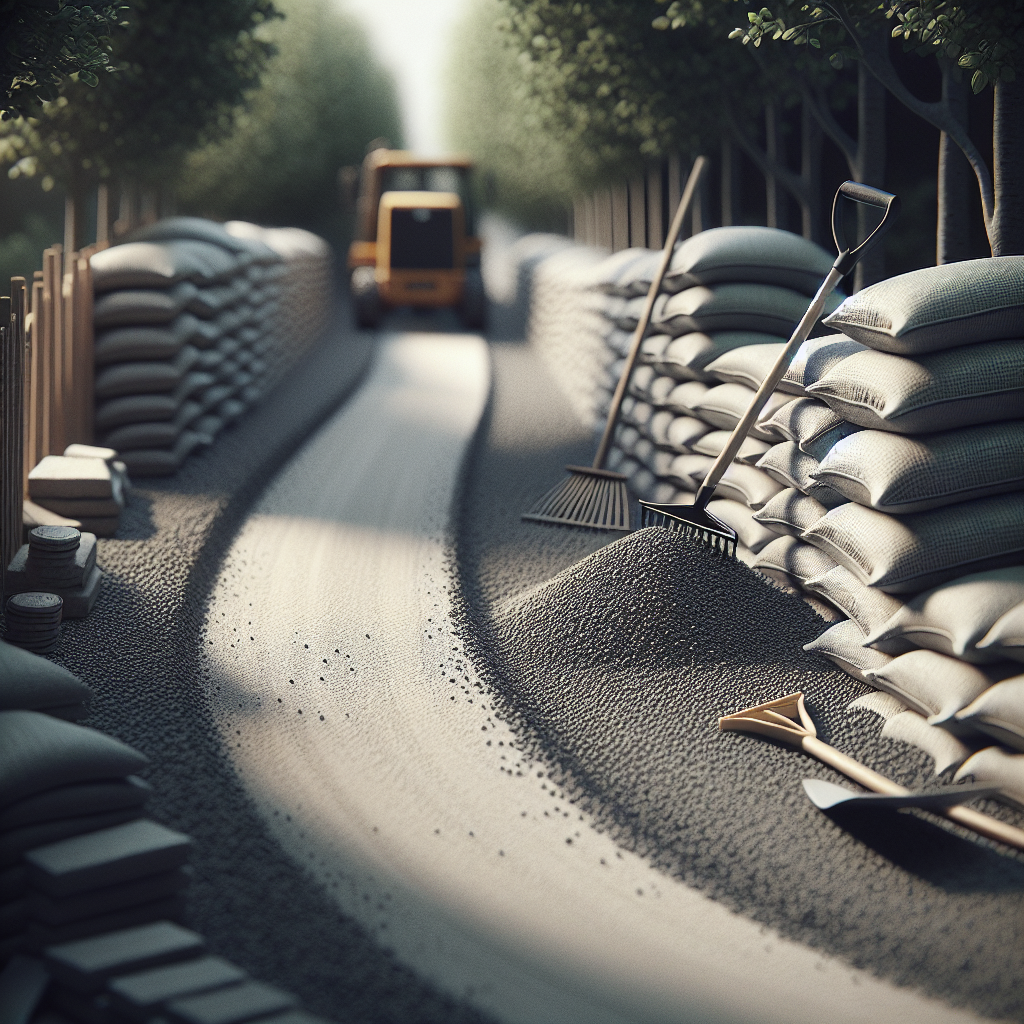
In addition, you’ll need a tool set that includes shovels, rakes, a wheelbarrow, and possibly a compacting machine if you’re dealing with a large area. These tools will be used for excavation purposes, spreading the gravel, and compacting it down into a solid layer.
Another essential material is edge restraint or driveway edging. This could be anything from wooden beams to steel or plastic edging. Its main purpose is to keep the gravel within the boundaries of your driveway and prevent it from spilling into your yard.
The last material that you will need is what’s known as “base” or “sub-base.” This typically consists of larger crushed stone or small-grade gravel which acts as a foundation for your driveway. It’s essential for drainage purposes and to provide a stable base for the finer top layer of gravel.
To conclude, understanding how to make a gravel driveway is not just about the process itself, but also about preparing and gathering all the necessary materials. This ensures that you are fully equipped to handle the task at hand and that the end result will be a well-execured, durable and aesthetically pleasing gravel driveway.
Calculating the Amount of Gravel Needed
When planning ‘how to make a gravel driveway’, it’s critical to accurately calculate the amount of gravel you’ll need. An accurate calculation prevents you from overspending on excess materials or falling short and needing to halt your project midway.
So, how do you estimate the quantity of gravel required? The amount of gravel needed depends on two key factors: the size of your driveway and the desired thickness of the gravel layer.
To start, you will need to measure the length, width, and depth (in feet) of your driveway. If your driveway isn’t a perfect rectangle, try dividing it into sections and then measure each section separately. This will provide more accurate dimensions.
The depth is usually determined by the size of the gravel pieces. For instance, if you’re using 3/4-inch gravel, you’ll want your driveway to be at least 3 inches deep.
Once you have these measurements, multiply them together (Length x Width x Depth) to get a total in cubic feet. This gives you a volume measurement which is how bulk gravel is sold.
However, keep in mind that this measurement alone may not be sufficient as it doesn’t take into account packing down and settling of the gravel over time. To account for this, it’s recommended to add about 25% more to your calculated volume.
Now that you have a rough idea of how much gravel you’ll need in cubic feet, converting that number into tons will make it easier for purchasing since gravel often is sold by the ton. A general rule of thumb is that 1 cubic yard of gravel is equal to about 1.13 tons. So divide your result in cubic feet by 27 (since there are 27 cubic feet in a cubic yard) and then multiply by 1.13 to get the amount of gravel you need in tons.
For example, if your driveway is 10 feet long, 10 feet wide, and you want a depth of three inches, your volume would be 25 cubic feet (10x10x0.25). Add an extra 25% for packing, giving you 31.25 cubic feet. Convert that into tons, and you’ll need approximately 1.3 tons of gravel.
There are also online tools and calculators that can assist you in determining the exact amount of gravel needed for your driveway project. Always remember to check with your local supplier as they may have specific recommendations based on the type of gravel you’re using or local environmental conditions.
In conclusion, knowing how to calculate the amount of gravel needed is a crucial step in the process of how to make a gravel driveway that is functional, durable, and aesthetically pleasing.
Preparing the Driveway Foundation
Knowing ‘how to make a gravel driveway’ begins with understanding the importance of preparing a solid foundation. The foundation is what provides support for the gravel and ensures that your driveway will be firm, durable, and drain properly. Without a good foundation, your driveway could be prone to sinking, developing potholes, or becoming uneven over time.
The first step in preparing the driveway foundation is to clear the area. Remove any grass, plants, or obstacles that could interfere with the construction of your driveway. Once the area is cleared, you will need to excavate it. The depth needed for excavation depends on your specific situation but generally speaking, you should plan on removing about 12 inches of soil. This will provide enough space for the layers of material that make up your driveway foundation.
Next, you need to install a layer of geotextile fabric over your excavated area. This fabric serves as a barrier that allows water to drain away while preventing the soil underneath from mixing with the gravel above. Not every project requires this step, but using geotextile fabric can significantly increase the lifespan of your driveway and save you from future maintenance issues.
After installing the geotextile fabric, it’s time to add your sub-base layer. This layer consists of larger stones or crushed rock and should be about 4-6 inches deep. The purpose of this layer is to provide additional stability for your driveway and create a solid base for the smaller gravel that will go on top.
Once you’ve laid down your sub-base layer, compact it using a mechanical plate compactor or other similar tool. Compacting this layer ensures that it’s firm and able to support the weight of vehicles without shifting or settling. It’s essential not to skip this step as an uncompacted sub-base can lead to an unstable driveway.
Lastly, you’ll need to add the final base layer which consists of smaller stones or crushed gravel. This should be about another 4-6 inches deep. Compact this layer just as you did with the sub-base layer.
Preparing a solid driveway foundation may seem like a lot of work, but it’s crucial for creating a gravel driveway that’s sturdy, durable, and long-lasting. Once your foundation is prepared, you’re ready to move on to the next step in ‘how to make a gravel driveway’: adding the top layer of gravel.
Laying the Gravel
Now that you have a clear understanding of the prerequisites, let’s delve into the main part of the process – Laying the Gravel. The success of your project, ‘How to make a gravel driveway’, largely depends on this crucial stage.
Once your driveway’s foundation is set, it’s time to pour in the gravel. The type of gravel used can significantly impact the driveway’s longevity and appearance, so make sure you choose wisely. Crushed stone and quarry process are popular choices for their durability and look. Remember, the size of the gravel should be around 1/2 inch to 2 inches in diameter to ensure proper drainage.
Begin with a layer of large stones for a solid base. Do not skimp on this step; it’s essential for preventing gravel loss into the soil below. This layer should be approximately 4-6 inches deep.
Next, spread another 4-inch layer of smaller gravel over the larger stones to form an even surface and fill any spaces. This is also known as ‘middle grade’ grout. Use a rake to level off this layer and ensure an even spread.
Finally, add a top layer of small sized gravel (about ½ inch) or finer crushed stone. This last layer gives your driveway a neat, finished look while also enhancing its durability. Again aim for about a 4-inch depth and rake it out smoothly.
As you lay each layer, remember to compact it before adding the next one. This can be done using a mechanical plate compactor or roller. Compaction is vital as it ensures each layer interlocks effectively to form a firm surface that can withstand the weight of vehicles.
It’s also worth noting that grading (creating a slight slope) your driveway away from your home can prevent water accumulation and potential damage. A 2% gradient, which means a 2-foot vertical drop for every 100 feet of driveway, is typically recommended.
With these steps correctly followed, the process of laying the gravel in your driveway will be a success. However, remember that over time, you may need to add more gravel to your driveway to maintain its looks and functionality. Regular maintenance is key to preserving the longevity of your gravel driveway.
So now you know how to make a gravel driveway! It’s an involved process but one that’s definitely worth it for the strong, durable and aesthetically pleasing result.
Maintaining Your Gravel Driveway
Once you’ve mastered how to make a gravel driveway, it’s important that you also understand how to maintain it properly. Here are some valuable tips on maintaining your gravel driveway to keep it looking sharp and functional for years to come.
Firstly, regular raking is crucial. Over time, car tires and weather conditions can cause the gravel in your driveway to shift and become uneven. Using a wide rake, make sure you redistribute the gravel regularly. This not only ensures an even surface making for smoother transitions for your vehicle but also allows you to spot any inconsistencies or problem areas early on.
Another integral part of gravel driveway maintenance is topping up. Depending on the traffic, your driveway might start showing signs of wear and tear faster than expected. This usually results in shallow spots or potholes developing on the surface. In such cases, adding a layer of fresh gravel helps to revitalize the driveway while filling in these spots. However, remember not to add too much at once as this can result in an uneven surface, making your driveway difficult to navigate.
Weeds and grass can quickly invade your gravel driveway if left unattended. This not only ruins the aesthetic appeal but can also cause damage over time. Regular use of a weed killer will help keep unwanted vegetation at bay. Alternatively, a more natural approach would be pulling them out by hand or using a propane torch (only if it’s safe!).
The edges of your driveway should also be part of your maintenance routine. Keep them clean and clearly defined to prevent gravel from spilling over into your yard. A shovel can be used to move stray pieces back onto the driveway.
Lastly, proper drainage is key in maintaining a durable gravel driveway. Without it, water may accumulate causing erosion and painful potholes over time. Ensuring that your driveway has a slight crown and angled sides for water runoff will prevent these issues.
Maintaining your gravel driveway does require some effort, but it is well worth the time. Regular attention will keep it looking pristine and functioning flawlessly, ensuring that it serves you faithfully for many years to come.
Troubleshooting Common Problems
Understanding ‘How to make a gravel driveway’ is just the first step. Once your driveway is installed, it’s important to know how to troubleshoot some of the common problems that can arise. Here are a few issues you may encounter and some tips on how to fix them.
Ruts and Potholes
Ruts and potholes can be a frequent problem with gravel driveways. These are usually caused by erosion due to water flow or vehicles driving over the surface constantly at the same spot. To repair this, start by removing any loose gravel in the rut or pothole, then fill it with fresh gravel until it is level with the rest of the driveway. Compact the fresh gravel using a tamper until it’s firmly in place.
Gravel Displacement
Over time, you may notice that the gravel is being displaced from your driveway, often due to tire motion or water runoff. This can create bare patches on your driveway. To address this problem, rake back the displaced stones back into place. If necessary, you may need to add more gravel to keep your driveway level and ensure that it has adequate drainage.
Weeds
Weeds growing through your gravel can not only be an eyesore but also cause dislodgement of stones over time. Regular use of weed killer can prevent this issue, but remember to choose an environmentally friendly one. For a non-chemical approach, consider using landscape fabric or plastic sheeting beneath your gravel layer as it can deter weeds from taking root.
Dust and Mud
A dry summer can turn your beautiful gravel driveway into a dust bowl, while rainy seasons might turn it into a mud pool. To combat dust, consider using a product like gravel binder, which can keep dust down by adhering your gravel together. For a muddy driveway, check your driveway’s drainage. If water is pooling, it may be necessary to install French drains or grading the driveway to direct water away from the surface.
Knowing ‘how to make a gravel driveway’ and being able to troubleshoot common problems can ensure that you maintain a beautiful and functional gravel driveway for years to come. Remember, regular maintenance is key to minimizing these issues.
Conclusion
In conclusion, learning how to make a gravel driveway not only enhances your home’s curb appeal but also provides an economical and durable solution for your parking needs. Gravel driveways not only give an aesthetic touch to your residence but also offer a less expensive alternative to other driveway materials like concrete or asphalt. Even though the process may seem daunting at first glance, our step-by-step guide can simplify it, turning even a novice into a competent DIY enthusiast.
The key to building a great gravel driveway lies in the careful preparation of the driveway base and choosing the right type of gravel. Proper grading and good drainage are your best defense against maintenance issues like potholes and ruts. It’s also worth noting that while a gravel driveway requires some maintenance, such tasks are typically minimal compared to other options, especially if you did the initial work correctly. Regularly checking for any issues will ensure your gravel driveway stays in excellent condition for years to come.
One of the major advantages of creating a gravel driveway is the flexibility it offers. Whether you’re dealing with an irregular space or you want to bring a rustic charm to your property, gravel allows you the latitude to achieve these objectives. It’s also worth considering that gravel driveways are eco-friendly since they don’t involve any non-permeable materials that could lead to runoff problems.
As we wrap up this guide on how to make a gravel driveway, it’s important to always remember safety should be paramount during your project. Ensure you have secured all necessary permits before starting and always wear protective gear when handling heavy equipment or materials.
Ultimately, constructing your own gravel driveway can be a rewarding project that adds value and functionality to your property. And remember, the more effort and attention you put into the process, the more satisfying and long-lasting results you’ll get.