Introduction
Welcome to our comprehensive guide on ‘How to pour a concrete pad for a shed’. Building a shed is an excellent home improvement project that can increase your storage space and even add value to your home. However, before you can start constructing the walls and roof of your new shed, you need to lay a solid foundation. This is where pouring a concrete pad comes in.
This introductory article will provide you with the basics of pouring a concrete pad for a shed, setting you up for the more detailed steps that will come later. You may be wondering why it’s necessary to pour a concrete pad, or why you can’t simply build your shed on bare earth or grass. The short answer is durability and stability. A concrete pad provides a stable, level base for your shed that can withstand the elements and the weight of your stored items.
Without a proper foundation, your shed could tilt or sink over time due to ground movement, cause damage to your stored items, or even collapse completely. A well-poured concrete pad also prevents moisture from seeping up from the ground into your shed, protecting your belongings from damp and mold.
Understanding how to pour a concrete pad for a shed is not as daunting as it may seem. With the right tools, materials, and step-by-step guidance (which we’ll provide in this blog), it’s a job that most DIY enthusiasts can undertake. It does require some physical labor and precision, but the end result is gratifying and serves as an essential base for your dream shed!
So whether you’re planning on building a simple tool shed or an elaborate garden getaway, starting with a strong foundation is crucial. Ready to get started on learning ‘how to pour a concrete pad for a shed’? Keep reading, and we’ll guide you every step of the way.
Necessary Materials and Tools
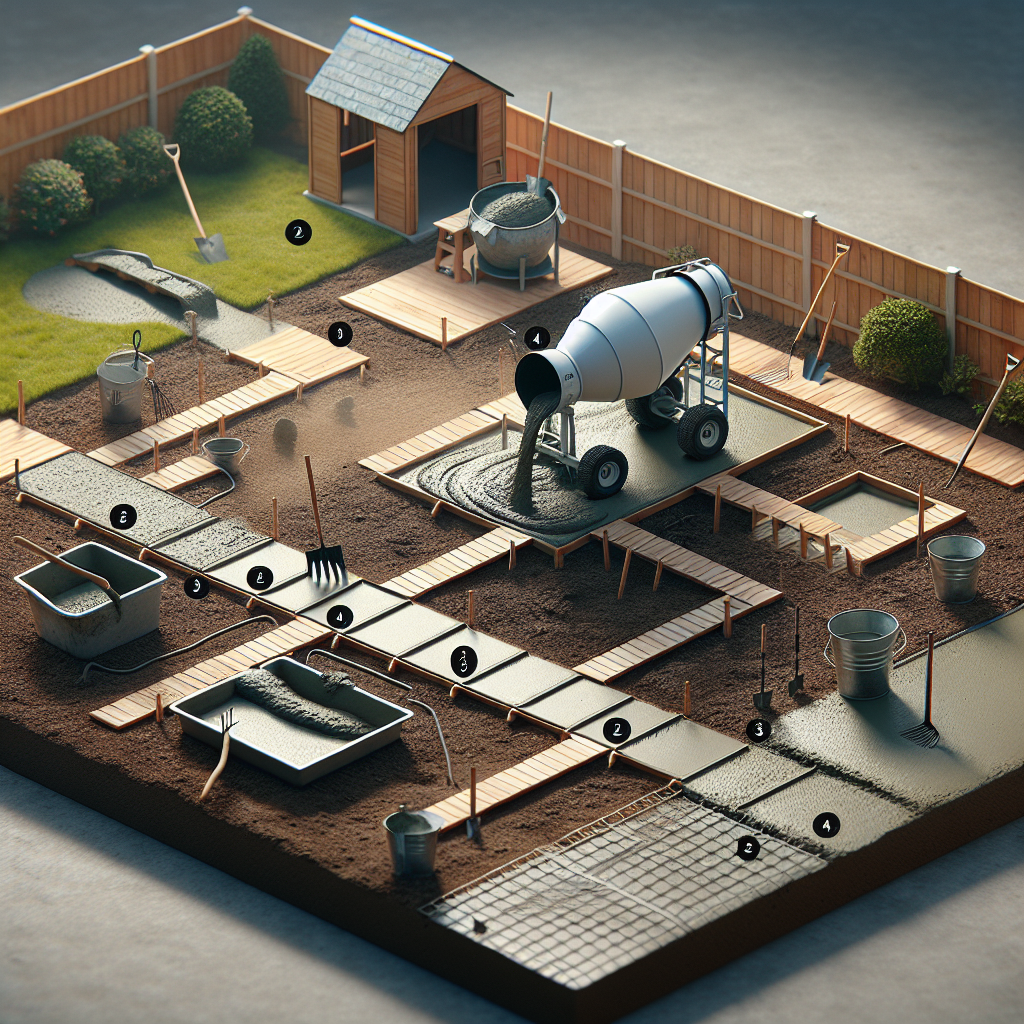
Before you begin the process of learning how to pour a concrete pad for a shed, it’s important to gather all the necessary materials and tools. Having everything at your disposal can make the process smoother and more efficient. Here’s what you’ll need:
Materials
- Concrete: The backbone of your shed pad, concrete is essential. You’ll need enough concrete mix to fill your shed’s dimensions. The quantity will vary depending on the size of the pad, so use an online concrete calculator to determine the exact amount.
- Gravel: A layer of gravel under your concrete pad helps in drainage and prevents frost heave, which can crack or displace the concrete.
- Rebar or Wire Mesh: Either rebar or wire mesh is used to reinforce the concrete pad, making it stronger and less prone to cracking.
- Wooden Boards: These are used to create a formwork for the concrete, holding it in place until it sets.
- Concrete Sealer: This is applied after the concrete has cured to protect it from moisture damage.
Tools
- Shovel: You’ll need this for digging out the area where you’ll pour your concrete pad. A flat-blade shovel works best for this task.
- Tape Measure and Level: These are vital for ensuring your formwork is accurately sized and level. An uneven pad can lead to instability in your shed.
- Carpenter’s Square: This tool helps ensure the corners of your formwork are square, resulting in a uniform and professional-looking shed pad.
- Wheelbarrow and Hoe: These are used for mixing your concrete. Alternatively, you can rent a concrete mixer for larger jobs.
- Trowel or Screed: After pouring the concrete, you’ll use a trowel or screed to smooth the surface and remove any excess.
- Concrete Float: This tool is used after screeding to further smooth the concrete surface.
Remember, safety should be your first priority when working with these materials and tools. Always wear protective gear such as gloves, eye protection, and sturdy footwear. With everything in place, you’re now ready to learn how to pour a concrete pad for a shed.
Site Selection and Preparation
Choosing the right site and preparing it adequately is a crucial first step in understanding ‘how to pour a concrete pad for a shed’. The area must be flat, stable, and away from any water bodies that could potentially flood. Keep a minimum of three feet around all sides of your shed for easy access and maintenance.
Once you’ve chosen your site, the preparation process begins. Start by removing any grass, plants, or debris from the area where you’ll be pouring your concrete pad. This should ideally go beyond just the surface; you should dig down to a depth of about 4 inches (or whatever depth is recommended for your specific shed). Make sure to set aside any topsoil you remove as this can be used later for landscaping around the finished shed.
After clearing the area, the next step is to level it out. You want to ensure your concrete pad will have a flat and even surface to rest on. Any uneven spots can cause instability in your shed or even lead to cracking in your concrete pad over time. Use a long level or a laser level to check for high and low spots across the whole area.
Compacting the soil is another important part of site preparation. Loose soil could settle over time under the weight of the concrete and shed, leading to an uneven base. Depending on the size of your project, you may be able to compact the soil using a hand tamper, but larger projects might require a plate compactor.
Next, consider whether your site has good drainage. Water pooling around your shed can cause damage over time, so it’s ideal if your site slightly slopes away from where your shed will be placed. If this isn’t naturally the case with your site, you’ll need to create a slope when you’re grading the area.
Finally, you’ll need to build a form for your concrete pad. This is a wooden frame that will hold the poured concrete in place while it dries. The form should be the exact size that you want your finished concrete pad to be. Use sturdy, straight boards and ensure they’re properly secured to prevent any movement when the concrete is poured.
Remember, site selection and preparation are as crucial as the actual process of pouring the concrete. Without an adequately-prepared site, even the best-mixed concrete can lead to an unsatisfactory result.
Forming the Concrete Pad
Forming the concrete pad is an essential step in the process of constructing a shed. By learning ‘How to pour a concrete pad for a shed’, you will be able to lay a strong foundation that will keep your shed firm and stable. It’s crucial to remember that correct measurements and careful pouring ensure the success of the whole project.
The first step in forming a concrete pad is to determine the right size and location for your shed. The pad should be slightly larger than the shed itself to prevent water from collecting around its base. After you’ve marked out the dimensions, you’ll need to excavate the area. Dig down about 6 inches and make sure the ground is flat and even.
Next, you’ll need to create a form using wooden boards that matches the dimensions of the pad. This form will keep your concrete contained while it’s drying and should be secured with wooden stakes driven into the ground at regular intervals. It’s crucial that your form is perfectly level; an uneven base will lead to an unstable shed.
Once your form is in place, lay down a layer of crushed stone. This provides a stable base for your concrete and helps with drainage. The layer should be around 4 inches thick, evenly spread, and tamped down firmly.
Before pouring the concrete, it’s recommended to install wire mesh or rebar for reinforcement. This step isn’t strictly necessary for smaller sheds, but if you’re building something larger or expect heavy loads, it can help prevent cracks in your finished pad.
The final step is pouring the concrete itself. You can either mix this yourself or order a ready-mix truck depending on the size of your project. Pour the concrete into the form, starting at one end and working your way across, ensuring it fills every corner. Use a straight piece of lumber to level off the top of the concrete, sliding it along the top edges of your form to create a smooth surface.
Remember that the concrete will need to cure for several days before you can build on it. Keep it damp during this time by spraying it lightly with water a few times a day. This will prevent the concrete from drying out too quickly and developing cracks.
By following these steps on ‘How to pour a concrete pad for a shed’, you’ll have a sturdy and reliable foundation for your new garden structure.
Mixing and Pouring the Concrete
Having prepared the ground and set up your forms, the next step on how to pour a concrete pad for a shed is indeed the fun part – mixing and pouring the concrete. This is where everything starts to take shape, literally, and it’s crucial that you follow the correct steps to ensure a solid and durable concrete pad.
Start by calculating the amount of concrete needed for your pad – this will depend on the dimensions of the shed. If you’re unsure about how much to order, it’s better to have more than less. A miscalculation could mean stopping mid-way through the process to get more materials, which can compromise the integrity of your pad.
When it comes to mixing your concrete, you can choose to mix by hand or use a cement mixer. For large shed pads, a cement mixer would save time and energy. If you decide to mix by hand, make sure you’re using a sturdy wheelbarrow and a hoe or shovel for stirring. Mix one part cement with two parts sand and four parts aggregate (gravel), then add water gradually until you reach a thick, pourable consistency.
Once your concrete is mixed, you’ll need to work quickly. Pour the concrete into the form starting at one corner and working your way across. Use a shovel or hoe to push it into all corners and edges of the form. In case of a large pad, have someone help you so that one person can pour while another spreads out the concrete evenly.
As you pour, keep in mind that concrete should be at least 4 inches thick all over your pad. To ensure this thickness is maintained throughout, place 2x4s or rebar across your forms at regular intervals. These will act as guides when you level off excess concrete with a screed board.
After pouring all the concrete, use a screed board to level it out. Drag the board across the top of your forms, removing excess concrete and smoothing out the surface. Following this, it’s time for the initial troweling to further smooth out your concrete pad. The final stage involves a process known as curing, which allows the concrete pad to harden and strengthens its structure.
Learning how to pour a concrete pad for a shed not only gives you the freedom to erect a shed wherever you want in your yard, but also equips you with skills that are applicable to other DIY home projects. Remember, safety is of utmost importance. Always wear protective gear such as gloves and safety glasses when working with concrete.
Finishing the Concrete Pad
After learning how to pour a concrete pad for a shed, you will need to understand how to finish it. This is an essential stage that contributes significantly to the durability, strength and overall appearance of your concrete pad.
The finishing process should commence immediately after you’ve poured and levelled the concrete. First, you’ll want to ‘screed’ the surface. This involves dragging a straight-edged tool across the top of the form boards to remove excess concrete and ensure everything is level. Use a back-and-forth sawing motion and consistently move along the form boards.
Once you have screeded the concrete, the next step involves ‘floating’. A bull float is used in this process. Move it over the concrete pad in sweeping arcs, maintaining consistent contact with the surface. Floating helps to smoothen the concrete and bring smaller particles and water to the surface for a better finish.
After floating, you must let the concrete set until all water has evaporated from the surface, and it’s hard enough to withstand your weight without leaving an impression. This can take several hours depending on weather conditions; patience is key.
Next comes edging, where you use an edging tool around the perimeter of your pad to create smooth, rounded edges. This not only enhances appearance but also prevents chipping at the edges.
The final stage of finishing requires a steel trowel. The troweling process further smoothens your pad and gives it a polished look. Start by holding the trowel at a slight angle and applying pressure as you sweep it across your pad. Be careful not to overwork the surface as this can cause cracking and other issues down the line.
Last but not least: curing. Once your concrete pad is finished, it needs to be kept moist for a curing period of around a week. This allows the concrete to achieve maximum strength and durability. Curing can be done by periodically spraying the pad with water or covering it with a curing compound.
By taking the time to properly finish your concrete pad after pouring, you ensure that your shed will have a solid, durable base for years to come. It might take a bit more effort, but it’s well worth it in the long run.
Curing the Concrete
Once you’ve completed the task of pouring the concrete, the next crucial step in learning ‘How to pour a concrete pad for a shed’ is curing the concrete. Curing is not just about letting the concrete dry. It’s a more comprehensive process that involves maintaining adequate moisture and temperature to allow the concrete to achieve maximum strength and durability. This is what gives your shed a strong and stable base.
The curing process begins as soon as you pour the concrete and finish it. You may think that once you have poured and smoothed out your concrete, you can forget about it and let nature do its work, but that’s not entirely true. In reality, if concrete dries out too quickly, it can weaken, crack, or even come apart. You want your shed’s concrete pad to be tough, last longer, and be able to withstand heavy loads and adverse weather conditions.
For effective curing, follow these steps:
- As soon as the bleed water has disappeared from the surface after finishing, apply a concrete curing compound to help slow down the rate of water evaporation. These compounds can be easily sprayed on with a hand sprayer. It forms a thin barrier preserving the moisture within the concrete.
- If weather conditions are very hot or windy, cover your slab with plastic sheets or wet burlap to keep it moist or reduce the rate of evaporation.
- In cold weather conditions, use insulating blankets or straw to keep temperatures from dropping too low.
The ideal curing period is generally considered to be about 28 days with water kept at an adequate level throughout this period. However, even after this period, keeping your concrete damp can still improve its durability.
Remember that curing is an important part of ‘How to pour a concrete pad for a shed’ process. It is as significant as getting the right mix or setting up an efficient formwork. A perfectly cured concrete pad means you’ve created a solid and long-lasting foundation for your shed.
So, ensure you invest adequate time and effort into this process. Your patience will be rewarded with a robust and enduring concrete pad that’s perfect for your shed!
Tips for a Successful Concrete Pad
Pouring a concrete pad for a shed can be a challenging task if you do not follow the proper procedures and guidelines. However, with the right knowledge and tools, it can be accomplished successfully. Here are some crucial tips on ‘how to pour a concrete pad for a shed’ that you should keep in mind:
1. Plan Properly: The first step towards a successful concrete pad is efficient planning. Determine the size and location of your shed, remembering to allow extra space for easy movement and future expansion. Remember to consider the local building codes and regulations.
2. Prepare the Site: Once you have planned correctly, the next step is site preparation. Clear the area of any vegetation and ensure that it’s level. You might need to hire equipment or professionals if your site is uneven or rocky.
3. Create a Strong Foundation: The durability of your concrete pad hugely depends on the quality of the foundation. Dig about 6 inches into the ground and fill it up with gravel for drainage purposes before pouring the concrete.
4. Make Use of Form Boards: Form boards help in shaping the concrete pad. Ensure they are straight and secure as they will guide your pour. They should be equal to the depth of your slab.
5. Mix Concrete Properly: Follow the instructions on your bag of pre-mixed concrete to ensure you use the correct water-to-concrete ratio as this will affect how easily it flows into your form boards.
6. Pour Wisely: Pouring should commence from one corner and gradually move towards the opposite end to avoid any formation of air pockets which can weaken your slab.
7. Level and Smooth: After pouring the concrete, use a screed to level it by moving it along the top of your form boards. A float can then be used to smooth out the concrete.
8. Cure the Concrete: For the concrete to gain strength and durability, it needs time to cure. This should take at least a week but could take longer depending on weather conditions.
In conclusion, pouring a concrete pad for a shed requires careful planning and execution. By following these tips, you ensure that your shed will have a solid and durable foundation that will serve its purpose for many years to come.
Conclusion
In conclusion, understanding ‘how to pour a concrete pad for a shed’ is an integral part of constructing a long-lasting, functional shed. This is not a simple process, and careful planning and execution can significantly impact the longevity and functionality of your shed. It involves site preparation, framing, mixing and pouring the concrete, and finally allowing it to cure properly.
Site preparation is crucial for the stability of the concrete pad. It involves clearing the area of rocks, roots, or debris that may interfere with the concrete pad’s stability. The frame needs to be built next. It should be level for a well-structured shed. The quality of the concrete mix also plays a vital role in achieving a strong and durable concrete pad. Ensure you follow the manufacturer’s instructions to achieve the right consistency.
The pouring process needs to be executed carefully to avoid forming air pockets that could weaken your concrete pad. Once poured, use a screed board to level off the top of the concrete, removing excess in the process. The final step is curing which entails maintaining adequate moisture levels for about a week. This last step is arguably one of the most important because if done incorrectly, it could lead to cracks and reduced durability.
Learning how to pour a concrete pad for a shed can save you money on hiring professionals and provide you with satisfaction from completing such a project by yourself. However, it’s important to remember that this task requires precision, time, and effort. If you’re not comfortable taking on this project on your own, do not hesitate to hire professionals who have experience in this area.
A correctly installed concrete pad can last for many years, providing a solid base for your shed. So whether you do it yourself or hire professionals, make sure it’s done correctly for optimal results.
Overall, pouring a concrete pad for your shed can be a rewarding project. With careful planning, the right materials, and diligent work, you can create a solid, long-lasting foundation for your shed. Remember, your shed is only as good as the base it’s built on, so give it the strong start it deserves by learning ‘how to pour a concrete pad for a shed’.