Introduction
Welcome to our detailed guide on ‘How to Pour a Concrete Step’. Whether you’re doing a bit of DIY at home, you’re a budding builder looking to expand your skills, or simply curious about the process, this blog post will take you through the steps (pun intended!) of pouring a concrete step. This practical task involves careful preparation, accurate measurement, and proper techniques to ensure safe and lasting results. Concrete steps can be an excellent addition to your home or garden, providing durable and weather-resistant access points.
In this guide, we will walk you through the entire process of creating a concrete step, from preparation to final touches. We’ll discuss what materials and tools you’ll need, how to prepare the area for pouring, how to mix and pour concrete, as well as tips on curing and finishing the step for professional results. Learning ‘how to pour a concrete step’ might seem daunting initially, but with the right information and guidance, it can be quite an enjoyable and rewarding project.
Concrete is a versatile material used extensively in construction due to its durability and strength. Whether it’s for a simple backdoor step or a grand entrance staircase, knowing how to work with concrete can open up many possibilities for enhancing your outdoor space. It’s important to stress that pouring concrete isn’t just about mixing cement, sand, and water; it’s an art that requires precision, patience and sound understanding of the material.
So whether you’re new to the world of DIY or are looking to add another feather in your cap as an experienced handyman/woman, read on. With this guide on ‘how to pour a concrete step’, we aim to make this task less intimidating and more accessible. And who knows? You might just discover a new passion for working with concrete.
Required Materials and Tools
In order to understand how to pour a concrete step, it is essential to first have the right tools and materials at hand. The following provides a comprehensive list of items needed to complete this task efficiently.
Materials:
- Ready-mix Concrete: This is the main material needed for your project. The amount depends on the size and number of steps you’re planning to build.
- Wooden Planks: These are used to create formworks, which are essentially molds where the concrete will be poured. Make sure you choose sturdy and straight planks.
- Rebar or Wire Mesh: This serves as reinforcement for your concrete step, providing additional strength and durability.
- Gravel: A layer of gravel is required beneath the concrete as part of the base.
- Water: Necessary for mixing with the ready-mix concrete.
Tools:
- Wheelbarrow or Concrete Mixer: You’ll need one of these to mix your concrete. A wheelbarrow can work for smaller projects, but a concrete mixer might be necessary for larger ones.
- Tape Measure: This is indispensable for accurate measurements, ensuring that your steps are evenly sized and positioned correctly.
- Square: A square tool helps in ensuring that corners and angles are precise.
- Saw: This tool is needed to cut the wooden planks to fit your formwork dimensions.
- Trowel: A trowel is used for smoothing and finishing the surface of the concrete.
- Shovel: It is used to place and spread out the gravel.
- Drill with screws or hammer with nails: This is to secure the wooden planks together, creating your formwork.
Now that you have all your required materials and tools at hand, understanding how to pour a concrete step will become significantly more straightforward. Remember, preparation is key when it comes to any construction project. This list not only ensures you have everything you need in order to avoid unnecessary interruptions but also contributes to a smoother and safer work process.
Preparing the Ground
When discussing ‘how to pour a concrete step,’ one of the most crucial stages is ‘Preparing the Ground’. It’s a significant part of the process that if done incorrectly may lead to unfortunate results like uneven steps or unwanted cracks. Hence, ensuring you prepare the ground correctly is fundamental to achieving a successful outcome.
Firstly, you need to define the area where your step will be poured. Use wooden stakes and builder’s line to delineate your desired layout. The width of your step should ideally be 4 feet, but it can be adjusted based on individual preferences and needs. Once the area is clearly marked, use a shovel for excavation. For standard concrete steps, the depth should be about 7 inches. This will provide enough space for about 4 inches of gravel base and 3 inches of concrete.
After digging into the needed depth, you then need to ensure that the ground is level. Use a bubble level tool or laser levels for accuracy. If there are high spots, dig them out, and if there are low spots, fill them with compacted soil. A well-leveled ground will not only contribute towards an even step but also provide an optimal base that promotes proper weight distribution.
The next crucial step in preparing the ground is laying a gravel base. Laying about four inches of gravel creates a stable base for the poured concrete. It also aids in drainage, preventing water from accumulating under your steps and causing damage over time.
It’s essential to compact the gravel thoroughly using a plate compactor or hand tamper. This prevents any future settling which could possibly create cracks in your concrete steps. Moreover, this compacted layer of gravel provides an ideal surface upon which the concrete will sit.
For additional stability and reinforcement, consider installing rebar – these steel bars are laid in a grid pattern on the excavated area. Rebar is especially recommended if you’re considering building large steps or a series of concrete steps. They will effectively distribute the weight and prevent cracking.
The final step in preparing the ground involves the installation of formwork. These are usually made from wooden boards that are arranged to create a mold in which the concrete will be poured. Ensure they are securely fastened together to resist the pressure exerted by the wet concrete.
In summary, understanding ‘how to pour a concrete step’ involves more than just mixing and pouring concrete. Proper ground preparation is key to achieving sturdy and long-lasting steps. So, always take your time during this initial stage to ensure your project’s success.
Building the Form
“`
In the process of learning how to pour a concrete step, one of the first and most crucial stages is building the form. Constructing the form lays the groundwork for your concrete steps, and it’s vital to get it right to ensure your steps are sturdy, functional, and visually appealing.
A form for concrete steps is essentially a mold that holds the concrete in place until it dries. These forms are usually made from wood, though they can also be constructed from other materials. The form defines the shape, size, and finish of your concrete step, so precision is key.
To begin building the form, you’ll first need to take accurate measurements. Measure the height, width, and depth of each step you plan on pouring. It’s often helpful to sketch out a rough plan on paper first, marking down all these dimensions. Remember that each step should be of equal size for safety and aesthetic purposes.
Once you have your measurements, cut out your form pieces from wood using a saw. You’ll need two side pieces for each step (which determine its width), a bottom piece (to shape its depth), and two or more riser pieces to shape the vertical part of each step. A key point to remember is that you must account for the thickness of the wood when measuring and cutting your pieces – neglecting this could result in steps that are smaller than intended.
After you’ve cut all your pieces out, assemble them into your desired step form using nails or screws. Make sure every connection is strong and secure to hold the weight of the poured concrete. Furthermore, seal any gaps with silicone caulk to prevent wet concrete from leaking out.
Finally, place your assembled form in its desired location taking into consideration not only where you want your steps but also where it will be easiest to mix and pour your concrete. Make sure the form is level; an uneven form will result in uneven steps. Once your form is securely and evenly placed, you’re ready to move onto the next stage: mixing and pouring the concrete.
Learning how to pour a concrete step begins with building a solid, secure form. By taking care with your measurements, cutting, and assembly, you’ll set yourself up for success in creating sturdy and attractive concrete steps.
“`
Mixing the Concrete
In our journey through the process of ‘How to pour a concrete step’, we have reached a crucial stage that requires precision and care; mixing the concrete. This step can make or break your concrete step project. The aim is to achieve a perfect consistency that will guarantee the strength and durability of your step.
Start by choosing the right concrete mix. For outdoor projects like steps, it’s recommended to use a mix designed for high strength and weather resistance. A commonly used type is a 4000 psi mix which is very durable and perfect for outdoor steps.
Once you have your concrete mix, it’s time to get to work. First, prepare a space where you can easily mix your concrete, like on a sturdy plywood sheet or in a wheelbarrow. Pour out your dry concrete mix and create a well in the center. This will hold the water as you slowly incorporate it into the mix.
The next step involves adding water. The quantity of water you need will depend on the specific brand and type of concrete mix you’re using. Therefore, always refer to the instructions on the packaging for guidance. However, be cautious not to add too much water at once; doing so can weaken your mixture, leading to cracks in your concrete step.
Now comes the mixing. You can use either a shovel or a hoe to gradually stir in the water from the edges towards the center. Continue mixing until all the dry particles are fully saturated and there are no lumps in your mixture. The consistency should be such that it holds its shape when squeezed but is still easy enough to pour.
It’s important to note that you should only mix as much concrete as you can use within 30 minutes to prevent it from hardening before you’re ready to pour it into your form. Also, mix a little bit extra to account for spillage or uneven surfaces.
Mixing concrete is no doubt hard work, but it’s also a crucial part of learning how to pour a concrete step. It’s the backbone of your project. Therefore, taking the time to mix your concrete properly will pay off in the end when you have a sturdy and durable concrete step that adds value and functionality to your home.
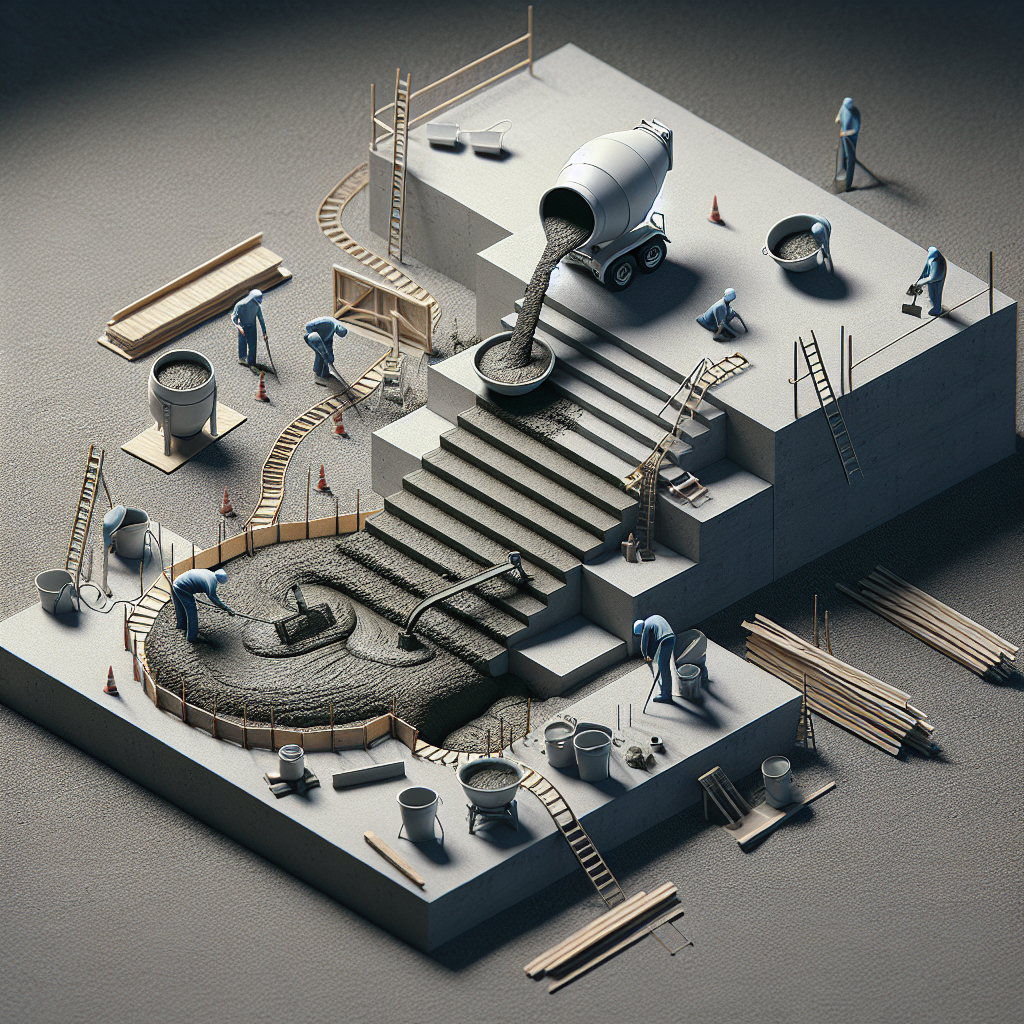
Pouring the Concrete
Once you’ve prepared the area for your concrete step, it’s time to move on to the next essential process – pouring the concrete. This step is crucial as it lays the foundations of your construction, determining its quality and durability. So, how to pour a concrete step effectively?
Firstly, ensure you have all necessary tools ready. This includes a wheelbarrow for mixing the concrete, a shovel for distributing it, and a trowel for smoothing it out. A long, straight board (a screed) will also be needed to level the top of the step.
When it comes to mixing the concrete, follow the manufacturer’s instructions carefully. It’s important to get the right consistency – too dry and your concrete will crumble; too wet and it may not set properly. The perfect consistency is similar to thick brownie batter; it should hold its shape when squeezed.
Begin by pouring the mixed concrete into your prepared formwork starting from one end and working your way towards the other. Use your shovel to distribute the concrete evenly within the frame, ensuring that all corners are filled. Once this is done, use your screed to level the surface by moving it in a sawing motion across the top edge of the formwork.
Next, you’ll want to remove any air bubbles trapped in the mixture as these can weaken your step over time. To do this, tap along the sides of the formwork with a hammer or mallet. If large bubbles appear on top of your mixture, continue tapping until they’re gone.
Finally, use a trowel to smooth over your step. This will create an even surface that doesn’t just look good but is safer too – rough edges can cause trips and falls.
The key to knowing how to pour a concrete step is patience and attention to detail. It may take a few tries to get the mixture just right, and you’ll need to work fairly quickly once it’s mixed to avoid it setting before you’re ready. But with a little practice, you’ll soon be able to pour a concrete step that is sturdy, durable, and looks professional.
Bear in mind that concrete takes time to cure and reach its full strength. This process can take up to a month, so it’s important not to rush it. Once your step is poured, let it sit undisturbed for at least 24-48 hours before removing the formwork. Then, let it cure for several more days before walking on it. For heavy loads, it’s best to wait at least a week.
Finishing the Concrete Step
Our next section zeroes in on the final part of this tutorial: ‘Finishing the Concrete Step’. By now, you should have a clear understanding of the preparation phase and how to pour a concrete step. Now, let’s tidy things up and give your new concrete step that polished look.
After pouring, the next step is to screed the top of the concrete. This process involves running a straight edge across the top of the concrete to level off the excess and fill in any low spots. The screeding process should be done immediately after pouring before the concrete begins to harden.
Following screeding, you’ll want to smooth out the surface with a float. Let’s dive into what that involves. A float is a flat tool used to smoothen out and compress the concrete surface. It helps in pushing larger aggregate below the concrete surface while bringing up a mixture of fine sand and cement paste known as ‘cream’ or ‘fat’. This cream is essential for creating a smooth hard-wearing finish. You can use either a hand float or a bull float depending on your project’s size and comfort.
Be cautious not to overwork the concrete. Overworking can cause water to rise to the surface, leading to a weaker top layer of your step. As soon as you get a smooth finish, stop floating.
Now, onto edging. Using an edging tool around the perimeter of your step is crucial for two reasons: aesthetics and durability. An edging tool will help you create rounded edges, thus giving your new step a professional look. Moreover, rounded edges are less likely to chip compared to sharp ones, enhancing your step’s long-term durability.
Your final task in finishing your concrete step is curing. Curing slows down the hydration (hardening) process ensuring that your step is as strong as possible. Once the step is hardened enough not to be damaged, start by gently spraying it with water. Then, cover it with a plastic sheet or a curing compound. Continue to keep the concrete damp for at least three days – five if you can manage it. The longer the curing process, the stronger your concrete step will be.
And there you have it! By following these steps, you’ll learn how to pour a concrete step and finish it off perfectly for that professional look. Whether you’re an amateur DIY enthusiast or seasoned builder, mastering this skill will open up new possibilities for home and garden projects. Remember, practice makes perfect, so don’t be disheartened if your first step doesn’t turn out exactly as you imagined. Keep trying and refining your technique, and before long, you’ll be pouring steps like a pro.
Curing the Concrete Step
Once you have poured your concrete step, the next critical stage is ‘Curing the Concrete Step’. This is a crucial process that should not be overlooked in any concrete project, including when learning how to pour a concrete step. Curing is the process of controlling the moisture and temperature levels of new concrete to ensure its proper hydration, strength development, and overall durability. Without adequate curing, your concrete steps are likely to have a weaker surface and may crack or flake sooner than expected.
There are several commonly used methods for curing concrete steps. The most popular among them is water curing. This approach involves continuously spraying the concrete with water, or covering it with soaked burlap or cotton mats. The goal is to keep the surface moist for at least 3-7 days. This method can be labor-intensive but it’s often considered the most effective in promoting strength and durability.
You can also opt to use membrane-forming curing compounds. These are special liquids that you spray or roll onto the concrete surface after it has hardened enough not to be marred by the application process. As it dries, this compound forms a membrane that slows down or nearly stops the evaporation of moisture from the concrete.
Another method of curing is known as ‘ponding’. This involves creating small dikes around the perimeter of your steps then flooding the area with water. However, this method is mostly suited for flat surfaces and might not be practical for steps.
Regardless of which method you choose, remember that curing is an essential part of creating durable and long-lasting concrete structures. It’s easy to get engrossed in learning how to pour a concrete step and forget about this vital step, but failing to cure your steps properly can lead to disappointing results.
The key takeaway here is that proper curing takes time. Typically, it’s best to let your newly poured concrete step cure for at least a week before subjecting it to heavy use. During this time, keep foot traffic to a minimum and avoid subjecting the steps to heavy loads. This patience will pay off in the form of a long-lasting, durable set of concrete steps that you can take pride in having made yourself.
Tips for a Successful Project
Before delving into the main tips for a successful project on how to pour a concrete step, it’s essential to understand that this particular type of project requires careful preparation, attention to detail, and some degree of physical strength. Here are some useful tips that can make your task not only manageable but also satisfyingly productive.
1. Proper Planning: The first tip to ensure a successful project is proper planning. This involves determining the size, shape, and number of steps needed, as well as purchasing the right quantity and quality of materials. Visualize the finished product and make sure you understand every step involved in how to pour a concrete step.
2. Preparation of the Site: Before beginning your work, it is vital to prepare the site adequately. This includes removing any debris or loose soil and levelling the ground where the steps will be placed.
3. Use High-Quality Materials: Always go for high-quality materials when preparing to pour a concrete step. Opt for concrete mix that is designed specifically for footpaths and steps as they typically have additives that increase durability and reduce the risk of cracking.
4. Accurate Measurements: Accurate measurements are key when creating your mould for the concrete step. Ensure that you measure twice and cut once, as mistakes at this stage can have significant implications later on in the process.
5. Proper Concrete Pouring: When it comes to pouring concrete, you need to do it carefully to avoid gaps or unevenness. Pour slowly and steadily, filling all corners and edges before moving towards the centre. Remember to smooth out the surface with a trowel afterwards.
6. Adequate Curing Time: Allow ample time for curing after you’ve poured the concrete. This process typically takes about 24 to 48 hours, depending on the thickness of your steps and the outside temperature. As a rule of thumb, it’s always better to allow more time rather than rush the process.
7. Safety Precautions: Lastly, never underestimate the importance of safety precautions when working with concrete. Always use protective gear such as gloves, safety glasses and long-sleeved shirts to protect yourself from possible harm.
In conclusion, working on a project such as how to pour a concrete step can be challenging but rewarding. By adopting these tips and dedicating some time and effort to this task, you can build a durable and appealing concrete step that will serve you for years to come.
Potential Problems and Solutions
While the process of pouring a concrete step may seem straightforward, it’s not uncommon to encounter challenges along the way. Knowing how to troubleshoot these potential problems is a crucial part of learning how to pour a concrete step.
Problem: The Concrete Doesn’t Set Properly
If you notice your concrete isn’t setting properly, it could be due to several factors. For one, you may have added too much water to the mix which will weaken the final product and can lead to cracking. Or perhaps, you chose a day that was too hot or too cold to pour your concrete. Extreme weather conditions can affect the curing process.
Solution: Always follow the manufacturer’s instructions for mixing your concrete. If you’re unsure about the weather, it’s better to reschedule. If it’s too late for that, consider using curing blankets for cold weather or retarding admixtures for hot temperatures.
Problem: Your Step has a Rough Finish
A rough finish doesn’t just look unprofessional, it can also pose a safety risk as it can cause tripping. This often happens when you prematurely finish troweling while bleed water is still present on the surface of your step.
Solution: Patience is key here. Allow the bleed water time to evaporate before you start finishing your step. Once the water is gone, you can proceed with troweling for a smooth finish.
Problem: Your Concrete Step Cracks After Drying
Cracking is a common issue when working with concrete and can be due to several reasons such as using an improper mixture, inadequate compacting and curing, or temperature fluctuations during the curing process.
Solution: To prevent cracks, ensure that your mixture has the right proportions of water and concrete. Moreover, compact your base thoroughly before pouring the concrete and keep your step moist for at least three days to allow it to cure properly. Using control joints can also help prevent cracking by allowing the concrete a specific place to crack.
By being aware of these potential problems and their solutions, you can feel confident in your ability to pour a concrete step successfully. Remember that practice makes perfect and don’t get discouraged if you encounter challenges along the way. With time and experience, you’ll soon be pouring concrete like a pro!
Conclusion
In conclusion, learning ‘how to pour a concrete step’ can seem like a daunting task, especially to those without any construction experience. However, with the right instructions, tools, and a bit of patience, it’s certainly something you can accomplish on your own. The process discussed in this blog post provides a comprehensive guide and great starting point.
Remember to adhere strictly to safety measures when pouring concrete. Always ensure you’re wearing the appropriate safety gear – including gloves, work boots, and eye protection. It’s crucial to keep in mind that concrete can cause severe burns if it comes in contact with skin for an extended period of time.
Also, don’t forget the essential factor of timing when working with concrete. Once mixed, you have a limited time before it begins to harden. Therefore, make sure all your preparations are complete before you start mixing your concrete.
The steps outlined herein not only teach you how to pour a single concrete step but also provide knowledge that can be applied in making multiple steps. The process simply requires repeating the same procedure for each step you wish to pour.
An important aspect of pouring a concrete step is understanding that it’s part science and part art. You need to follow the technical aspects closely – like obtaining the right mix and maintaining the correct water-to-cement ratio. But there’s also an artistic aspect – such as creating a smooth finish or adding textures or patterns to your step.
Though this guide simplifies the process of pouring a concrete step as much as possible, don’t get discouraged if your first attempt doesn’t come out perfect. Like any other skill, practice makes perfect. With time and persistence, you’ll get better at this task and soon enough you’ll be able to pour flawless concrete steps that not only serve their functional purpose but also add aesthetic value to your property.
So, go ahead and take that first step in creating your concrete step. Remember, every expert was once a beginner. Don’t be afraid of making mistakes, but rather learn from them. Here’s wishing you all the best in your concrete pouring endeavors.