Introduction
Welcome to our comprehensive guide, designed to provide you with all the information and tips you need on how to pour concrete for a driveway. The process of pouring concrete for your driveway might seem like a daunting task, especially if it’s your first experience. However, with the right guidance and methodical approach, it can be a rewarding DIY project.
Learning ‘how to pour concrete for a driveway’ offers an array of benefits. For one, it might save you a significant amount of money compared to hiring professionals. Also, by doing it yourself, you have complete control over the process, ensuring that every detail aligns with your exact specifications and standards.
Whether you are replacing an old, worn-out driveway or installing a new one in your property, concrete is undeniably an excellent material choice. It’s durable, cost-effective, and requires minimal maintenance. In fact, a correctly installed concrete driveway can last up to 30 years or more with proper care and maintenance.
However, pouring concrete is not as simple as mixing some cement and spreading it around. There’s a lot of preparation involved in the process. To ensure a smooth finish and long-lasting result, getting the right mix of concrete, preparing the ground adequately and understanding how weather conditions can affect your work is essential.
In this blog post, we’ll take a deep dive into the step-by-step process of pouring concrete for a driveway. We’ll explain what tools and materials are needed, how to prepare the ground properly, how to mix and pour the concrete, and finally, how to cure it for maximum longevity and durability.
By the end of this guide, we hope that even beginners will feel confident enough to undertake this project. So let’s jump right in!
Understanding the Basics of Concrete
Before delving into ‘How to pour concrete for driveway’, it’s important to first understand the basics of concrete. Concrete, one of the most common and versatile materials in construction, is used not only for driveways, but for buildings, bridges, and more. But what exactly is it?
Concrete is a mixture of coarse aggregate (like gravel), fine aggregate (usually sand), water, and cement – a powdered substance made of calcium silicates and aluminates that acts as a binder. When water is added to cement, a chemical reaction called hydration occurs, binding together the aggregates into a hard, stone-like material: concrete.
There are various types of concrete, each with distinct properties making them ideal for different applications. The most widely used type is Ordinary Portland Cement (OPC) but there are others like high-strength, lightweight and decorative concretes. The specific type you choose to use when pouring your driveway will depend on your specific needs such as strength requirement, appearance and weather conditions.
Now, you might be wondering about the difference between concrete and cement. Remember, cement is an ingredient in concrete. So while the terms are often used interchangeably in conversation, they’re not technically the same thing.
The quality of your concrete depends largely on the proportion of its components. The right balance makes a huge difference to its durability and strength. This mix ratio can be altered depending upon the end use of the concrete. For instance, if you are pouring concrete for a driveway, you would require a stronger mix than if it were being used for a patio. So understanding how to create the mix is vital.
In addition to this, curing plays an indispensable role in determining the final strength of concrete. Curing is the process where the concrete is kept damp for a certain period after it has been poured, to allow it to reach its maximum strength. If concrete is not cured properly, it can lead to a weak driveway that can crack easily.
Now that we’ve covered the fundamentals of concrete, you’re well on your way to understanding ‘How to pour concrete for driveway’. Stay tuned as we continue this discussion and explore in detail the process of preparing, mixing, pouring and curing concrete for your driveway.
Tools and Materials Needed
When you’re planning on executing a project like “How to pour concrete for driveway,” it’s essential that you gather all the necessary tools and materials before starting. The right quality and quantity of materials can make or break your project, and having the proper tools can increase efficiency and ensure the job is done correctly.
1. Concrete
The main material needed for this project is concrete. The type you need will depend on your specific needs and the climate in your location. For driveways, you’ll usually be using a mix designed for high strength, typically with a minimum of 3000 psi. You’ll need enough concrete to cover the entire driveway at a depth of about four inches.
2. Gravel
Before pouring the concrete, it’s essential to have a layer of compacted gravel. This provides a stable base for your driveway and improves drainage.
3. Wooden Boards
To create the formwork for the driveway, you’ll need wooden boards that are straight and sturdy. They will act as temporary molds where you’ll pour your concrete into.
4. Rebar or Wire Mesh
Rebar or wire mesh is used to reinforce the concrete, preventing it from cracking over time due to shrinkage or temperature changes.
5. Tools
The tools needed include a wheelbarrow for mixing the concrete, a shovel for moving both the gravel and concrete, rubber gloves to protect your hands, a long 2×4 board for screeding (leveling off the concrete), masonry trowels for smoothing out the surface, and a broom to add texture to prevent slipping when it gets wet.
6. Concrete Sealer
After the concrete has cured, you’ll need to apply a concrete sealer to protect the surface from oil stains, freeze/thaw damage, and deicing chemicals.
It’s important to consider that DIY driveway pouring can be physically demanding and requires precision for a quality finish. If you’re unsure about any part of this process, it may be best to hire a professional. However, if you’re comfortable with the challenge and have gathered all the necessary tools and materials, then you’re ready to begin your project on how to pour concrete for a driveway.
Preparing the Driveway Area
Before we delve into how to pour concrete for a driveway, it’s essential to underscore the importance of adequately preparing the driveway area. Proper preparation ensures the longevity and durability of your driveway, preventing problems like cracking and surface discoloration.
Firstly, you need to clear the driveway area of any grass, rocks, or debris. This might involve removing existing concrete or asphalt and digging out any organic material, as these could decompose over time, causing your concrete to sink or crack.
The next step is to mark out the exact dimensions for your driveway using wooden stakes and string. Make sure you’ve planned for sufficient width and length for your vehicles and take into consideration any local zoning laws that may apply. Once you’ve marked out the area, you’ll need to dig down to the required depth for your sub-base layer. The usual depth is about 7-8 inches but this could vary depending on your local climate and soil type.
After excavating the area, it’s important to compact the soil using a plate compactor or hand tamper. This will help ensure your driveway has a solid foundation and prevent sinking or shifting in the future. Then you should add a layer of gravel as a sub-base to provide further support for the concrete and aid in drainage.
The final step in the preparation phase is to install wooden forms around the perimeter of the driveway area. These forms act as a mold for your concrete, so make sure they are straight, level, and securely fastened together. The top of these forms should be at the same level as what you want your finished driveway surface to be.
By now, you should have a well-prepared area ready for pouring concrete. Understanding how to prepare for pouring concrete for a driveway is just as vital as the process of laying the concrete itself. It’s the key to a flat, smooth driveway that stands up to daily wear and tear and lasts for many years.
Setting up the Concrete Forms
The first essential step in learning how to pour concrete for a driveway is setting up the concrete forms. This procedure is crucial because it defines the dimensions of your driveway and provides a containment area for the poured concrete. The success of your project highly depends on this initial setup, so it’s important to get it right.
Firstly, you need to determine the size and shape of your driveway. Use wooden stakes to mark the corners and outline the intended layout. It’s advisable to design it with a slight slope for water drainage purposes – a recommended slope is about 1/8 inch drop per foot of length.
After marking out your driveway, you now need to set up the concrete forms. These are typically made from two-by-fours or two-by-sixes, depending on the thickness of your driveway. Attach these boards along the outlines you’ve marked, securing them firmly into position with wooden stakes driven into the ground every few feet. Make sure to use a level to ensure that the top edge of each form board is flush with one another. This will create an even surface for your concrete.
The corners are a bit trickier. You will need to miter cut the ends of your form boards at a 45-degree angle so that they meet neatly at each corner. Use screws rather than nails for fastening since they grip better, ensuring longevity and stability of your forms.
For curves or irregularly shaped driveways, flexible form boards may be required. These bendable boards can be shaped according to your design, providing versatility and customization that regular straight boards cannot. Again, secure them in place using wooden stakes and screws.
Once done with setting up forms, take time to double-check everything. The tops should be level, corners neatly joined, and all boards securely fastened. Any mistakes here can lead to deformities in your finished driveway, so meticulousness is key.
Lastly, it’s a good idea to apply a form release agent on the insides of the forms to prevent the concrete from sticking. This will make removal of the forms easier later on, and reduce potential damage to your new driveway.
Setting up concrete forms can seem like a daunting task, especially for beginners. However, with careful planning and precision, you will be well-prepared for the next step – pouring the concrete for your driveway.
Mixing the Concrete
The first step in understanding how to pour concrete for a driveway is learning how to effectively mix the concrete itself. Concrete, as we know it, is a mixture of cement, water, and aggregates like sand or gravel. The strength and durability of your driveway heavily depend on the quality of the mixed concrete. Therefore, it’s crucial to give extra attention to this stage.
To begin with the mixing process, you’ll first need to acquire all necessary materials: a sturdy wheelbarrow or a concrete mixer for larger projects, a hoe or shovel for mixing, water, ready-mix concrete, and a measuring bucket. It’s always a good idea to have some extra materials at hand in case you need more than anticipated.
Start by pouring the dry ready-mix concrete into your wheelbarrow or mixer. Make sure to wear a mask during this step as the dust from the dry mix can irritate your lungs. After adding the dry mix, create a small well in the center and pour approximately half of your measured water into it. You want to add just enough water to make the mix workable but not overly wet.
Using your hoe or shovel, start blending all the components together. Stir until you achieve a uniform consistency – similar to cookie dough. If needed, gradually add more water or dry mix until you get it right. Remember that adding too much water might make the mixture easier to handle but can also weaken your final product.
Once you’ve reached this point, congratulations! You’ve managed one of the most critical steps on how to pour concrete for a driveway.
An important tip while mixing concrete is never rush it. Take your time and ensure you have thoroughly mixed your components for optimal strength and durability. The better you perfect this step; the better will be the end result of your concrete driveway.
Before moving on to the pouring stage, test your mix’s consistency. The ideal mix should hold its shape when squeezed in your hand, but still, be pliable enough to be worked with. If it crumbles or doesn’t hold its form, add a bit more water. However, if it sags or is too squishy, you need to add more dry mix.
Mixing the concrete right is an art and science combined. With patience and careful attention to detail, you’re one step closer to a perfectly poured concrete driveway.
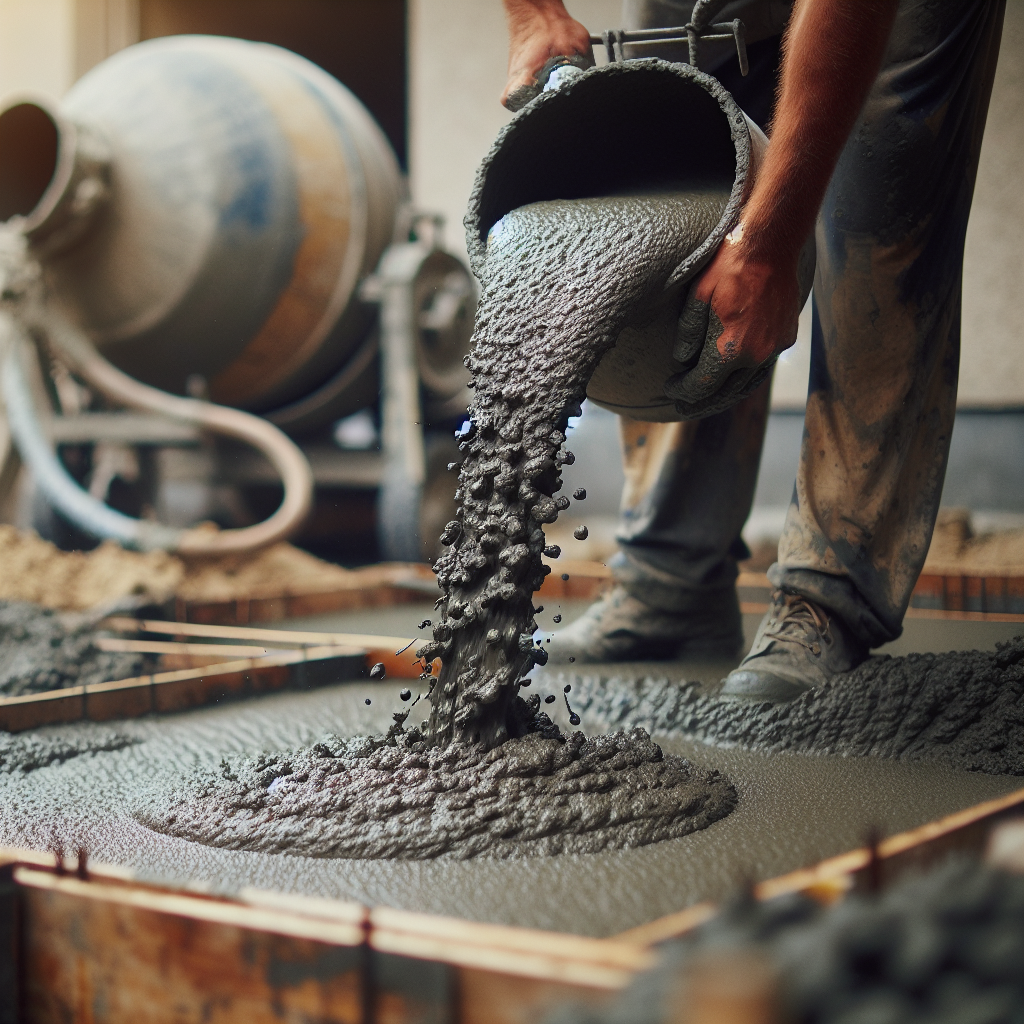
Pouring the Concrete
When it comes to building a durable, long-lasting driveway, the process of pouring concrete is critical. Not only does it form the base of your driveway but its proper installation ensures longevity and sturdiness. In this section, we will cover the important topic of ‘How to pour concrete for driveway’.
Before you begin pouring the concrete, ensure that all preparations are completed. The ground should be properly compacted and the frame or formwork securely in place. It’s also crucial to check the weather forecast as rain can ruin fresh concrete.
Pouring the concrete begins with mixing. You can choose to order ready-mixed concrete or do the mixing yourself. If you opt for the latter, remember that it’s a delicate balance of sand, cement, aggregate and water. Too much or too little of any component can affect the strength and durability of your concrete. A typical mix may include one part cement, two parts sand, three parts aggregate (like gravel), and just enough water to make it workable.
Once you’ve got your concrete mix ready, start pouring from one corner of your driveway and work your way across. Use a rake or a shovel to spread the concrete evenly across the surface within the framework. Aim for a consistent depth across the entire driveway. Keep in mind that thicker driveways are stronger and more durable, but they also require more concrete.
After you have spread out all of your concrete, use a straight edge or screed board to level off the top. This should be run back and forth across the top edge of the formwork to remove excess concrete and create an even, level surface. Subsequently, use a float or trowel to smooth out any rough spots on your newly poured concrete driveway surface.
Remember, time is of essence when working with concrete as it begins to harden as soon as it’s mixed. Therefore, it’s important to work quickly and efficiently.
Finally, after the concrete has been leveled and smoothed, it needs to be cured. This is a crucial process that involves keeping the concrete damp for several days which allows it to reach its maximum strength. You can simply spray it lightly with water several times a day or cover it with wet burlap.
Learning how to pour concrete for a driveway can seem like a daunting task but with proper planning and execution, you can do it yourself. Remember, the key lies in preparation, patience, and precision.
Levelling and Finishing the Concrete
When it comes to the process of ‘how to pour concrete for driveway,’ one of the final, yet critical steps is levelling and finishing the concrete. This step ensures that your driveway has a smooth and even surface, adding to the aesthetic appeal and functionality.
Once you have poured the concrete into your driveway frame, you need to level it out. This process, also known as screeding, involves running a straight edge or a screed board back and forth across the top of the forms to cut off excess concrete. It is essential that the screed you use is longer than your form width. Carefully move it across the entire surface in a sawing motion. This will level out the wet concrete while also compacting it against your form.
To further ensure a flat surface, use a bull float or a darby immediately after screeding. These tools are used to smooth out any ridges left by the screed board and fill in any dips or low spots. Keep in mind that if you’re using a bull float, it should be moved across the concrete in a slightly arced path, not in circular motions.
At this point, it’s essential to wait for the concrete to lose its sheen before proceeding with finishing touches. The amount of waiting time depends on various factors such as temperature, wind speed, and humidity.
Once ready, use an edging tool to create a rounded edge around the perimeter of your driveway. This will prevent chipping at the edges and increase durability. Then there’s an optional step for those who want a textured finish: using a broom across the surface of your concrete driveway. A broom finish can provide traction on the driveway surface which can be beneficial in slippery conditions.
After these steps, you must apply a concrete sealer. This is a step you can’t afford to skip. A quality concrete sealer will protect your new driveway from water penetration, freeze-thaw conditions, road salts, oil spills, and other chemicals. More than just protection, the sealer will also enhance the color of your concrete driveway if you used colored concrete.
In conclusion, levelling and finishing your concrete driveway is a crucial part of the process in ‘how to pour concrete for driveway.’ By following these steps carefully, you’ll create a durable, attractive and functional driveway that stands up against time and weather.
Curing the Concrete
Once you’ve mixed and poured the concrete, the real patience begins. The process of curing the concrete is crucial in ‘how to pour concrete for driveway’. Here is where your work solidifies (literally) and your new driveway gets its strength and durability!
Curing refers to the process of maintaining adequate moisture, temperature, and time for keeping the concrete hydrated so that it can achieve its desired properties. It starts immediately after placement and finishing so that it can develop the intended strength and durability. The longer you allow your concrete to cure, the harder it will become.
The curing process requires a delicate balance of temperature and humidity. Ideally, you want temperatures between 50-90 degrees Fahrenheit and a relative humidity above 50%. Be aware of weather forecasts during this period; sudden temperature drops can cause cracking, while quick drying on hot days can lead to surface scaling.
There are different methods of curing concrete, but one commonly used for driveways is water curing. This involves keeping the surface continuously damp for at least three days by sprinkling water over it or covering it with wet burlap. This method helps maintain moisture in the concrete, allowing it to cure evenly.
If you live in a hot climate or cannot commit to water curing, chemical membrane-forming curing compounds are another option. These are sprayed onto the concrete surface forming a barrier that retains moisture and aids in proper curing.
Properly cured concrete has a significantly higher surface hardness than uncured concrete. After about a week of curing, your driveway should be hard enough for vehicles to drive on – however, many experts suggest waiting as long as 30 days just to be on the safe side. Always remember that rushing this process can lead to cracks or other damages further down the line.
In conclusion, when considering ‘how to pour concrete for driveway’, never underestimate the importance of curing. It might take time and patience, but by allowing your driveway to cure properly, you are ensuring that it will be durable and long-lasting.
Tips for Maintaining a Concrete Driveway
After completing the task of ‘how to pour concrete for driveway’, it is essential to upkeep the driveway to ensure its longevity and keep it looking aesthetically pleasing. The following are some practical tips to maintain your concrete driveway.
Seal Your Driveway: Sealing your concrete driveway is an essential part of maintenance. It prevents water, ice, car fluids, salt and other chemicals from staining and eating away at the concrete. To preserve the look and lifespan of your driveway, it’s recommended you seal it every 2-3 years.
Clean Regularly: Regular cleaning can significantly enhance the longevity of your driveway. Use a stiff brush and a mixture of detergent and warm water to scrub its surface. For stubborn stains, consider using a pressure washer or a concrete cleaner.
Avoid or Repair Cracks: Even a well-poured concrete driveway can develop cracks over time due to weather conditions or weight pressure. Avoid parking heavy vehicles on the drive as much as possible. Fill any small cracks as soon as you notice them using a high-quality concrete crack filler to prevent them from spreading.
Remove Stains Promptly: If you notice oil, grease, or other stains on your driveway, clean them up as quickly as possible. Allowing these substances to sit on your driveway can cause discoloration and damage over time. Specialized cleaners are available that can effectively remove these stains without damaging the underlying concrete.
Refrain from Using Deicers: During winter, avoid using deicing chemicals such as salt on your concrete driveway. These chemicals can cause surface damage and increase the number of freeze-thaw cycles the driveways goes through, which can eventually lead to cracking and pitting.
Regular Inspection: Regularly inspect your driveway for any signs of wear and tear. The sooner you identify a problem, the easier (and cheaper) it will be to fix. If you notice large cracks or serious damage, it may be best to consult a professional.
Remember, understanding ‘how to pour concrete for a driveway’ is only half the battle. The real trick is in maintaining it properly to ensure it serves you well for years to come.
Conclusion
In conclusion, learning how to pour concrete for a driveway can be a fulfilling and rewarding task. While it may seem daunting at first, with thorough planning and preparation, attention to detail, and patience, anyone can enjoy the benefits of this DIY project. This guide has provided you with step-by-step instructions on how to properly lay down a high-quality concrete driveway.
It’s essential to remember that pouring concrete is not just about laying down mixed cement onto a dirt path. It involves several steps – from preparing and squaring off the site, setting up proper forms, ensuring adequate reinforcement, mixing the concrete properly, pouring and leveling it efficiently, to curing it correctly. Every one of these steps plays a vital role in ensuring the end result is a durable and well-laid driveway.
This ‘How to pour concrete for driveway’ guide emphasizes the importance of safety measures throughout the process. Always equip yourself with appropriate safety gear such as gloves, safety glasses, and knee pads to safeguard against potential hazards during the process.
When done right, a well-poured concrete driveway can last for several years without requiring major repairs or replacement. It enhances your property’s curb appeal while offering a robust surface for your vehicles. If you are unsure at any point or feel that the task is beyond your DIY skills, it’s essential that you seek help from professionals.
Pouring a concrete driveway is indeed challenging but doable. With this comprehensive guide, you now have all the knowledge you need to embark on this project with confidence. Whether you’re an experienced DIY enthusiast or a homeowner looking to save some costs on home improvement projects, knowing how to pour concrete for your driveway gives you greater control over your space while also delivering a sense of accomplishment.
Indeed, understanding how to pour concrete for a driveway is more than just about saving costs; it’s a journey towards mastering a new skill, enhancing your property, and deriving satisfaction from manual labour. Happy concreting!