Introduction
Welcome to our blog post titled ‘How to pour concrete stairs’. If you are considering doing home improvements yourself or are just curious about the process, then you have come to the right place. In this blog, we aim to provide a comprehensive guide on how to pour concrete stairs.
Stairs are an important part of most homes, providing access to different levels. For stairs that are both durable and aesthetically pleasing, concrete is a popular choice. It’s not only affordable but also provides a great deal of flexibility in terms of design and finishing options.
Whilst pouring concrete stairs may seem like an intimidating task, with the right tools, materials and a bit of patience, it’s a project that can certainly be tackled by the DIY enthusiast. Understanding the process from start to finish can help you avoid common mistakes and ensure an end result you can be proud of.
In this guide, we will walk you through each step involved in pouring concrete stairs; from designing your stairs and creating the formwork, to the actual pouring of the concrete, and finally the finishing touches. We will explain what materials and tools you’ll need, as well as offer some handy tips along the way.
Whether you are building a new set of stairs or replacing an old one, our ‘How to pour concrete stairs’ guide will equip you with all the necessary knowledge for your concrete stair project. So let’s embark on this home improvement journey together.
Tools and Materials Needed
In order to successfully complete your project on ‘how to pour concrete stairs’, you need to have the right tools and materials. The quality of your tools and materials can significantly impact the results of your DIY project, hence it’s critical to carefully select what you need.
Firstly, you will need concrete mix. The amount depends on the size and height of the stairs you’re planning to build. Making sure you have enough beforehand will save you from the inconvenience of running out in the middle of the project. Additionally, for larger projects, consider investing in a cement mixer as this will save time and ensure a consistent mix.
Next on the list is form materials. Wooden boards are typically used to build forms or molds which will shape the concrete stairs. The dimensions should be according to your design plan. Often, builders use 2x4s or 2x6s depending on the stair width.
A trowel is a must-have tool for any concrete project. It is used to smooth out the concrete once it has been poured into the form. A magnesium float is also beneficial for smoothing and leveling purposes.
You’ll also need a shovel or a hoe to mix your concrete (unless you’re using a cement mixer), and a wheelbarrow to transport it. Don’t forget about protective gear. Concrete can cause burns when it comes into contact with skin, so it’s important to wear long sleeves, long pants, sturdy boots, work gloves, safety glasses, and a dust mask when working with concrete.
A concrete edger is also essential for creating professional-looking edges on each stair riser and tread. This tool will give your stairs a clean, finished look that adds to its overall appeal.
Lastly, we recommend using a level throughout your project to ensure that your stairs are even and balanced. An uneven staircase can be a serious safety hazard, so take the time to confirm each step is level before allowing the concrete to set.
With these tools and materials, you’re set to start your project on how to pour concrete stairs. Always remember to work safely and meticulously for optimal results.
Safety Precautions
When it comes to learning how to pour concrete stairs, safety should always come first. There are several potential hazards in the process, and it’s essential to take all necessary precautions to prevent injuries and accidents.
Firstly, always wear appropriate protective clothing. This includes sturdy boots to protect your feet from heavy objects, long pants and long-sleeved shirts to prevent skin contact with wet concrete, gloves for hand protection, and safety glasses to shield your eyes from splashes. Wet concrete can cause severe burns or eye damage, so this isn’t a step you should overlook.
Another key safety aspect is ensuring you have proper respiratory protection. Concrete dust can be harmful if inhaled, so it’s a good idea to wear a dust mask or respirator while mixing and pouring the concrete. Ensure adequate ventilation if working in a confined space.
Next, remember that working with concrete involves heavy lifting and physical strain. Always use proper lifting techniques when handling bags of concrete mix or moving filled buckets. It’s crucial not to overexert yourself; take breaks as needed.
Besides personal safety, you need to pay attention to the safety of the workspace itself. The area where you’re going to pour the stairs should be level and stable. If you’re working outdoors, check the weather forecast beforehand as rain or freezing temperatures can compromise the integrity of freshly poured concrete.
In addition, always make sure the tools you’re using are in good condition. Check for any signs of damage before beginning your project; damaged tools can break during use and potentially cause injury.
Lastly, keep children and pets away from your work area. They might inadvertently walk through the wet concrete or get into other materials that could be hazardous.
Learning how to pour concrete stairs is a rewarding DIY project, but it’s essential to prioritize safety above all else. By following these precautions, you can ensure a safe and successful project.
Preparation Steps
If you’re thinking of undertaking a home improvement project, learning how to pour concrete stairs can be an excellent way to add value and style to your property. However, like any construction job, successful completion requires careful preparation. Here is a guide on the key preparation steps you should follow.
Step 1: Design and Measurement
The first crucial step in learning how to pour concrete stairs is creating a detailed design and taking accurate measurements. Decide on the number of steps, the width and height of each step, and the overall dimensions of the staircase. Remember to factor in local building codes and safety guidelines. Once you’ve determined these specifications, draw a blueprint for reference throughout the project.
Step 2: Gather Materials and Tools
Next, gather all the necessary materials and tools for pouring concrete stairs. This includes concrete mix, water, a concrete mixer or wheelbarrow, shovels, a trowel, a level, wooden boards for forms, and reinforcing steel bars (rebar). Make sure you have appropriate safety gear as well – protective goggles, gloves, and sturdy boots are essential.
Step 3: Build the Concrete Forms
Once your design is ready and materials are at hand, start building the concrete forms based on your measurements. These wooden structures will shape your staircase while the concrete cures. Always check that your forms are perfectly level and secure – any errors here will directly impact the final result.
Step 4: Install Rebar
Before pouring the concrete, install rebar within your forms for added stability and strength. Rebar should be evenly spaced throughout each step and securely tied together with wire. The ends should also be bent into hooks to prevent the rebar from shifting within the concrete.
Step 5: Prepare the Concrete Mix
The final preparation step is mixing your concrete. Follow the manufacturer’s instructions to ensure you achieve the correct consistency. Keep in mind that you want a mix that is workable but not too wet – it should hold its shape when squeezed, without leaking water.
Remember, preparation is key when it comes to learning how to pour concrete stairs. By taking the time to measure accurately, gather your materials and tools, construct sturdy forms, install rebar correctly, and prepare your concrete mix, you’ll be well on your way to successfully completing this project.
Forming the Staircase
Learning how to pour concrete stairs begins with forming the staircase. This step is crucial, as it will determine the size, shape, and overall finish of your stairs. The process involves creating a wooden frame that corresponds to the dimensions of the stairs you want to construct.
To start, you’ll need to mark out the area where the stairs will be located using stakes and strings. After that, measure and cut wooden planks according to your stair’s dimensions – height, width, and depth of each step. It’s important that these measurements are accurate for your comfort and safety.
After this initial preparation, start assembling your form from the bottom step up. Set up your first riser at the base, then place a tread on top of it. Continue stacking risers and treads alternately until you reach the final height. Make sure to check the level of each step as you go along for an even staircase.
The side walls of the form are equally important. These should be equal in height to your topmost riser and run along both sides of your stacked treads and risers. Once these walls are in place, secure them together with cross braces to keep the structure rigid.
This whole process may seem tedious but remember that your concrete will take on whatever shape you create with your formwork. So take your time to double-check measurements, levels, and alignments. A well-formed staircase will give you an easier time when you eventually pour your concrete and result in a visually pleasing and structurally sound set of stairs.
By following these steps diligently, not only will you learn how to pour concrete stairs efficiently, but you’ll also have a professional looking staircase as a result. Remember that forming the staircase is a significant first step, and a well-constructed formwork will ensure the success of your stairs project.
Mixing the Concrete
“`
Having understood the preparatory steps, let’s dive into one of the most crucial steps on our guide on ‘how to pour concrete stairs’ – mixing the concrete. To get a durable and high-quality finish, the concrete must be mixed correctly.
Start by purchasing a high-quality concrete mix from your local hardware store. Make sure to check the packaging for the specific water-to-concrete ratio as this may vary depending on the brand. If you’re dealing with a larger project, consider investing in a small cement mixer to save time and ensure an even mix.
Before mixing, put on appropriate safety gear such as gloves, eye protection, and a mask. Working with cement can be dangerous because it contains substances that can irritate your skin and respiratory system. Remember, safety first!
To begin mixing the concrete, pour the needed amount of water into your mixing container or cement mixer. Gradually add the concrete mix while continuously stirring to avoid any lumps forming. It is important not to add all of your concrete mix at once because it may become too difficult to stir and could result in an uneven mixture. Your aim is to achieve a consistency similar to thick pancake batter – evenly mixed and pourable, but not too runny.
If you find that your mixture is too thick or thin, don’t panic! This is a simple fix. If your mixture is too thick, add a small amount of water until you reach the right consistency. Conversely, if your mixture is too thin, gradually add more dry concrete mix.
Once mixed, use your concrete promptly. The longer it sits unused, the more it will start to harden which could compromise the quality of your stairs. While pouring your concrete stairs, consistently stir your mixture to keep it from hardening prematurely.
To sum up, mixing the concrete for your stairs requires careful attention to ratios and consistency. The success of your project on how to pour concrete stairs largely depends on how well you mix your concrete. Take your time during this step, keep safety precautions in mind, and you’ll be on your way towards creating sturdy and enduring concrete stairs.
“`
Pouring the Concrete
Once you’ve prepared your stair molds or forms, it’s time to get to the heart of our article’s topic: how to pour concrete stairs. The key to achieving professionally finished stairs is to ensure your concrete mix and pouring techniques are correct.
Start by mixing your concrete. A standard mixture typically includes one part cement, two parts sand, and three parts aggregate, mixed with enough water to make a workable paste. This is a general guideline, but always follow the manufacturer’s instructions for the best results. You can either mix concrete by hand for smaller projects or use a concrete mixer for larger ones. The consistency of your mix should be such that it holds its shape when squeezed but is still pliable enough to work with.
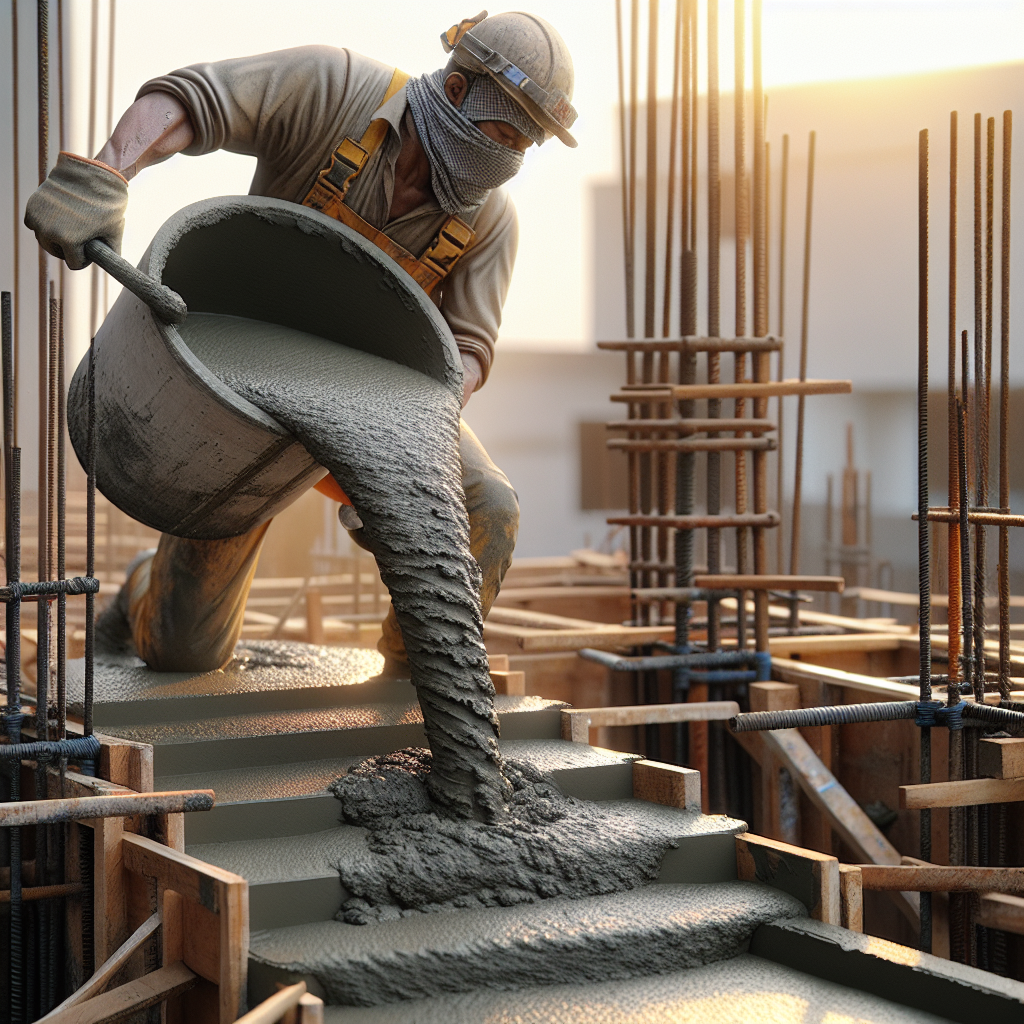
Before pouring the concrete, dampen the insides of your forms with water. This prevents them from absorbing moisture from your concrete mix which can result in improper curing. Start pouring the concrete into the lowest step first. Pour in smaller amounts rather than trying to fill the entire step at once. This will help you manage and control the flow of concrete and prevent it from overflowing or spilling out.
As you pour, use a spade or trowel to push the concrete into all corners and nooks of your form, ensuring an even fill without any air pockets or voids. Once filled, level off the top of each step with a straight-edged board or a screed, moving it in a sawing motion across the form edges to remove excess concrete.
It’s crucial not to rush this process — patience and attention to detail go a long way in determining how well your stairs turn out. After you’ve poured each step, give the concrete time to settle before moving onto the next one. And remember, always wear protective gear (gloves, boots, safety glasses) to protect yourself from potential splashes or concrete burns.
After pouring your steps, allow the concrete to cure properly before removing the forms. Curing is a vital step in concrete work as it helps to strengthen the mixture and prevent cracks or damages. It can be a time-consuming process, but it’s definitely worth the wait. Once the forms are removed, you’ll be left with durable, perfectly shaped concrete stairs that you poured yourself!
To ensure that you’ve mastered how to pour concrete stairs, practice on smaller projects and gradually move up to larger ones. With patience and persistence, you’ll be able to create beautiful, sturdy concrete stairs for your home or any other space.
Finishing the Surface
Once you’ve poured the concrete into the formwork and tamped it down to remove any air pockets, the next step in learning how to pour concrete stairs involves finishing the surface. This process is pivotal in ensuring your stairs have a smooth, sleek appearance and a durable finish that can withstand regular use.
The process of finishing the surface commences once the bleed water (the water that rises to the surface after you pour the concrete) has evaporated. The exact timing of this may vary depending on factors such as temperature and humidity. However, generally, it should take around 1 to 2 hours.
To start finishing, you’ll need a magnesium float. Using this tool, go over the surface of the stairs. This action pushes down the aggregate and brings up a creamy mixture of cement and sand, creating a smooth layer on top.
After floating, use an edging tool to shape and smooth the edges of each stair. These edges are prone to damage and chipping, so giving them some extra attention now will increase the longevity of your stairs. For perfect straight edges, you can use a wooden or metal straightedge.
For stairs that will see heavy foot traffic or weather exposure, consider applying a broom finish for additional traction. Simply drag a broom across the still-wet concrete surface to create small ridges that help prevent slips and falls.
If you want a decorative finish on your steps, you could incorporate concrete stamps or dyes at this stage. However, keep in mind that these require additional cost and labor.
Remember to cover your newly poured concrete stairs with plastic sheeting once you’re done finishing. This helps slow down drying time, which can result in stronger more crack-resistant concrete. Leave it covered for at least three days, or longer in colder weather.
Understanding how to pour concrete stairs is a skill that requires patience and precision, particularly when it comes to finishing the surface. However, with careful planning and execution, you can create durable and attractive concrete stairs that will serve you well for years to come.
Curing the Concrete
Once you have successfully followed the necessary steps on how to pour concrete stairs, the next crucial phase is curing the concrete. Curing is an essential process that ensures your newly poured concrete stairs attain their maximum potential strength and durability. Not all homeowners understand the importance of this process, but failing to properly cure concrete can lead to reduced strength, cracking, and reduced lifespan of your stairs.
The curing process begins immediately after pouring and finishing the concrete. It involves maintaining adequate moisture and temperature in the freshly poured concrete stairs. This allows hydration to take place, which is a chemical reaction between water and cement that ultimately leads to the hardening of the mix.
There are several ways to cure concrete. The method you choose will depend on the conditions at your project site and personal preference. One common method is water curing, which involves keeping the surface of the concrete moist for three to seven days after pouring. This can be done by continuously sprinkling water on the surface or covering it with burlap or cotton mats soaked in water. Alternatively, plastic sheets or special curing compounds can be used to seal in moisture.
Another approach is steam curing, which is ideal for colder climates where temperatures are too low for effective hydration. In this method, steam is applied at a specific pressure and temperature to accelerate hydration.
It’s important to remember that rushing the curing process can result in weak and brittle stairs that may not last as long as they should. Therefore, patience and attention to detail are key when it comes to curing concrete stairs.
Although curing might seem like an extra step after learning how to pour concrete stairs, it’s a fundamental part of ensuring your stairs are strong and durable. By taking time to properly cure your new staircase, you’re investing in its longevity—so it’s well worth the effort.
Clean Up and Maintenance
Pouring concrete stairs is a project that takes a certain level of skill and planning, but it doesn’t end when the concrete dries. The last, but equally important step in the process is the clean up and maintenance. With proper care, your newly poured concrete stairs can be a long-lasting addition to your home or building.
Firstly, you need to clean up your worksite. Begin by removing all the construction debris such as broken pieces of wood or excess concrete. It’s necessary to dispose of these materials properly for environmental reasons and to prevent potential injury.
Next, rinse off the tools you used during your ‘how to pour concrete stairs’ project. Concrete can stick to your tools and harden, making them worthless for future projects unless they are cleaned immediately. Soak the tools in water while you’re doing clean-up and then brush off any remaining concrete before it dries. Never let concrete-laden tools dry out before cleaning.
For concrete mixer clean up, ensure that no concrete residue is left inside because it can harden and make your equipment unusable for future projects. Rinse it thoroughly with a hose, making sure to dislodge any residue from hidden corners and crevices.
Now we move on to the maintenance part. Concrete stairs require a few days to cure completely. During this time, keep the stairs moist by spraying them lightly with water several times a day – this helps the concrete cure evenly, preventing cracks or chips.
Consider applying a sealant after the stairs have fully cured. This will add an extra layer of protection against wear and tear, stains, and weather damage. The sealant also gives the stairs a polished look and makes them easier to clean.
Regular inspection is key to maintaining your stairs’ longevity. Check for signs of cracking or chipping. If you find minor cracks, fill them immediately with a concrete crack filler to prevent them from expanding. For larger cracks or structural issues, you may need to consult a professional.
Remember, taking the time to clean up after your project and investing in regular maintenance can greatly extend the lifespan of your concrete stairs and keep them looking their best.
Common Mistakes to Avoid
When learning how to pour concrete stairs, it’s important to be aware of some common mistakes that could potentially affect the quality and safety of your stairs. Here are a few pitfalls to avoid.
Failing to Create a Proper Layout
One of the most common errors when pouring concrete stairs is failing to create a proper layout. Before you begin pouring, you should have a clear plan for your stairs, including their dimensions, the number of steps, and their positioning. Incorrect planning can lead to uneven steps, incorrect height or width, or even structural instability.
Neglecting Safety Measures
Safety should always be your primary concern when working with concrete. This includes wearing appropriate protective gear such as gloves, goggles and long sleeves, as well as making sure the area around you is clear of obstacles that might cause accidents. A common mistake is overlooking these safety precautions which could lead to serious injuries.
Not Preparing the Subgrade Correctly
The subgrade or the ground where the stairs will be laid should be properly prepared before pouring the concrete. This means it should be free from loose debris, compacted thoroughly and leveled accurately. Failing to do so can result in an unstable base for your stairs which can cause them to crack or shift over time.
Adding Too Much Water to the Mix
While mixing concrete may seem like a simple task, adding too much water is a common error. A mixture that’s too wet will weaken the concrete, reducing its durability and lifespan. It’s essential that you follow the manufacturer’s instructions regarding water-to-cement ratio to ensure your concrete stairs will maintain their integrity for years to come.
Poor Finishing Techniques
Finishing techniques play a crucial role in the final appearance and safety of the stairs. Poor troweling can leave rough surfaces that can cause slips and falls, while inadequate curing can lead to a weak surface prone to cracks. Make sure you have a clear understanding of these techniques before you begin your project.
Learning how to pour concrete stairs properly is a complex task where every detail counts. Avoiding these mistakes will help ensure that your stairs are safe, sturdy, and visually appealing. Always remember that when it comes to such significant projects, sometimes it’s better to hire professionals if you’re not fully confident in your abilities. Practice makes perfect, so don’t be discouraged if your first few attempts are less than perfect.
Conclusion
In conclusion, mastering the art of how to pour concrete stairs is a skill that requires attention to detail, patience, and practice. It’s a process that involves careful planning and execution to ensure a solid, sturdy staircase that can stand up to years of use. The steps outlined in this blog post provide a tried-and-true methodology to follow, but every project is unique and may require additional considerations or adaptations.
The key to success lies in meticulous preparation of the site and the formwork. A well-prepared site will lay the foundation for a smooth pouring process, while correctly built forms will ensure the correct shape and dimensions of the stairs. It’s vital to take time in these initial stages as any mistakes here can have significant impacts on the final result. Remember that pouring concrete isn’t a race; it’s more like a marathon where taking your time to get things right pays off in the end.
Mixing and pouring concrete is perhaps the most challenging part of the process, but with careful maneuvering and attention to detail, you can achieve great results. Remember that safety should always be your top priority; wear appropriate protective equipment and be mindful of your actions at all times. After pouring, don’t forget that curing is just as crucial as any other step in this process — it ensures strength and durability for your staircase.
While learning how to pour concrete stairs may seem daunting at first, with patience and persistence, you can develop this skillset. There’s nothing quite like the satisfaction of completing a project with your own two hands and seeing your efforts turn into a lasting structure. Whether you’re building stairs for your home or working on a larger construction project, these steps will serve as a helpful guide on your journey.
Take note that even though this guide provides an excellent starting point for aspiring DIYers or builders looking to broaden their skillset, there is always room for improvement and advancement. Continually seeking out education, practice, and experience will only make you more proficient in your craft. So whether you’re a seasoned pro or a DIY enthusiast, never stop learning and improving. Every set of stairs you pour is another step up in your journey.
With that being said, the next time you’re faced with a staircase project, don’t shy away from the challenge. Remember these steps, roll up your sleeves, and embrace the task. The end product will not only be a testament to your ability to master how to pour concrete stairs but also a source of pride and accomplishment.