Introduction
Welcome to our latest blog post – ‘How to put concrete slab’. If you are a DIY enthusiast looking for your next challenge, or perhaps a seasoned construction professional seeking to refresh your knowledge, this guide will serve as an invaluable resource. The process of putting a concrete slab might appear intimidating initially, especially for first-timers. However, with the correct tools, instructions, and a little patience, it is a task that can be accomplished successfully.
Whether you’re building a patio, creating a walkway, laying a foundation for your outdoor shed or garage, or any other structure that requires stability, learning how to put concrete slab will prove beneficial. Concrete slabs are popular due to their durability and versatility. They provide a solid base for various types of structures and can withstand different weather conditions.
It is important to remember though that working with concrete requires diligence and precision. A poorly executed job can lead to cracks in the slab over time or even structural instability. But don’t worry! With the step-by-step guide we have prepared on how to put concrete slab, we aim to equip you with all the knowledge needed to ensure your project’s success.
Throughout this article, we will discuss the materials needed, the preparation required before pouring the concrete, and other crucial steps involved in the process. We’ll also share tips on how to guarantee your safety while working on your project. Moreover, we will also delve into some common challenges that may arise when putting a concrete slab and ways to overcome them.
So whether you’re an experienced builder or just starting out in DIY projects, this ‘How to put concrete slab’ guide is designed with simplicity and clarity in mind – making it easier for everyone to understand and implement.
Join us as we explore this fascinating process together and arm ourselves with the knowledge required for such an undertaking. Let’s make your next outdoor project a successful and rewarding one with our comprehensive guide on how to put concrete slab.
Understanding Concrete Slabs
Before jumping into the details of ‘how to put a concrete slab’, it’s vital that we first develop an understanding of what concrete slabs are and their importance. Concrete slabs are a crucial foundational element in construction projects ranging from small residential homes to large commercial buildings. They help provide a firm, level surface upon which the rest of the structure can be built.
A concrete slab is essentially a flat, often rectangular, piece of concrete that can be used for various purposes, like serving as the foundation for floors, ceilings, and even roofs. They are commonly used because of their strength and durability, with the ability to withstand significant amounts of weight and pressure.
Concrete slabs are made by pouring concrete — mixtures of cement, water, sand, and aggregate— into a mold or formwork which is typically constructed from wood or metal. The concrete is then spread evenly within the formwork and allowed to cure or harden over time. Curing is an essential process that helps achieve the maximum potential strength of the slab by maintaining adequate moisture and temperature conditions.
It’s also important to note that reinforcement is generally added to concrete slabs to increase their load-bearing capacity. Reinforcement typically comes in the form of steel bars (rebar) or mesh which is placed within the slab before the concrete is poured.
Understanding ‘how to put a concrete slab’ involves more than just knowing about its composition or how it’s made. It’s also about knowing how to properly prepare the site where you’ll be placing your slab, how to create and set up your formwork correctly, how much reinforcement you’ll need, and what kind of finish you want on your slab once it’s cured.
Whether you’re looking to install a new driveway, create a patio, or lay the groundwork for a home addition, knowing how to put a concrete slab is a valuable skill. It requires careful planning, preparation, and a good understanding of how to work with concrete. But with the right knowledge and tools, it’s certainly something that you can achieve.
Remember that working with concrete requires patience and precision. But once you’ve mastered it, you’ll be able to create durable and long-lasting structures that will stand the test of time. As we move forward in this blog post, we’ll get into more details about the steps involved in putting a concrete slab — from preparing your site to pouring and finishing your slab.
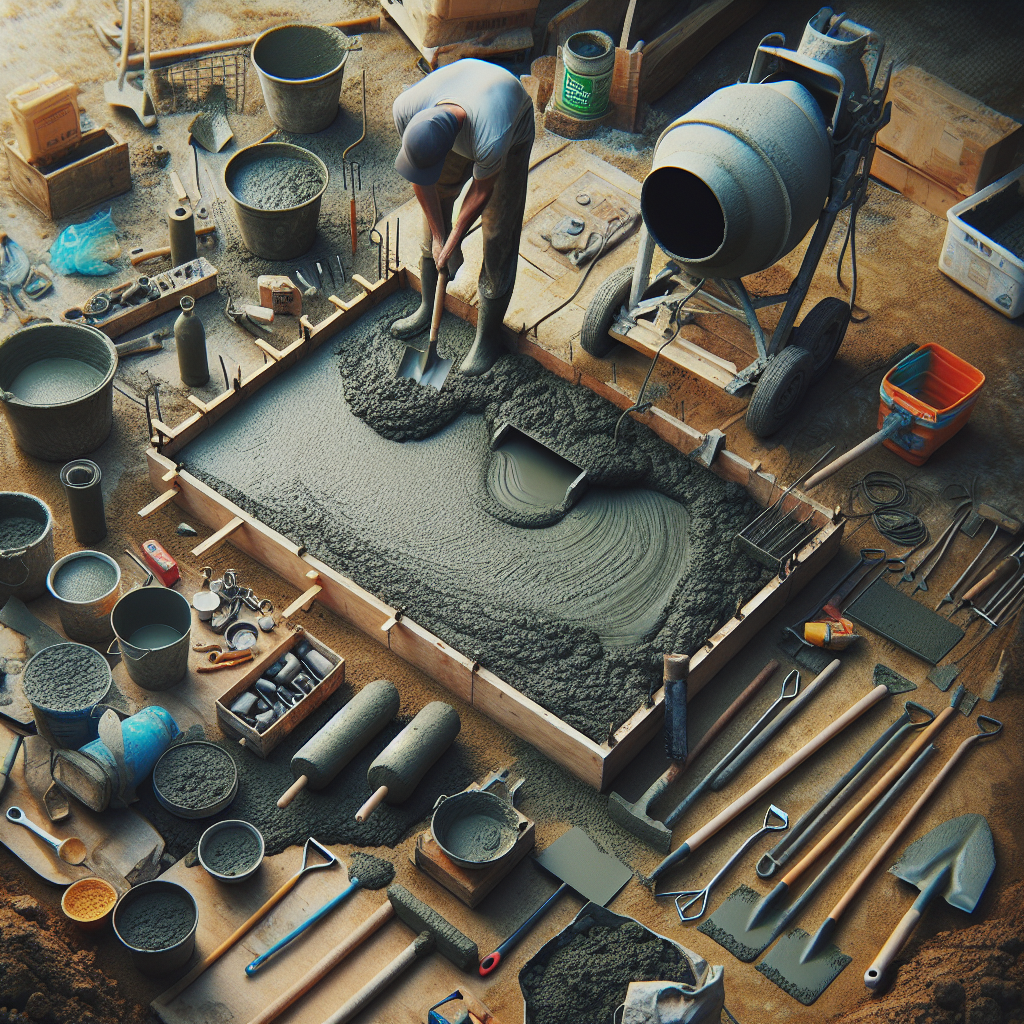
Necessary Tools and Materials
Before diving into the process of ‘How to put a concrete slab’, it is essential to understand and have all the necessary tools and materials required for this project. Ensuring you have all the right equipment can help you achieve professional-level results and make the task more manageable.
The first crucial element is, of course, the concrete mix. Depending on your project’s size, you may need several bags of ready-mixed concrete or may need to order a truck-load of ready-mix concrete. In addition, you’ll need water for mixing the concrete; ensure to follow the producer’s guidelines for the correct water-to-concrete ratio.
Next, you will need some formwork which will give your slab its shape. This can be made from wooden planks or metal forms. You also need stakes and string lines to mark out the area where you’re going to pour the concrete slab, and a level to ensure that your formwork is perfectly horizontal.
In terms of tools, you will need a shovel or a wheelbarrow to mix your concrete if you’re not using ready-mix. A trowel is necessary for smoothing out the surface of the slab once it’s poured, while a long straight-edged piece of wood, known as a screed, is used to level off the raw concrete after it’s been poured into the formwork.
An edging tool can be used on the edges of your slab to create a professional-looking finish. If you are planning on adding texture or patterns to your concrete slab, then specialized stamps or texture mats may be needed.
You will also require safety gear while working with concrete since it can cause skin irritation and damage eyes. Use sturdy gloves, protective eyewear, and long-sleeved clothing when handling wet cement.
Finally, remember that curing is an integral part of the concrete laying process. You’ll need plastic sheets or curing compounds to keep the concrete from drying out too quickly, which can cause it to crack.
In conclusion, laying a concrete slab involves more than just pouring concrete into a hole. It requires a variety of materials and tools from the initial stages of marking out your area to the final stages of curing the concrete properly. Always make sure you have everything you need before you start to ensure a smooth and successful project.
Preparing the Site
If you’re planning a DIY project and wondering ‘How to put a concrete slab’, the first thing you need to tackle is preparing the site. The preparation phase is crucial to ensure that your concrete slab is level, sturdy, and long-lasting. Here are some steps to guide you through the process.
Firstly, you need to mark out the area where the slab will be placed. Use stakes and string to map out the exact dimensions of the slab. Make sure you measure accurately, as this will determine how much concrete you will need.
After marking out the area, the next step is to clear it of any debris or vegetation. This includes removing any grass, rocks, tree roots or other organic material that might be in the way.
Once the area is cleared, it’s time to level the ground. This is an essential step in how to put a concrete slab properly. If the ground isn’t level, it could result in an uneven slab which may crack or break over time. To ensure a flat surface, use a shovel to move soil around and a tamper or plate compactor to compact it evenly.
After levelling the ground, you’ll need to set up formwork around the edge of your marked out area. Formwork can be made from timber planks and helps contain the concrete in place while it sets. Ensure that your formwork is level as this will also dictate how level your concrete slab will be.
The last step in preparing the site is putting down a base layer of gravel or crushed stone. This provides a solid foundation for your slab and helps improve drainage. The thickness of this layer will depend on the size and weight of your slab but generally should be about 10-15 cm.
In summary, preparing the site for a concrete slab involves marking out the area, clearing it of debris, levelling the ground, setting up formwork, and laying down a base layer. These steps are essential in ensuring that your concrete slab is sturdy, level and long-lasting.
Remember that safety should always be a priority whenever you’re handling heavy materials or using machinery. Always wear appropriate protective gear, like gloves, eye protection, and sturdy footwear. And don’t hesitate to seek professional help if you’re unsure about any part of the process.
Creating the Formwork
One of the most essential steps in understanding ‘how to put a concrete slab’ is creating the formwork. The formwork, also known as shuttering, is a temporary mold into which concrete is poured and allowed to set. It serves as a containment boundary for the concrete slab and ensures that it sets in the desired shape and dimension.
To start with, you’ll need to gather your materials. These typically consist of wooden boards or metal sheets, but the material you use may vary depending on the size and complexity of your project. The thickness and strength of your formwork material should be sufficient to withstand the pressure exerted by the fresh concrete without warping or collapsing.
Start by measuring and marking out the area where you want your concrete slab to be. Use a chalk line or marking paint for visibility. The dimensions of this marked area will dictate the size of your formwork. Cut your material to size using the appropriate tools, ensuring that each piece fits together perfectly to form a watertight seal.
Once your pieces are cut, assemble them on a flat, level surface. This can be done using screws or nails for wooden boards, or welding for metal sheets. It’s crucial to ensure that the corners are square and the sides are straight; any deviations could result in a misshapen or uneven slab.
With your formwork assembled, place it over your marked area and secure it firmly into place. You can do this by driving stakes into the ground at regular intervals along its exterior and then screwing or nailing them to the formwork. This will prevent it from shifting or warping as the concrete is poured in.
Finally, before you pour in your concrete, apply a release agent to the inside of your formwork. This stops the concrete from sticking to it and makes it easier to remove once the concrete has set. While this step is optional, it can save you a lot of time and effort in the long run.
By following these steps, you will have created a sturdy and well-shaped formwork for your concrete slab. Remember that the quality of your formwork will directly influence the quality of your finished slab, so take your time and pay attention to details. Now you’re ready for the next stage: pouring the concrete.
Mixing and Pouring the Concrete
After preparing the site for laying the concrete slab, the next crucial step is ‘Mixing and Pouring the Concrete’. This step is fundamental in understanding how to put a concrete slab correctly. The quality of your concrete mix and the way it is poured ultimately determines the durability and finish of your concrete slab.
First, it’s important to get the right concrete mix. Usually, a mixture of cement, sand, aggregate (stones), and water is used. The standard ratio is 1 part cement, 2 parts sand, and 3 parts aggregate, all mixed with sufficient water to make a spreadable paste. It’s recommended to use a mechanical concrete mixer for this job to ensure an even consistency and better quality mixture.
Once you have your concrete mix ready, it’s time to start pouring. Begin at one end of the formwork and gradually work your way to the other end. To do this effectively, you’ll need two people – one person to pour the concrete and another person to spread it evenly with a rake or trowel. As you fill up the formwork, make sure that there are no pockets of air in your slab as they can weaken its structure.
It’s essential that you work reasonably quickly in this stage because concrete starts to set soon after mixing with water. Therefore, do not mix more than what you can use within about half an hour. If you’re working on a large project or in hot weather conditions where the concrete might dry out fast, consider using retarders to slow down the curing process.
Remember that pouring concrete isn’t just about spreading it across a designated area. It needs careful attention and constant monitoring. As you pour, keep checking the depth to ensure it remains consistent across the entire slab. Use straight edges or screeds for this purpose by dragging them across the surface of the freshly poured concrete.
Finally, as you finish pouring the concrete, smooth the surface using a bull float. The bull float pushes down the aggregate and brings up the cream or paste, which helps in creating a smoother surface. This process should be done immediately after screeding.
Knowing how to put a concrete slab involves understanding each step of the process in detail. However, with careful planning and execution, mixing and pouring the concrete can be a satisfying part of the job.
Leveling and Smoothing
After understanding the basics of how to put a concrete slab, let’s delve into one of the most critical steps called ‘Leveling and Smoothing’. This process is integral to ensure a uniform and even surface that not only looks aesthetically pleasing but also ensures the slab’s functionality and longevity.
Once the concrete mix has been poured into the framework, it’s time to level and smooth it out. This is where your long, straight 2×4 comes into play. Known as a screed, this tool is used to level out the concrete. First things first, you’ll want to slightly overfill your form with concrete.
When leveling, you’ll place your 2×4 on its side and then rest it against the top edges of your form. With a saw-like motion, pull the screed across the form repeatedly, drawing excess concrete off as it goes along. Ideally, you should have a helper who can occasionally shovel more concrete in front of the screed if you need it.
As for smoothing or finishing, this is done after screeding. The process helps in making the surface smoother by compacting the concrete’s top layer while bringing some of its water content to the surface. You’ll use a tool called a float for this job. It comes in different types; large floats are used by pushing them ahead of you while walking on wet support slabs within the formwork. Smaller hand-held trowels are used for smaller work or for edges.
Remember, smoothing isn’t about applying pressure; it’s more about gently guiding the float over the surface. The intention is to compact and smoothen without dislodging aggregate particles within the mix or causing lines or gouges on forms.
Once you’ve smoothed the entire surface, allow it to dry slightly before deciding if a second round of smoothing is needed. Often, a second pass will give your slab a smoother and more professional look, but it depends on the finish you’re going for.
In conclusion, understanding the process of ‘Leveling and Smoothing’ is vital in learning ‘How to put a concrete slab’. While it might seem intimidating at first, with practice and patience, you can master this task and create a professionally finished concrete slab on your own.
Curing the Concrete
After pouring, smoothing, and finishing your concrete slab, the final step in ‘how to put concrete slab’ is the curing process. Curing the concrete should not be overlooked as it plays a significant role in enhancing the strength and durability of the concrete slab.
Curing involves maintaining adequate moisture and temperature in freshly cast concrete to allow hydration of cement. This is necessary because if the water from the mixture evaporates before the chemical process is complete, then the concrete will not reach its full strength and can crack.
The first and foremost technique of curing is to simply keep it damp. This can easily be achieved by spraying a fine mist of water over the slab at regular intervals throughout the day. However, remember not to flood it as this could erode the surface.
If you are unable to commit to this kind of maintenance, another option is to use curing compounds. These are special chemical solutions that you spray onto the surface of the concrete after it has been poured. They form a barrier against water evaporation, allowing the concrete to cure steadily and uniformly.
For those who wish to avoid chemicals, there are also concrete curing blankets available on the market. These are made of a special fabric that traps moisture in while still allowing air circulation. They can be simply draped over your new slab after it has been smoothed out.
Generally, curing should take place for a minimum of seven days after pouring but extending up to 28 days under certain circumstances or for specific types of concrete. However, if temperatures drop below freezing or go above 90 degrees Fahrenheit during this time period, additional steps may need to be taken to ensure proper curing.
Regardless of your chosen method, remember that properly curing your concrete slab will increase its lifespan and strength. It will also reduce the likelihood of cracks and other types of damage that may occur over time if the concrete is not cured correctly.
In conclusion, understanding how to put a concrete slab involves more than just pouring and smoothing out the mixture. The curing process is equally vital and should not be skipped if you want your slab to stand the test of time.
Finishing Touches
The process of ‘how to put concrete slab’ is not entirely done until you’ve added the finishing touches. These are the details that give your slab a professional appearance, increase its longevity and enhance its resistance to wear and tear. The finishing process should be begun as soon as the concrete has been leveled and smoothed out, but before it begins to harden or set.
A crucial step in adding the finishing touches is edging the slab. Edging helps to create a neat, rounded border that not only looks good but also improves the slab’s durability. To edge the slab, you’ll need an edging tool which you’ll run around the edges of the slab, pushing it into the concrete whilst moving it back and forth in a sawing motion. This action helps to compact the concrete along the edges, making them stronger.
Once edging is done, you can move on to grooving the slab. Grooves are shallow cuts made in the surface of the concrete that help to control cracking. As concrete dries and hardens, it tends to shrink, which can lead to cracking. By providing a predetermined path for these cracks to follow in non-threatening directions (that is, not spreading wide across your entire slab), grooves help maintain the structural integrity and appearance of your new concrete slab.
Finally, it’s time for smoothing and floating. To do this, you’ll need a bull float or hand float tool. The purpose of floating is to remove any imperfections from the surface of your concrete slab and compress the concrete particles for a smooth finish. In addition to enhancing appearance, a smooth finish also makes it easier to walk on your slab without tripping over ridges or bumps.
Make sure you don’t rush through these finishing touches – they’re critical for ensuring both the aesthetic appeal and structural soundness of your concrete slab. And remember, while it’s crucial to begin the finishing process before the concrete starts to harden, you also need to give it enough time to partially set up so your edging and grooving efforts don’t simply disappear. It’s a delicate balance that will come with practice.
When done right, a well-placed concrete slab can be a valuable addition to your home or property. So take your time, do it right, and enjoy the satisfaction that comes from a job well done.
Safety Tips
While learning ‘how to put concrete slab’, it’s important to prioritize your safety. Concrete work can be heavy, messy, and potentially hazardous if you don’t take the necessary precautions. Here are some essential safety tips to consider throughout the process of installing a concrete slab.
Firstly, always wear appropriate personal protective equipment (PPE). This includes wearing sturdy work boots to protect your feet from falling concrete pieces, long pants and sleeves to prevent skin contact with fresh concrete, and durable gloves to protect your hands. The alkalis in wet cement can cause severe skin burns, so it’s crucial to avoid direct contact. Consider also wearing knee pads if the work involves kneeling.
Another important piece of PPE is safety glasses or goggles. Concrete chipping or cutting can send small particles flying, which could cause serious damage if they hit your eyes. A dust mask or respirator is also necessary when mixing concrete or cutting concrete slabs to prevent inhalation of dust particles which could lead to lung problems.
Aside from PPE, maintaining a clean and organized worksite is another fundamental aspect of safety when putting in a concrete slab. Ensure spills are cleaned up promptly and tools are not left lying around where they can cause trips and falls.
Physical safety is paramount, but so is taking care of your body during intense physical labor. Remember to take regular breaks and stay hydrated when working with concrete, especially on hot days when the risk of heat stroke increases. Consider using mechanical aids like wheelbarrows and concrete mixers for heavy lifting instead of doing it manually, which can lead to back injuries.
Finally, it’s worth remembering that the curing process generates heat. If you’re laying a large slab, this heat can build up and potentially cause burns or fire if not managed correctly. Always be mindful of this and take necessary precautions.
Knowing how to put concrete slab involves more than just understanding the technical steps. It also involves knowing how to keep yourself safe throughout the process. By taking these precautions, you can ensure that your project is completed safely and successfully.
Conclusion
In wrapping up, it is evident that the process of ‘how to put a concrete slab’ involves a series of well-thought-out steps that require careful planning and execution. It’s not just a simple task of mixing concrete and pouring it out on the ground. It necessitates a comprehensive understanding of preparing the site, creating the right mix, laying out the slab correctly, and allowing it adequate time to cure.
Learning how to put a concrete slab is an essential skill, particularly for homeowners who desire to enhance their properties with patios, walkways, or foundations for sheds or garages. By mastering this task, you not only save on cost but also have the freedom to customize your design to suit your specific needs and personal taste.
However, it’s also important to remember that putting a concrete slab is not always a do-it-yourself project, especially when dealing with larger and more complicated works. Professional contractors have the necessary expertise and tools to ensure that the job is done right. They can help avoid costly mistakes and ensure that your slab will last for many years.
Regardless of whether you opt to undertake this project yourself or hire a professional, gaining an understanding of ‘how to put a concrete slab’ gives you an insight into what the process entails. This knowledge can aid you in making informed decisions about your project and effectively communicating with any professionals you may hire.
In conclusion, putting a concrete slab might require time, effort, and patience but it’s definitely a rewarding task. Whether you are looking to lay down a small patio or erecting a new structure altogether, knowing how to put down a concrete slab is an invaluable skill that will serve you well in numerous DIY home projects.
The information provided in this article should provide you with enough guidance to either start experimenting with smaller projects or effectively supervise a professional’s work. Remember, good planning, preparation and patience are the essential ingredients for putting a successful concrete slab.